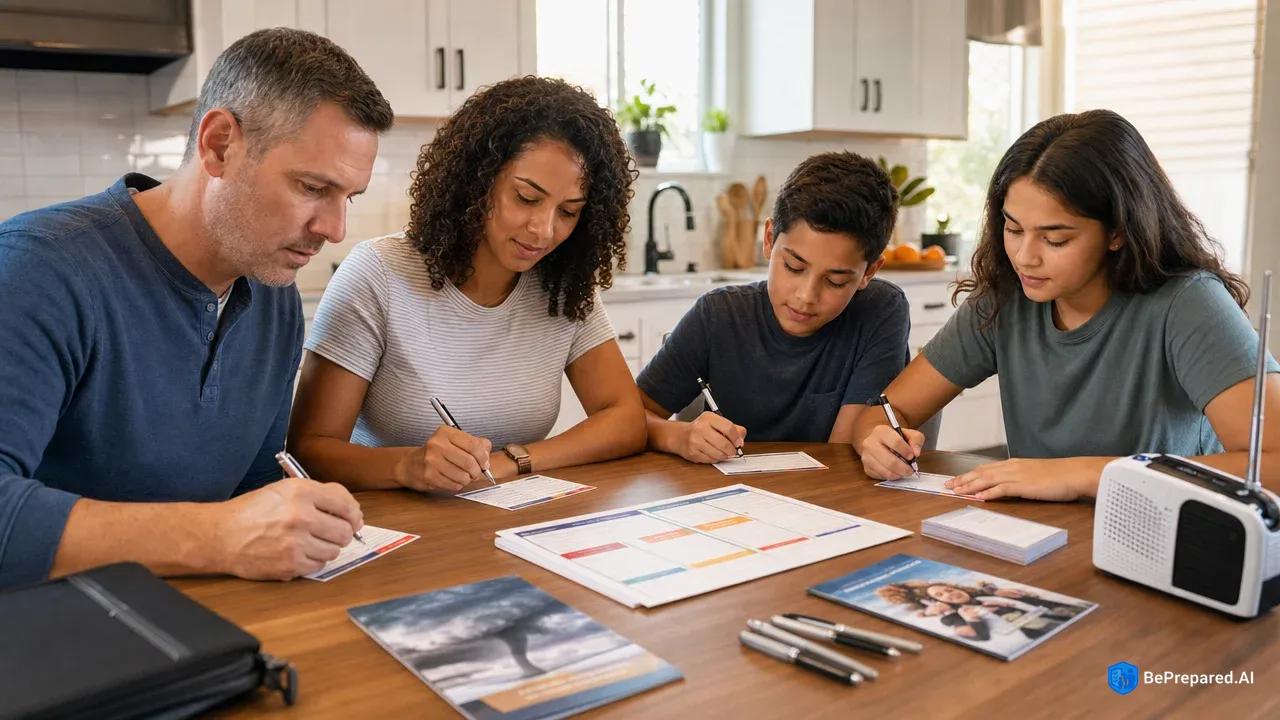
Why Emergency Contact Cards Matter (Especially During Tornadoes)
Sarah was at the grocery store when the tornado sirens began wailing across town. Her husband was at work fifteen miles away, and their two kids were at different schools. In the chaos that followed—as she rushed to the store's back room with other shoppers and the twister carved a path through their neighborhood—her phone lost signal. When she emerged twenty minutes later to find downed power lines and debris everywhere, she couldn't reach anyone. Her battery was dying, cell towers were overwhelmed, and she had no idea where her family had taken shelter or how to find them.
This scenario plays out more often than you'd expect. Tornadoes can strike with limited warning time, and they don't care if your family is together or scattered across the county . When severe weather hits, communication systems fail right when you need them most. Cell towers lose power, networks become overloaded with emergency calls, and smartphones—those devices we've become completely dependent on—turn into expensive paperweights.
That's where emergency contact cards become your lifeline. These simple, wallet-sized pieces of information work when technology fails. FEMA recommends that every family member carry emergency contact information at all times . First responders who find injured or disoriented people need to know who to contact. Emergency shelters need your information to help reunite families. Even neighbors and good Samaritans who want to help you need a way to reach your loved ones when your phone is dead or damaged.
The good news? Creating these cards is straightforward, and you can do it in an afternoon. You don't need special skills or expensive equipment. Just gather some basic information, print it out, and laminate it. That's it. You've just taken a huge step toward protecting your family.
- Personal Information
- Full name, date of birth, address, and any medical conditions or allergies that emergency responders need to know
- Primary Emergency Contacts
- Names and phone numbers of immediate family members, close friends, or trusted neighbors who can be reached quickly
- Medical & Insurance Details
- Doctor's contact info, preferred hospital, insurance provider and policy numbers, and current medications
- Out-of-Area Contact
- Contact information for someone in a different city or state who can coordinate family communication during local disasters
- Important Account Numbers
- Bank account details, credit card companies, and utility providers for quick access during recovery
- Card Storage & Updates
- Keep cards in wallets, car glove compartments, and emergency kits; review and update information every six months
Essential Contact Information Checklist
Creating an effective emergency contact card starts with gathering the right information. Think of this as building a communication safety net that catches you when everything else fails. Your card needs enough detail to help others connect you with your family, but it also needs to fit in your wallet and be quickly readable in stressful situations.
Immediate Family Contacts
Start with the people who matter most. List each family member's full name and at least two phone numbers—typically a cell phone and a work number. Include your spouse, children, and anyone else living in your household. Don't assume you'll remember these numbers in a crisis. When you're injured, exhausted, or in shock, even your spouse's cell number might slip your mind. Write down your own contact information too, because someone else might need to use your card to help you.
If you have elderly parents or other relatives who live nearby, add them to your list as well. They might be checking on you, or you might need to check on them. Having everyone's numbers in one place saves precious time when every minute counts.
Out-of-State Contact Person
Here's something many people overlook: during regional disasters like tornadoes, local phone networks become completely jammed, but long-distance calls often go through without problems . FEMA guidelines specifically recommend designating an out-of-state contact person . This person becomes your family's communication hub. If you can't reach your spouse directly, you can both call your sister in California, leave messages with her, and coordinate your reunion plans through her.
Choose someone reliable who's usually available and make sure every family member has this person's contact information memorized and written on their card. Call this person now and ask if they're willing to serve as your family's emergency contact. Explain what that means—they might get calls from multiple family members during a disaster, and they'll need to relay messages and help coordinate your reunion.
Give your out-of-state contact a brief overview of your family's emergency plan. They should know where your kids go to school, where you and your spouse work, and what your meeting places are. This background information helps them ask the right questions and give better guidance when everyone's stressed and scared.
Work and School Information
According to FEMA guidelines, your emergency contact cards should include work and school contact information for every family member . List the name and address of each workplace and school, along with main phone numbers and direct extensions if available. During a tornado, your child's school will have emergency procedures in place, and you need to know how to reach them—or how emergency responders can verify where your children should be.
Schools often have specific pickup procedures during emergencies. Some won't release children to anyone not on an authorized list. Others have designated reunification sites away from the school building. Knowing these procedures helps you understand where your children likely are and what steps you need to take to reach them.
Similarly, employers often have accountability systems during disasters. They need to know you're safe, and they might have resources to help you. Some companies provide emergency assistance to employees affected by disasters. Having your workplace contact information handy makes it easier to tap into those resources when you need them.
Essential Emergency Numbers
Beyond family contacts, include your local emergency management office, your utility companies (electric, gas, water), and your insurance agent. While 911 should always be your first call for immediate emergencies, these other numbers become crucial in the hours and days after a tornado when you're dealing with damage assessment, insurance claims, and service restoration.
Your local emergency management office can tell you about shelter locations, road closures, and available assistance programs. Utility companies need to know about downed lines, gas leaks, and service outages. Your insurance agent starts the claims process that gets your life back to normal.
Don't worry about memorizing all these numbers. That's what the card is for. Just make sure they're current and legible.
Medical and Special Needs Information
When tornado survivors arrive at emergency shelters or medical facilities, they're often separated from their medications, medical devices, and medical records. Some are injured and unable to communicate clearly. Others are children or elderly family members who may not know all their medical details. The medical information on your emergency contact card can save your life or the life of someone you love.
Critical Medical Conditions
List any serious medical conditions that emergency responders or medical personnel need to know about immediately. This includes diabetes, heart conditions, epilepsy, severe asthma, and any condition that might require specific treatment or could be mistaken for something else. If your daughter has epilepsy, for example, responders need to know that a seizure isn't caused by a head injury.
The American Red Cross recommends including both medical and insurance information on emergency contact cards . This information speeds up appropriate care and reduces dangerous mistakes. When medical personnel know your conditions upfront, they can make better decisions about your treatment.
Be specific but brief. "Type 1 diabetes, insulin-dependent" tells responders what they need to know. So does "severe asthma, uses rescue inhaler." You don't need to write your entire medical history—just the conditions that could affect emergency treatment.
Medications and Allergies
Write down current medications with dosages, especially for critical prescriptions like insulin, heart medications, or blood thinners. Include serious allergies, particularly to medications like penicillin or common painkillers. If you have a severe allergy to bee stings or peanuts, note that too. This information helps medical personnel treat you safely when you can't speak for yourself or when you're too stressed to remember details accurately.
If you take multiple medications, you might not have room to list them all on a wallet-sized card. Focus on the most critical ones—the medications you absolutely cannot miss or that could cause dangerous interactions with emergency treatments. You can keep a complete medication list in your home emergency kit as a backup.
Update this section whenever your medications change. New prescriptions, changed dosages, and discontinued medications should all be reflected on your card. An outdated medication list can be almost as dangerous as no list at all.
Medical Equipment and Doctors
If anyone in your family depends on medical equipment—oxygen, a wheelchair, hearing aids, or specialized devices—note this on your card. Include your primary care physician's name and phone number, along with any specialists who manage chronic conditions. Add your pharmacy's contact information too. After a tornado destroys your home and scatters your belongings, you'll need to replace medications quickly, and your pharmacy will have your prescription records.
For children with special needs, include brief notes about their conditions and any communication challenges. "Nonverbal, uses sign language" or "Autism, may not respond to name when stressed" helps responders and shelter workers interact appropriately with your child.
If you use a medical alert service or wear a medical ID bracelet, note that on your card too. This redundancy ensures that even if your bracelet is lost or damaged, critical information is still available.
Meeting Places and Reunion Information
Picture this: a tornado has just passed through your area. You were at work, your spouse was running errands, and your kids were at school. The roads are blocked with debris, some neighborhoods are without power, and cell service is spotty at best. Where do you go?
Without predetermined meeting places, families waste precious hours driving around, trying different locations, and increasing their stress and risk. FEMA recommends establishing both neighborhood and regional meeting places because having these predetermined locations eliminates confusion during high-stress emergency situations . Let's walk through how to choose these places and make sure everyone in your family knows the plan.
Step 1: Choose Your Primary Meeting Place
Start close to home. Your primary meeting place should be somewhere near your house that everyone can reach on foot if necessary. This might be a distinctive tree in your yard, your mailbox, or a neighbor's house. Choose something that will likely survive a tornado—so probably not your wooden shed.
The corner of your property where your fence meets the neighbor's fence works well because even if structures are destroyed, property lines remain. A large tree with distinctive features can work, though remember that tornadoes can uproot trees. Some families choose a neighbor's brick house or a concrete storm shelter as their primary meeting point.
Make sure this location is obvious and that every family member, including young children, knows exactly where it is and what it looks like. Walk there together as a family. Take pictures. Make it memorable. The goal is that even a scared six-year-old can find this spot without help.
Step 2: Designate a Neighborhood Meeting Place
Your secondary meeting place should be within your neighborhood but outside your immediate property. Think about locations that serve as community landmarks: the neighborhood park, a church, a school, or a local business like a gas station or grocery store. Choose somewhere sturdy that's likely to remain identifiable even with damage.
Brick or concrete buildings work better than wood-frame structures. Public buildings like libraries, fire stations, or community centers are good choices because they're designed to serve as gathering points. Many communities designate certain buildings as emergency shelters, and these make excellent secondary meeting places.
Include the complete street address on your contact card, not just the name. In a disaster, street signs might be gone and landmarks might look completely different. "Miller Park, 1250 Oak Street, northwest corner near tennis courts" is much more helpful than just "Miller Park" when half the park's features might be destroyed.
Step 3: Select a Regional Meeting Place
Your third meeting place should be outside your immediate area—somewhere beyond the likely tornado damage path. This might be a library in the next town, a shopping center ten miles away, or a relative's house in another community. The idea is that if your neighborhood is severely impacted and unsafe, your family needs somewhere farther away to regroup.
This location becomes especially important if you're evacuated to different emergency shelters and need a place to reunite once it's safe to leave. Choose somewhere that's easy to find and has parking. A major shopping center, a well-known restaurant, or a public building works well.
Consider the route to this location. Are there multiple ways to get there if some roads are blocked? Is it accessible from your workplace, your kids' schools, and your home? The best regional meeting place is one that everyone can reach from wherever they might be when disaster strikes.
Step 4: Add Landmarks and Details
For each meeting place, include not just the address but also distinctive landmarks or directions. "The big oak tree at Miller Park, northwest corner near the tennis courts" is more helpful than just "Miller Park" when half the park's features might be destroyed. These details help family members find each other and help emergency responders understand your reunion plans if they're assisting you.
Describe what the location looks like from different directions. "The red brick library on Main Street, across from the post office" gives people multiple reference points. If the post office is damaged, the red brick building on Main Street might still be recognizable.
Test your meeting places by actually going there. Make sure the addresses are correct and the landmarks you've noted are actually distinctive and easy to find. What seems obvious when you're calmly planning might be confusing in the chaos after a tornado.
Important Account and Insurance Information
The tornado has passed, your family is safe and reunited, and now you're facing the overwhelming task of recovery. Your home might be damaged or destroyed. Important documents could be scattered across three counties. This is when having account and insurance information on your emergency contact card transforms from "nice to have" to "absolutely essential."
Having this information readily available speeds up disaster recovery processes, because you can start making crucial calls immediately instead of spending days trying to reconstruct basic information . Let's look at what you need and how to organize it securely.
Insurance and Financial Contacts
List your homeowner's or renter's insurance policy number and your agent's direct phone number. Include your auto insurance information too, since tornadoes often damage vehicles. Add your bank's customer service number and your account numbers (or at least enough digits to identify your accounts).
If your wallet survives but your home doesn't, you'll need to access funds quickly for hotel rooms, food, clothing, and emergency supplies. Your bank can help you get emergency cash or replacement cards, but only if you can verify your identity and account information. Having your account numbers handy makes this process much faster.
Write down your insurance deductibles too. Knowing whether you have a $500 or $5,000 deductible helps you make better decisions about what damage to claim and what to handle yourself. It also helps you understand how much money you'll need to access immediately for repairs.
Important Document Locations
Note where you store critical documents—even if that location is now destroyed, it helps to know what you're looking for and where to start searching. If you have a safe deposit box, include that information and the bank location. If you've stored digital copies of important documents in cloud storage, write down that service and your username (though not your password—keep that memorized or stored securely elsewhere).
List the types of documents you've stored and where. "Birth certificates and passports in fireproof safe in master bedroom closet" helps you or emergency workers locate these crucial documents if your home is damaged but still standing. "Digital copies in Dropbox under 'Important Documents' folder" reminds you that you have backups even if the physical copies are destroyed.
Consider what documents you'll need most urgently after a disaster: identification, insurance policies, property deeds, vehicle titles, and financial records. Make sure you know where both physical and digital copies are stored.
Employer and School Emergency Procedures
Include brief notes about your employer's and children's schools' emergency procedures. Many workplaces and schools have specific protocols for disasters, including designated shelter areas and communication systems. Knowing these procedures helps you understand where your family members likely took shelter and how to get information about their status.
Some schools, for example, won't release children to anyone not on an authorized pickup list, so having that information handy prevents delays. Other schools have designated reunification sites away from the school building. If you know your child's school sends all students to the community center during tornado warnings, you know where to look for your child.
Workplaces might have emergency notification systems—phone trees, text alerts, or online portals where employees can report their status. Write down how to access these systems. If your employer uses a specific website or phone number for emergency check-ins, include that information.
A Word About Security
Balance completeness with security. You're carrying sensitive information, so consider what you'd want a stranger to have if you lost your wallet. Full account numbers for everything might be too much, but enough information to identify your accounts helps.
Some people use partial numbers or codes that make sense to them but wouldn't help an identity thief. You might write the last four digits of your bank account number plus a reference to where you keep the full number. Or you might use abbreviations that your family understands but strangers wouldn't.
The goal is giving yourself and legitimate helpers enough information to assist you without creating unnecessary risk. Think about what information you'd need to verify your identity to your bank or insurance company. That's what belongs on your card.
Creating and Maintaining Your Cards
You've gathered all this crucial information—now you need to turn it into durable, reliable emergency contact cards that will survive whatever disaster throws at them. The best information in the world doesn't help if it's smeared into illegibility by rain or torn apart by wind. This is where a small investment in materials and a commitment to maintenance pays enormous dividends.
Step 1: Choose Your Materials and Format
Start by designing your card to fit a standard wallet-friendly size—similar to a credit card. This ensures people will actually carry it instead of leaving it at home because it's awkwardly sized. You can create a simple template in any word processor or use free templates available from emergency management websites.
Type rather than handwrite—typed information is easier to read in poor lighting or stressful situations, and it looks more official, which helps if you need to show it to authorities. Use a clear, readable font like Arial or Times New Roman in at least 10-point size. Smaller fonts save space but become hard to read, especially for older family members or in dim lighting.
Organize your information logically. Put the most critical information—family contacts and medical conditions—at the top where it's immediately visible. Group related information together: all medical information in one section, all meeting places in another. Use bold headings to separate sections so people can quickly find what they need.
Step 2: Laminate for Durability
Once you've printed your cards, laminate them immediately. Laminated emergency cards survive water damage, mud, and rough handling far better than paper cards . You can use a home laminator (they're inexpensive and useful for many purposes), or take your cards to an office supply store for professional lamination.
The plastic coating protects your information from rain, flooding, sweat, and the general wear and tear of living in a wallet or backpack for months at a time. It also makes the card more rigid and easier to find in a crowded wallet or bag. The small cost of lamination is worth it for the peace of mind that your information will be readable when you need it.
Some people create multiple versions—a full-size card for wallets and a slightly larger version for emergency kits that includes even more detailed information. The wallet version has the essentials, while the kit version might include additional contacts, more detailed medical information, or insurance policy details that don't fit on the smaller card.
Step 3: Make Copies for Everyone
Create a card for every family member, including children old enough to carry a backpack. Kids' cards might have slightly different information—perhaps simpler language or additional notes like "I am 8 years old" or "My parents are [names]." Young children should have cards that identify them and explain how to contact their parents.
Make extra copies to store in your emergency kit, your car's glove compartment, and your workplace desk drawer. The redundancy ensures that even if you lose your wallet, you have backup copies accessible. Keep one in your spouse's car, one in your teenager's school locker, and one in your gym bag. The more copies you have in different locations, the more likely you'll have access to this information when you need it.
Consider making a larger poster-sized version to keep in your home emergency kit. This version can include more detailed information, photos of family members, and additional contacts that don't fit on the wallet-sized cards. It's also easier to read and can be posted in an emergency shelter to help others identify and contact your family.
Step 4: Set a Regular Update Schedule
Emergency contact information can change frequently. Phone numbers change, people move, kids switch schools, you change jobs, insurance companies update policy numbers. Set a calendar reminder to review and update your emergency contact cards every six months . This regular maintenance keeps your information current and reliable.
Pick a memorable time for your updates—perhaps when you change your clocks for daylight saving time, or on New Year's Day and the Fourth of July. The specific timing doesn't matter as much as having a consistent schedule that you'll actually follow.
During your update, verify that phone numbers still work by actually calling them. Make sure your out-of-state contact person is still willing and able to serve in that role. Confirm that your meeting places still exist and make sense for your family's current situation. Has your neighborhood park been renovated? Did your favorite restaurant close? Update your cards to reflect these changes.
Check that medical information is current. Have any medications changed? New diagnoses? Different doctors? Update everything and print fresh cards. Destroy the old cards so you don't accidentally grab an outdated version.
Step 5: Practice Using Your System
Finally, test your emergency contact system periodically. Have a family meeting where everyone takes out their cards and reviews the information together. Practice calling your out-of-state contact. Drive by your meeting places and make sure everyone remembers where they are.
Ask your kids what they'd do if they were separated from you during a tornado—can they recite the key information from their cards? Make it a game. Quiz each other on phone numbers and addresses. The more familiar everyone is with the information, the more useful it becomes in an actual emergency.
Do a practice run where you pretend the power is out and cell service is down. How would you reach each other? Where would you go? Walk through the scenario step by step. This practice transforms your emergency contact cards from theoretical preparation into practical, usable tools that your family can rely on when seconds count.
Consider doing a full family drill once a year. Pretend a tornado has just passed and everyone is in different locations. Each family member goes to the designated meeting place without using phones. Time how long it takes everyone to reunite. Discuss what worked and what didn't. Adjust your plan based on what you learned.
The more you practice, the more automatic your emergency response becomes. When a real tornado strikes, you won't have to think about what to do—you'll already know because you've practiced. Your emergency contact cards will be familiar tools, not mysterious pieces of paper you've never looked at.
Ready to create your family's emergency contact cards? Start by gathering the information listed in this article. Set aside an hour this weekend to type up your cards, print them, and get them laminated. Give everyone in your family their card and spend fifteen minutes reviewing the information together. That's it—you've just taken a simple but powerful step toward keeping your family safe and connected, no matter what happens.
Your future self—standing in the aftermath of a tornado, trying to reconnect with your loved ones—will thank you for taking this straightforward action today. You don't need to be an expert or spend a lot of money. You just need to take that first easy step.