Understanding Your Property's Wildfire Risk Profile
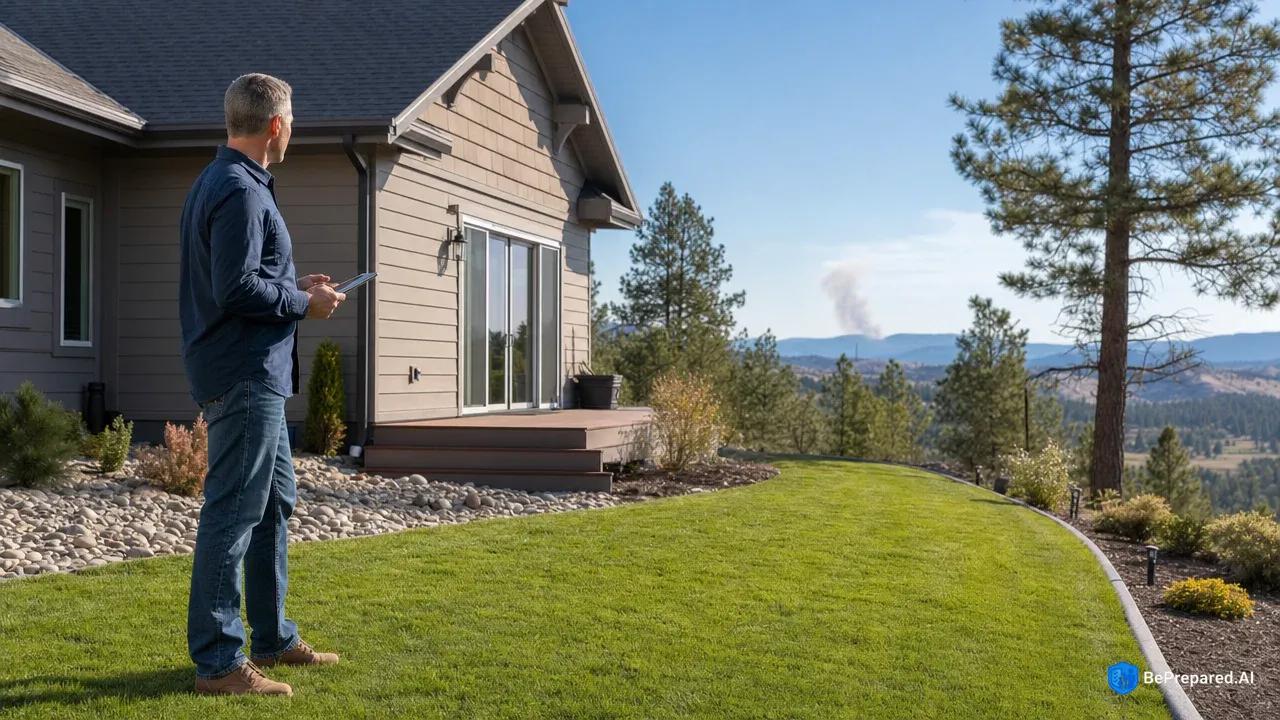
Sarah Chen stood on her back deck one September morning, coffee in hand, watching a thin column of smoke rise from the mountains fifteen miles away. The fire seemed distant—a problem for someone else. Three weeks later, she evacuated with twenty minutes' notice, joining a convoy of neighbors who'd also believed their suburban homes sat safely beyond wildfire's reach. When she returned, her house stood intact while her neighbor's had burned to the foundation. The difference wasn't luck—it was risk factors neither of them had understood until it was too late.
The uncomfortable truth is that wildfire exposure extends far beyond the obvious mountain cabins surrounded by pine forests. According to the Wildfire Risk to Communities platform, over 70 million properties across the United States face significant wildfire exposure . These aren't just rural retreats or backcountry homesteads—they include suburban developments, edge-of-town neighborhoods, and even properties that residents would never classify as "wildland-urban interface." The fire doesn't consult your mental map of where wilderness ends and civilization begins.
Understanding your property's specific risk profile represents the essential first step in effective wildfire preparation. Homes located in Very High Fire Hazard Severity Zones carry a one-in-four chance of burning within thirty years —odds that should motivate any homeowner to action. Yet risk assessment isn't binary. Your property exists on a spectrum of vulnerability determined by dozens of interacting factors, from the slope of your land to the age of your roof shingles, from the native vegetation surrounding your home to the prevailing wind patterns during fire season.
The good news is that professional-grade risk evaluation tools have become accessible to individual homeowners. What once required expensive consultations with fire safety experts can now be accomplished through systematic self-assessment combined with digital mapping platforms. This democratization of risk knowledge means you can identify your vulnerabilities before disaster strikes, creating opportunities for meaningful mitigation rather than reactive scrambling when evacuation orders arrive. Early assessment enables proactive strategies that genuinely reduce your risk profile rather than simply checking boxes on a generic preparedness list.
The difference between Sarah and her neighbor ultimately came down to factors that could have been identified and addressed years before that September fire. Understanding your property's unique risk profile transforms wildfire preparedness from abstract anxiety into concrete, manageable action items with measurable outcomes. You can't control whether fire threatens your area, but you can control how vulnerable your property is when it does.
- Topographic Risk Factors
- Slope angle, aspect direction, and elevation create fire behavior patterns - steep slopes accelerate fire spread while valleys can channel winds and create dangerous conditions
- Vegetation Density & Type
- Fuel load assessment including native plant species, moisture content, and continuity - dense, dry vegetation creates higher ignition probability and faster fire progression
- Climate & Weather Patterns
- Historical data on temperature, humidity, precipitation, and wind patterns - seasonal variations and extreme weather events directly correlate with fire season intensity
- Mitigation Strategy Integration
- Risk matrix correlates with specific defensible space requirements and structural hardening recommendations based on identified vulnerability factors
Geographic and Environmental Risk Factors
Wildfire risk begins with the land itself—the physical geography that shapes how fires move, intensify, and threaten structures. Your property's location within the broader landscape creates the foundation upon which all other risk factors build. Understanding these geographic and environmental elements requires looking beyond your property lines to see how your home sits within the larger ecosystem of potential fire behavior.
Terrain slope represents one of the most significant geographic risk multipliers. Fire travels uphill with frightening speed, preheating vegetation ahead of the flame front and creating convection currents that accelerate spread. A property situated on a slope of fifteen degrees or greater faces exponentially higher risk than flat terrain. Properties located mid-slope or at ridgetops experience different fire behavior patterns than those at valley bottoms, where cool air settles and vegetation tends toward higher moisture content. Elevation also matters—higher elevations often correlate with different vegetation communities and weather patterns that influence fire season timing and intensity.
The steeper your slope, the more aggressive your defensible space needs to be. Fire behavior specialists recommend extending defensible space distances by significant margins on upslope properties. A home on a thirty-degree slope might need defensible space extending 150 feet or more, compared to the standard 100 feet for flat terrain. Walk your property with slope in mind, identifying which directions present uphill approaches where fire would gain momentum and intensity.
The vegetation surrounding your property creates the fuel that feeds wildfire. Different plant communities carry vastly different fire risk profiles. Dense chaparral in California, pine forests in the Mountain West, palmetto scrub in Florida, and oak woodlands in Texas all burn with distinct characteristics in terms of intensity, ember production, and flame length. Properties bordered by continuous vegetation that connects to larger wildland areas face higher risk than those surrounded by irrigated lawns and agricultural fields.
The concept of "fuel continuity" describes whether fire can move easily from wildland vegetation to your property. Gaps in vegetation create natural firebreaks, while continuous fuel beds create highways for advancing flames. During your property assessment, trace the path fire would take from surrounding wildlands to your home. Are there continuous stretches of vegetation? Do shrubs connect to tree branches that overhang your roof? Does tall grass extend right up to your foundation? Each connection represents a fuel pathway that needs disruption.
Climate patterns and seasonal variations determine when your property faces peak fire risk. An average of 70,000 wildfires burn approximately 7 million acres annually across the United States , but these fires cluster in predictable seasonal windows that vary by region. The Southwest faces peak risk in late spring before monsoon rains arrive. The Pacific Northwest sees its worst fire season in late summer and early fall. The Southeast experiences elevated risk during spring and fall when humidity drops and vegetation dries.
Understanding your region's fire season allows for strategic timing of maintenance activities and heightened vigilance during critical periods. Wildfire season now lasts 2.5 months longer than in the 1970s , meaning the window of risk has expanded significantly in recent decades. What were once distinct periods of danger have become extended seasons requiring sustained attention. Track local fire danger ratings throughout your fire season, not just during the peak months you might remember from years past.
Proximity to wildland areas and local fire history provide crucial context for assessing your property's risk. Insurance companies now use satellite imagery and artificial intelligence to assess wildfire risk, examining vegetation density, slope, and proximity to wildland areas . These same factors should inform your personal risk assessment. Homes within one mile of large tracts of wildland vegetation face fundamentally different risk than those surrounded by developed neighborhoods. The transition zone where homes meet wildland vegetation—the wildland-urban interface—creates particularly hazardous conditions where fire can move from natural fuels to structures.
Local fire history reveals patterns that matter for your property. Areas that have burned repeatedly demonstrate that conditions exist for fire to reach those locations. While past fire can temporarily reduce fuel loads, it also confirms that your property sits within a fire-prone landscape. Research your area's fire history through local fire departments, forestry agencies, or online databases. Properties that have experienced near-misses or evacuations in the past will likely face similar threats in the future.
Wind patterns during fire season complete the geographic risk picture. Prevailing winds determine the most likely direction of fire approach and influence ember transport distances. Properties downwind of large vegetation areas during typical fire-weather wind patterns face higher exposure than those upwind. Local topography can create wind tunnels or eddies that concentrate fire behavior in specific locations. Canyon properties often experience enhanced winds that push fires upslope with particular ferocity.
Understanding typical wind patterns during fire season helps you prioritize which sides of your property require the most attention in creating defensible space and hardening structures against ember attack. Your local fire department or weather service can provide information about prevailing wind directions during fire weather conditions. Note which direction your property faces relative to these winds and nearby vegetation—this determines your highest-risk exposure direction.
Home Structure and Materials Assessment
While you cannot change your property's geographic location, you exercise considerable control over your home's structural vulnerability to wildfire. The materials and design features of your house determine whether it can withstand the onslaught of radiant heat, direct flame contact, and the ember storm that often precedes the main fire front. A systematic assessment of your home's structural elements reveals specific vulnerabilities that targeted improvements can address.
Begin your assessment at the top—literally. Your roof represents the largest and most vulnerable surface area of your home. Embers cause approximately 90% of home ignitions during wildfires , and your roof catches the majority of these embers. Class A roof materials provide the highest fire resistance rating , including composition shingles, metal roofing, clay or concrete tiles, and slate. If your home still has wood shake shingles, you're essentially covering your house with kindling—this represents a critical vulnerability requiring immediate attention.
Even Class A roofing requires proper maintenance. Accumulated debris in valleys and against chimneys creates ignition points that compromise even fire-resistant materials. Pine needles, leaves, and twigs collect in roof valleys, behind solar panels, and anywhere water naturally channels. These accumulations dry out during fire season and provide perfect conditions for embers to ignite and smolder. The intersection between roofing and other structures, such as where the roof meets walls or where chimneys penetrate the roofline, creates vulnerable points where embers can lodge.
Walk around your property and view your roof from all angles. Use binoculars if necessary to inspect areas you can't see clearly from the ground. Look for debris accumulation, damaged or missing shingles, gaps where flashing has pulled away, and any penetrations that aren't properly sealed. If you can safely access your roof, conduct a closer inspection, but don't take unnecessary risks—hiring a professional inspector makes sense if your roof is steep or high.
Move next to your home's siding materials. Wood siding, particularly if weathered or in poor repair, provides ready fuel for ignition. Vinyl siding melts under radiant heat before flames even arrive, creating gaps that allow ember entry into wall cavities. Stucco, fiber cement, brick, and metal siding offer superior fire resistance. The condition of siding matters as much as the material—gaps between siding panels, cracks in stucco, or loose boards create entry points for embers.
The first few feet of siding face the highest risk , as surface fires and radiant heat concentrate near ground level. Pay particular attention to the area where siding meets the foundation, where debris can accumulate against combustible materials. Check for mulch, leaves, or vegetation touching your siding. Look for gaps where rodents or weather have created openings. Examine corners and edges where siding panels meet—these junctions often develop gaps over time as materials expand and contract with temperature changes.
Windows represent another critical vulnerability point. Standard single-pane windows can fail from radiant heat alone, without direct flame contact, allowing fire to enter your home's interior. Multi-pane windows with at least one pane of tempered glass provide significantly better performance. Large windows and glass doors create more vulnerable surface area than smaller windows. Skylights face particular risk from ember accumulation if they're not properly screened or if debris collects in the wells around them.
The window frame material also matters. Vinyl frames melt and fail more readily than wood, aluminum, or steel frames. During your assessment, note the size, number, and location of windows, particularly those facing the direction from which fire would most likely approach based on local topography and wind patterns. Windows on the side of your home facing wildland vegetation or prevailing fire-season winds deserve priority attention for upgrades.
Vents throughout your home's exterior—in eaves, attic spaces, foundation crawlspaces, and gable ends—create necessary airflow for your home's systems but also provide entry points for wind-driven embers. Standard rectangular vents with large openings offer minimal resistance to ember intrusion. Ember-resistant vents incorporate one-eighth inch or smaller mesh screening that blocks embers while maintaining airflow . This fine mesh prevents embers from entering while still allowing adequate ventilation for your attic and crawlspaces.
Covering existing vents with appropriate mesh represents a relatively simple and cost-effective improvement. Don't overlook less obvious vents, such as those for bathroom fans, dryer exhausts, or combustion air intakes for furnaces and water heaters. Crawl under your deck to check for foundation vents. Use a ladder to inspect eave and gable vents. Count all vents and assess whether each has adequate ember-resistant screening.
Decks, patios, and attached outbuildings extend your home's vulnerable footprint. Wood decks attached to your house create a direct fuel pathway from ground level to your home's interior. The space beneath decks often accumulates leaves, needles, and other debris that provides perfect conditions for ember ignition. A fire starting beneath your deck can quickly spread to your home's siding and interior.
Composite decking materials vary widely in fire resistance—some perform well while others burn readily. Check manufacturer specifications for your decking material's fire rating. Fencing that attaches directly to your home creates another fuel pathway that can carry fire from your yard to your structure. Detached sheds, workshops, and storage buildings can become secondary ignition sources if they catch fire and generate additional embers or radiate heat toward your main structure.
During your assessment, evaluate all structures within one hundred feet of your home, as these can contribute to fire exposure. Note which structures contain combustible materials, which are built with fire-resistant materials, and which could be improved. Consider the path fire could take from outbuildings to your main home—are there fuel connections that need disruption?
Assess your gutters and the overall maintenance condition of your home's exterior. Gutters filled with pine needles, leaves, and debris become linear ignition sources running along your roofline. These elevated fuel sources sit in direct contact with your roof edge and fascia boards. Accumulated debris on roofs, in roof valleys, or against walls creates concentrated fuel loads exactly where you least want them.
Overhanging branches that touch or come close to your roof provide direct pathways for fire to reach your home. Peeling paint, rotted wood, and other maintenance issues create additional vulnerabilities. The most fire-resistant materials won't protect your home if poor maintenance creates ignition opportunities. Walk your property's perimeter with a critical eye toward maintenance issues. Note peeling paint, damaged siding, rotted trim boards, and accumulated debris. These maintenance items often get deferred, but they directly affect your wildfire vulnerability.
Defensible Space Evaluation Methods
Creating and maintaining defensible space around your home represents perhaps the most effective wildfire risk reduction strategy available to homeowners. Proper defensible space can reduce structure ignition probability by up to 85% , a remarkable risk reduction achievable through systematic vegetation management. Understanding how to evaluate and create defensible space requires familiarity with the zone concept that fire professionals use to organize vegetation management strategies.
The zone approach breaks your property into concentric rings around your home, each with specific vegetation management goals. These zones aren't arbitrary—they reflect how fire behavior changes with distance from structures and how different management strategies affect fire intensity and ember production. Understanding these zones helps you prioritize your efforts and apply the right level of vegetation management in each area.
Zone 0 and Zone 1: The Immediate Zone (0-5 feet) and Near-Home Zone (5-30 feet)
The area immediately surrounding your home—within five feet—requires the most aggressive fuel reduction. This immediate zone should contain no combustible materials whatsoever. Remove all dead vegetation, including fallen leaves, needles, and branches. Eliminate wood mulch within five feet of your home, or use non-combustible alternatives like gravel, rock, or decomposed granite. Move firewood piles, propane tanks, and stored materials away from this immediate zone.
Even living plants in this area should be carefully selected, low-growing, and well-irrigated. Think of this zone as an extension of your home's structure rather than as landscaping—it serves a defensive function, not an aesthetic one. Choose fire-resistant plants like succulents, ice plant, or other high-moisture, low-growing species. Space these plants as individual specimens rather than continuous beds. Keep them pruned low and remove dead material promptly.
From five to thirty feet, you're creating the near-home zone where strategic vegetation management significantly reduces fire intensity and ember accumulation. Remove all dead plants, grass, and vegetation. Space trees to prevent crown-to-crown contact—fire behavior specialists typically recommend separating tree crowns by at least ten feet, though specific guidance varies by region and vegetation type. Remove tree branches within six to ten feet of the ground to prevent surface fires from climbing into tree canopies.
This "ladder fuel" removal breaks the vertical fuel continuity that allows fires to transition from grass and shrubs into tree canopies. A ground fire burning grass and low shrubs generates far less intensity than a crown fire racing through tree tops. By removing the ladder that connects these fuel layers, you force fire to remain on the ground where it's less intense and more easily controlled.
Space shrubs to prevent continuous fuel beds. Fire behavior specialists often recommend spacing individual shrubs at least twice their mature height apart. A shrub that will grow to four feet tall should be planted at least eight feet from its neighbors. This spacing prevents fire from moving easily from shrub to shrub, reducing overall fire intensity and rate of spread.
Evaluate your Zone 0 and Zone 1 by walking the perimeter of your home with a critical eye. Look for any combustible materials that could carry fire to your walls or roof. Check beneath decks, stairs, and overhangs where debris accumulates out of sight. Examine the vegetation immediately adjacent to your home—are there shrubs touching the siding? Branches overhanging the roof? Vines growing on walls? Each of these represents a direct fuel pathway that could bring fire to your structure.
Measure these zones accurately. Five feet is shorter than most people estimate—it's about two adult paces. Thirty feet is roughly ten paces. Use a measuring tape or measuring wheel to mark these distances with temporary stakes or flags. This visualization helps you understand the actual extent of your immediate defensible space and often reveals that you haven't cleared as much area as you thought.
- Assessment & Prioritization (Month 1)
- Conduct comprehensive property evaluation using standardized risk assessment tools, identify high-priority zones within 30 feet of structures, and create detailed improvement priority matrix
- Immediate Actions (Months 1-3)
- Clear combustible materials from Zone 1 (0-5 feet), remove dead vegetation, clean gutters and roofs, establish ember-resistant barriers with measurable completion targets
- Long-term Strategic Upgrades (Year 2-3)
- Complete Zone 3 modifications (30-100 feet), major structural improvements, advanced fire suppression systems, and comprehensive evacuation planning with annual review cycles
- Progress Tracking Dashboard
- Monthly checklist system with photographic documentation, completion percentage tracking, budget monitoring, and seasonal maintenance scheduling with automated reminders
- Annual Review & Adaptation
- Systematic evaluation of implemented measures, risk reassessment based on changing conditions, plan updates incorporating new research, and continuous improvement protocols
Zone 2: The Reduced Fuel Zone (30-100 feet)
The intermediate zone extending from thirty to one hundred feet from your home focuses on reducing overall fuel loads and breaking up fuel continuity. This zone doesn't require complete vegetation removal, but rather strategic thinning and maintenance that reduces fire intensity and rate of spread. The goal is to create a landscape where fire can still burn but does so with much lower intensity and slower spread.
Create horizontal spacing between tree crowns. Fire behavior specialists often recommend at least ten feet of separation, though this varies based on tree species, slope, and local conditions. Remove smaller trees growing beneath larger ones—these ladder fuels allow fire to climb from the ground into tree crowns. Reduce shrub density significantly—aim for individual shrubs or small groupings rather than continuous hedges or thickets.
In this zone, pay particular attention to topography. If your property slopes upward away from your home, fire will travel uphill with increased intensity, requiring more aggressive fuel reduction on the uphill side. Fire moving upslope preheats vegetation ahead of the flame front and benefits from convection currents that draw flames upward. If your property slopes downward, you have slightly more flexibility, though you still need to prevent continuous fuel beds.
Create "fuel breaks"—areas of very low vegetation or non-combustible surfaces—that interrupt the path fire would take toward your home. These might include gravel driveways, irrigated lawns, garden beds with widely spaced plants, or areas of bare mineral soil. Fuel breaks don't stop fire completely, but they slow its progress and reduce intensity, giving firefighters better opportunities to defend your home.
Measure your Zone 2 defensible space using a measuring wheel, measuring tape, or by pacing. An average adult stride equals roughly three feet, so one hundred feet is about thirty-three paces. Mark the thirty-foot and one-hundred-foot perimeters with temporary stakes or flags. This visualization helps you understand the actual extent of your defensible space and identify areas where vegetation management falls short.
Many homeowners significantly underestimate these distances, believing they've created adequate defensible space when they've only addressed the first twenty or thirty feet. Actually measuring and marking these zones often reveals substantial work remaining. Take photos from various angles showing your marked zones—these provide baseline documentation and help you track progress over time.
Zone 3: The Extended Protection Zone (100+ feet)
Beyond one hundred feet, you're creating an extended protection zone where the goal shifts to reducing overall fire intensity and preventing extreme fire behavior. In this zone, thin trees to reduce crown fire potential. Remove dead standing trees (snags) that could fall and carry fire closer to your home or block evacuation routes. Reduce surface fuels by removing fallen branches and dense undergrowth.
The specific extent of Zone 3 depends on your property size and local regulations. Some jurisdictions require defensible space extending 150 feet or more from structures, particularly on steep slopes or in areas with high fire hazard. Check your local fire department or forestry agency for specific requirements in your area.
For properties smaller than one hundred feet in any direction, your defensible space extends to your property line, and you should communicate with neighbors about vegetation management on adjacent properties. Wildfire doesn't respect property boundaries, and your risk reduction efforts can be compromised by poor vegetation management on neighboring lots. Consider organizing a neighborhood effort to create community-wide defensible space.
Approach neighbors diplomatically, sharing information about wildfire risk and the benefits of defensible space. Offer to help with vegetation management projects or coordinate bulk disposal of vegetation debris. Many neighborhoods have successfully organized community chipper days or group purchases of vegetation management services, reducing costs and creating more comprehensive protection.
Maintenance Schedules and Seasonal Preparations
Defensible space isn't a one-time project—it requires ongoing maintenance to remain effective. Vegetation grows, debris accumulates, and plants die. Without regular maintenance, your defensible space degrades quickly, particularly in areas with fast-growing vegetation or significant seasonal leaf and needle drop.
Establish a maintenance schedule that includes spring cleanup to remove winter accumulation of fallen branches and leaves, pre-fire-season inspection and maintenance in late spring or early summer, and post-fire-season assessment in fall to identify any new vulnerabilities. The time commitment varies based on property size, vegetation type, and climate, but plan for regular attention throughout the year.
Spring maintenance focuses on removing debris that accumulated during winter storms. Rake leaves and needles from Zone 0 and Zone 1. Clear gutters and roof surfaces. Prune dead branches and remove dead plants. This is also a good time to apply fresh non-combustible mulch in Zone 0 if you've chosen to use rock or gravel.
Pre-fire-season maintenance in late spring or early summer represents your final preparation before peak fire danger arrives. Conduct a thorough inspection of all three zones, addressing any issues identified. Mow or cut dry grass to four inches or less. Remove any new vegetation growth that has compromised spacing in Zone 1 and Zone 2. Clean gutters again if trees have dropped seeds, flowers, or early leaf fall.
Post-fire-season assessment in fall provides an opportunity to evaluate how well your defensible space performed and plan improvements for the following year. This is also when you'll deal with fall leaf drop in deciduous areas. Remove accumulated leaves from Zone 0 and Zone 1, and reduce leaf litter in Zone 2. Identify any trees or shrubs that died during the summer and plan for their removal.
Track your maintenance activities in a simple log or calendar. Note what you did, when you did it, and how long it took. This record helps you plan future maintenance schedules and provides documentation of your ongoing risk reduction efforts for insurance purposes. Take photos during each maintenance session to document the condition of your defensible space over time.
Digital Risk Assessment Tools and Resources
The technological revolution in wildfire risk assessment has placed sophisticated analytical tools directly in homeowners' hands. What once required expensive consultations with fire behavior specialists can now be accomplished through online platforms and mobile applications that synthesize vast datasets into property-specific risk assessments. Understanding how to access and interpret these tools empowers you to move beyond general awareness to precise knowledge of your property's vulnerabilities.
The Wildfire Risk to Communities Platform
The Wildfire Risk to Communities platform, developed by the U.S. Forest Service, represents the most comprehensive publicly available risk assessment resource. This platform provides property-specific risk scores for over 70 million addresses across the United States . To use this tool effectively, navigate to wildfirerisk.org and enter your property address. The platform generates a detailed risk report that includes your overall wildfire risk rating, wildfire likelihood scores, potential fire intensity estimates, and community-level risk context showing how your property compares to surrounding areas.
The risk scores use a scale from low to extreme, but don't stop at the headline number. Dig into the detailed report to understand the specific factors driving your risk score. The platform breaks down risk into components including likelihood of wildfire burning on your property, expected fire behavior characteristics, and susceptibility of nearby structures. It provides information about the surrounding landscape, including vegetation types, topography, and historical fire occurrence.
Perhaps most valuable, the platform identifies specific risk factors you can address through mitigation efforts, distinguishing between factors you cannot change (like slope and climate) and those you can modify (like vegetation and structure materials). Review each section of the report carefully. Print or save a PDF copy for your records. Compare your property's risk score to neighboring properties to understand whether your risk is typical for your area or elevated due to specific local factors.
The platform also provides information about nearby fire stations, water sources, and community wildfire protection plans. This context helps you understand not just your property's vulnerability but also the resources available to protect it. Note the distance to the nearest fire station and whether your property has adequate access for fire engines—narrow driveways or roads can compromise firefighter access during emergencies.
State and Local Fire Department Mapping Tools
State and local fire department mapping tools provide region-specific detail that complements the national platform. California's Fire Hazard Severity Zone maps, Colorado's Wildfire Risk Assessment Portal, and similar state-level resources incorporate local fire history, vegetation mapping, and regulatory information. Access these through your state forestry agency or fire marshal's website.
Many county and municipal fire departments maintain their own mapping tools with even more granular detail. These local resources often include information about evacuation routes, fire station locations, and community fire protection capabilities that influence your overall risk profile. Contact your local fire department to ask about available mapping tools and risk assessment resources.
State and local tools often include regulatory information about defensible space requirements, building codes, and permit requirements for vegetation management. Some jurisdictions have specific rules about what you can and cannot do with vegetation, particularly if you have protected trees or habitat on your property. Understanding these regulations before you begin work prevents compliance issues and potential fines.
Insurance Company Assessment Platforms
Insurance company assessment platforms have become increasingly sophisticated as insurers work to understand and price wildfire risk accurately. Some insurance companies now provide policyholders with access to their risk assessment data, including aerial imagery analysis and vegetation mapping. Contact your insurance provider to inquire about available risk assessment resources.
Even if they don't provide direct access to their assessment tools, asking about your property's risk factors and what improvements might reduce premiums can yield valuable insights. Insurance companies use satellite imagery and artificial intelligence to assess wildfire risk, examining vegetation density, slope, and proximity to wildland areas —the same factors you should consider in your self-assessment.
Request a copy of any risk assessment your insurance company has conducted on your property. Ask specifically what factors are increasing your premiums and what improvements would qualify for discounts. Some insurers offer premium reductions for documented fire mitigation work, but you must proactively provide this information—they won't automatically know about improvements you've made.
Mobile Applications and On-Site Tools
Mobile applications enable on-site evaluation and documentation. Apps like NFPA's Wildfire Prepared Home allow you to conduct structured property assessments using your smartphone or tablet, capturing photos and notes about specific vulnerabilities. These apps guide you through systematic evaluation of your home's exterior, defensible space, and surrounding landscape.
The documentation they create serves multiple purposes—tracking improvements over time, providing evidence for insurance discussions, and creating records for potential grant applications or cost-sharing programs for fire mitigation work. Download one or more of these apps and conduct a guided assessment. The structured approach ensures you don't overlook important vulnerabilities.
Use your phone's camera to document current conditions before you begin improvements. Take photos from the same locations and angles periodically to track changes over time. Date-stamp your photos and organize them in folders by year and season. This visual record provides powerful evidence of your risk reduction efforts.
Professional Inspection Services
Professional inspection services offer the most thorough assessment option, though at a cost. Certified fire inspectors or Firewise professionals can conduct on-site evaluations that identify vulnerabilities you might overlook and provide detailed recommendations prioritized by effectiveness and cost. Professional inspections typically cost between $200 and $500 for residential properties, depending on property size and complexity.
Many fire departments offer free or low-cost inspections, though these may be less detailed than private professional services. Contact your local fire department to ask about available inspection programs. The National Fire Protection Association's Firewise USA program maintains a directory of qualified professionals and can connect you with local resources .
A professional inspection makes particular sense if your property has complex features, if you're planning major renovations or improvements, or if you want expert guidance on prioritizing mitigation efforts. The inspector's report provides a roadmap for improvements and can support applications for grants or cost-sharing programs.
Understanding Tool Limitations
When using any digital tool, understand its limitations. Risk scores represent probabilities and general patterns, not predictions about specific fire events. A "moderate" risk score doesn't mean you're safe—it means your probability of experiencing wildfire is lower than properties with "high" or "extreme" scores, but the risk remains real. Similarly, a "low" risk score doesn't eliminate the need for basic preparedness.
Use these tools as starting points for deeper investigation rather than definitive answers. Cross-reference multiple tools to build a comprehensive understanding of your risk profile. The Wildfire Risk to Communities platform might show one risk level while your insurance company's assessment shows another—these differences reflect different methodologies and data sources, not errors. Consider the full range of assessments when evaluating your risk.
Update your assessments periodically as conditions change and new data becomes available. Conduct a fresh assessment every two to three years, or sooner if significant changes occur in your area (like a nearby fire, major development, or substantial vegetation changes). Risk isn't static—it evolves with changing climate, vegetation, and development patterns.
Creating Your Risk Reduction Action Plan
Armed with detailed knowledge of your property's vulnerabilities, you can now transform assessment into action. An effective risk reduction plan prioritizes improvements based on their effectiveness, cost, and feasibility, creating a roadmap for systematic risk reduction over time. Most homeowners cannot address all vulnerabilities simultaneously, making strategic prioritization essential for making meaningful progress without overwhelming yourself or your budget.
Priority Ranking of Identified Vulnerabilities
Begin by categorizing your identified vulnerabilities into three tiers based on urgency and consequence. This prioritization helps you focus resources on the most critical issues while maintaining a clear path forward for less urgent improvements.
Tier One includes critical vulnerabilities that represent immediate, high-consequence risks. These are the issues that could directly cause your home to ignite during a wildfire. Examples include wood shake roofs that need immediate replacement, missing or inadequate vent screening that allows direct ember entry, combustible materials stored against your home's exterior, complete absence of defensible space in Zone 0 and Zone 1, or dead trees leaning toward your structure.
These demand immediate attention and should be addressed within the current calendar year. If budget constraints prevent tackling all Tier One items immediately, address them in order of consequence—start with the vulnerability most likely to cause ignition. A wood shake roof represents a higher immediate risk than inadequate vent screening, though both need attention.
Tier Two encompasses important improvements that significantly reduce risk but don't represent immediate critical failures. These are the enhancements that move you from vulnerable to reasonably protected. Examples include upgrading to ember-resistant vents with proper mesh screening, improving window fire resistance through multi-pane or tempered glass, extending defensible space to full recommended distances in all zones, replacing combustible siding with fire-resistant materials, or upgrading deck materials from wood to composite or non-combustible options.
Plan to address Tier Two improvements within one to three years. Sequence these based on effectiveness and opportunity—if you're already planning to replace windows for energy efficiency, upgrade to fire-resistant windows at the same time. If you're re-landscaping a section of your yard, incorporate defensible space principles into the new design.
Tier Three includes enhancements that provide incremental risk reduction beyond the basics. These are the refinements that take you from reasonably protected to optimally protected. Examples include upgrading from good to excellent roof materials, adding additional fire-resistant landscaping features, improving access for emergency vehicles through driveway widening or turnaround installation, or installing exterior sprinkler systems for additional protection.
These can be addressed opportunistically as budgets allow or during normal maintenance cycles. If your roof needs replacement in five years anyway, plan to upgrade to the most fire-resistant materials available at that time. If you're adding a new driveway, design it to meet fire department access requirements.
Within each tier, further prioritize based on effectiveness relative to cost. Removing combustible materials from Zone 0 costs nothing but labor and provides enormous risk reduction. Installing ember-resistant vent screening represents a relatively modest investment with disproportionate benefit. Replacing an entire roof is expensive but may be necessary if current roofing represents a critical vulnerability.
Cost-Benefit Analysis of Mitigation Measures
Develop a realistic budget for your risk reduction plan. Common improvements range from essentially free (debris removal and basic vegetation management you do yourself) to substantial investments (roof replacement or deck reconstruction requiring professional contractors). Understanding typical costs helps you plan and prioritize effectively.
Defensible space creation and maintenance for an average suburban property might cost $500-2,000 if you hire professionals, or primarily your time if you do the work yourself. Initial creation requires more intensive effort than ongoing maintenance. Professional tree services charge $500-1,500 for significant thinning and pruning work. Vegetation removal and disposal might cost $300-800 depending on volume and local disposal fees.
Ember-resistant vent installation typically runs $300-1,000 depending on the number of vents and whether you hire professionals or do the work yourself. Vent covers cost $15-50 each, and most homes have 6-15 exterior vents requiring protection. This represents one of the highest value improvements—relatively low cost with substantial risk reduction.
Roof replacement with Class A materials ranges from $8,000-25,000 depending on home size, material choices, and local labor costs. Composition shingles represent the lower end of this range, while metal roofing or tile falls at the higher end. If your current roof is nearing the end of its lifespan anyway, the incremental cost of upgrading to fire-resistant materials is modest.
Window upgrades might cost $300-1,000 per window for replacement with multi-pane, tempered glass units. Most homes have 10-20 windows, making complete window replacement a substantial investment ($3,000-20,000 total). Prioritize windows on the sides of your home facing the highest fire risk—you may not need to replace all windows immediately.
Deck replacement or modification could run $5,000-30,000 depending on size and materials. Replacing a large wood deck with composite materials represents a major investment. Consider phased approaches—you might replace the most vulnerable sections first or add skirting and ember screening beneath existing decks as interim measures.
Balance these costs against the value they protect and the insurance savings they may generate. A $10,000 investment in roof replacement and vent upgrades protects a $400,000 home while potentially reducing annual insurance premiums. Some insurers offer discounts up to 20% for documented fire mitigation work , though discounts vary widely by company and location.
Many improvements also qualify for insurance discounts, tax incentives, or cost-sharing programs through state forestry agencies or fire districts. Research available financial assistance programs in your area. Some jurisdictions offer grants or low-interest loans for fire mitigation work. The USDA Forest Service provides cost-share programs in some areas. State forestry agencies often maintain lists of available funding sources.
Contact your local fire department, forestry office, or county emergency management agency to ask about available programs. Some programs reimburse up to 50% of eligible mitigation costs. Others provide free chipper services for vegetation removal. Community programs might offer group purchasing discounts for fire-resistant materials or vegetation management services.
Timeline for Implementing Improvements
Create a realistic timeline that sequences improvements logically and spreads costs over manageable periods. Some work is seasonal—vegetation management is best done in spring or fall in most climates, while construction projects might be limited to dry summer months. Some improvements should be sequenced—there's little point in installing new ember-resistant vents if you plan to replace your roof in six months, as the roof replacement will likely require vent replacement anyway.
Year One might focus on immediate, low-cost improvements that address Tier One vulnerabilities. Clear Zone 0 and Zone 1 defensible space completely, removing all combustible materials from within 30 feet of your home. Remove combustible materials stored against your home's exterior. Install ember-resistant screening on all existing vents. Clean all gutters and roof surfaces thoroughly. Remove dead trees and branches threatening your home. Prune tree branches to eliminate ladder fuels.
These improvements require primarily labor rather than major financial investment. Many homeowners can accomplish most of this work themselves over several weekends. The risk reduction achieved in Year One is substantial—you've addressed the most critical vulnerabilities that could cause immediate ignition.
Year Two could tackle more substantial projects from Tier Two. Extend defensible space to full 100-foot distances in all zones, with appropriate thinning and spacing. Upgrade windows on the most exposed side of your home to multi-pane, tempered glass units. Replace problematic siding sections with fire-resistant materials. Install ember-resistant vents to replace screened standard vents. Address deck vulnerabilities through screening, skirting, or material replacement.
Year Two improvements require more significant investment but build on the foundation established in Year One. You're moving from critically vulnerable to reasonably protected. Spread these projects across the year to manage cash flow—windows in spring, defensible space extension in early summer, deck work in fall.
Year Three might address major investments like roof replacement if needed, or focus on Tier Three enhancements if your Tier One and Tier Two items are complete. Replace roof with Class A fire-resistant materials if current roofing is combustible or nearing end of life. Complete any remaining window upgrades. Add enhanced fire-resistant landscaping features. Improve emergency vehicle access if needed. Install exterior sprinkler systems or other supplemental protection measures.
By Year Three, you've systematically addressed your property's vulnerabilities in order of priority. Your home is now substantially more fire-resistant than when you started. Ongoing maintenance preserves these improvements and addresses new vulnerabilities as they emerge.
Adjust this timeline based on your specific circumstances. Properties with critical vulnerabilities might need to compress Year One and Year Two work into a single year. Properties with modest vulnerabilities might stretch improvements over four or five years. The key is maintaining forward progress while managing costs and effort sustainably.
Documentation for Insurance and Emergency Planning
Document everything throughout your risk reduction process. This documentation serves multiple critical purposes and provides value far beyond the time required to create it.
Take dated photographs of your property before improvements, during work, and after completion. Photograph each area where you've made changes—before and after shots of defensible space zones, close-ups of new vents or siding, roof conditions before and after cleaning or replacement. Use your phone's camera with location and date stamps enabled. Take photos from consistent locations and angles so you can track changes over time.
Keep receipts for all materials and professional services. Create a dedicated file folder (physical or digital) for your wildfire mitigation project. Save receipts, invoices, contracts, and payment records. Note the date, vendor, work performed, and cost for each expense. This financial documentation supports insurance discussions, tax deductions if available, and grant applications.
Create a summary document that lists all improvements made, dates completed, costs incurred, and supporting photos. Update this document as you complete additional work. This master record provides a comprehensive view of your risk reduction efforts and makes it easy to share information with insurance agents, potential home buyers, or emergency managers.
Share relevant portions of your risk reduction plan with your insurance agent. Many insurers will reduce premiums based on documented fire mitigation efforts, but you must proactively provide this information—they won't automatically know about improvements you've made. Contact your agent after completing significant improvements and provide documentation including photos, receipts, and descriptions of work performed.
Ask specifically about available discounts for fire mitigation work. Some insurers offer discounts for ember-resistant vents, Class A roofing, defensible space creation, or Firewise USA certification. Discounts vary by company and location, but they can reduce premiums by up to 20% in some cases . Even if your current insurer doesn't offer discounts, this documentation may help you secure better rates when shopping for coverage.
Some insurers conduct periodic re-inspections using aerial imagery, but don't rely on this—submit documentation directly. Aerial imagery may not capture all improvements, particularly those involving vents, windows, or detailed vegetation management. Proactive documentation ensures your insurer has complete information about your risk reduction efforts.
Regular Reassessment and Maintenance Schedules
Your risk reduction plan isn't static. Vegetation grows back, materials age and fail, and new vulnerabilities emerge. Build regular reassessment into your plan to ensure your improvements remain effective and to identify new issues before they become critical.
Conduct a thorough property walk-through at least annually, preferably in spring before fire season begins. Use this reassessment to identify maintenance needs, evaluate the effectiveness of previous improvements, and adjust your plan based on changing conditions or new information. Walk through each defensible space zone, checking for vegetation growth that has compromised spacing or created new fuel continuity. Inspect your home's exterior for new gaps, damage, or maintenance issues. Check vents to ensure screening remains intact. Examine gutters and roof surfaces for debris accumulation.
Create seasonal maintenance checklists that ensure ongoing attention to critical areas. These checklists transform maintenance from an overwhelming task into manageable routines spread throughout the year.
Spring maintenance focuses on removing debris that accumulated during winter storms and preparing for the coming fire season. Rake leaves and needles from Zone 0 and Zone 1. Clear gutters and roof surfaces of winter accumulation. Prune dead branches and remove dead plants. Inspect vent screening for damage from winter weather. Check siding and roofing for winter damage requiring repair. Apply fresh non-combustible mulch in Zone 0 if using rock or gravel. Test any fire protection equipment like pumps or sprinklers.
Pre-fire-season maintenance in late spring or early summer represents your final preparation before peak fire danger arrives. Conduct a thorough inspection of all three defensible space zones, addressing any issues identified. Mow or cut dry grass to four inches or less throughout Zone 1 and Zone 2. Remove any new vegetation growth that has compromised spacing requirements. Clean gutters again if trees have dropped seeds, flowers, or early leaf fall. Confirm that all vent screening remains intact and properly secured. Review evacuation plans with family members and update emergency supply kits.
Post-fire-season assessment in fall provides an opportunity to evaluate how well your defensible space performed and plan improvements for the following year. Remove accumulated leaves from Zone 0 and Zone 1 in areas with deciduous trees. Reduce leaf litter in Zone 2 to prevent fuel accumulation. Identify any trees or shrubs that died during the summer and plan for their removal. Assess whether any improvements made during the year need adjustment. Plan next year's improvement projects and budget.
Track your maintenance activities in a simple log or calendar. Note what you did, when you did it, and how long it took. This record helps you plan future maintenance schedules and provides documentation of your ongoing risk reduction efforts for insurance purposes. A simple spreadsheet or calendar app works well for this tracking.
The time commitment for ongoing maintenance varies based on property size, vegetation type, and climate. Properties with fast-growing vegetation or significant seasonal leaf drop require more frequent attention than those with slow-growing plants or minimal debris accumulation. Budget time for regular maintenance as part of your normal property care routine—this work protects your home and family while maintaining your property's value and insurability.
The most effective risk reduction plans become integrated into your routine property maintenance rather than existing as separate, overwhelming projects. By spreading work across seasons and years, and by maintaining improvements once completed, you create sustainable risk reduction that protects your home and family for the long term. The investment of time and resources pays dividends in reduced risk, lower insurance costs, and peace of mind knowing you've taken concrete action to protect what matters most.
Create a personalized preparedness plan based on your location and family needs.