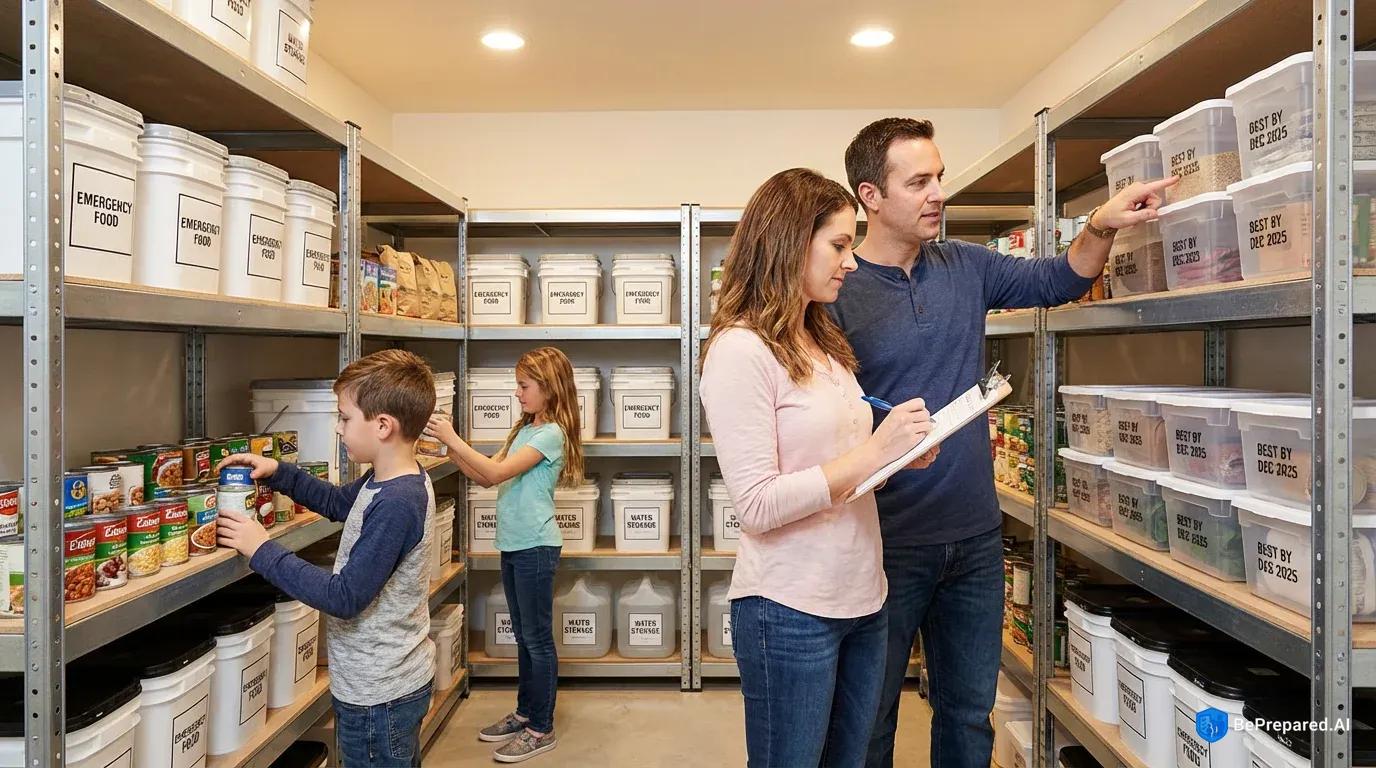
Understanding Emergency Food Storage Requirements
The power went out at 3 a.m. on a Tuesday, and by sunrise, Maria realized this wasn't a typical outage. The transformer explosion two blocks away had damaged infrastructure that would take weeks to repair. Her neighborhood was without electricity, and within hours, the local grocery store had closed its doors—unable to preserve perishables or process electronic payments. Maria opened her pantry and stared at three cans of soup, half a box of crackers, and some condiments. She had a family of four to feed, and she had no idea how long this would last.
This scenario plays out more often than most people realize. Whether it's a natural disaster, infrastructure failure, or unexpected emergency, the question isn't if you'll need emergency food supplies—it's when. Understanding how to properly calculate and store emergency food isn't about paranoia. It's about practical preparation that could mean the difference between weathering a crisis with confidence or facing genuine hardship.
The foundation of effective emergency food storage starts with understanding basic human needs. Adults require approximately 2,200 calories per day during emergencies to maintain their health and energy levels . This isn't an arbitrary number—it's based on the metabolic demands of an average adult maintaining normal activity levels. During a crisis, you might actually need more calories than usual. Stress, physical exertion from emergency tasks, and even the body's response to temperature extremes all increase caloric demands. FEMA recommends maintaining a minimum three-day supply of food for each household member, though many preparedness experts suggest extending this to at least two weeks .
Beyond raw calories, nutritional balance becomes critical during extended emergencies. Your body doesn't just need energy—it needs the right building blocks to maintain immune function, muscle mass, and mental clarity. A pile of rice might provide calories, but without adequate protein, fats, vitamins, and minerals, you'll face declining health within days. Emergency situations already tax your body's systems. Poor nutrition compounds this stress exponentially. The human body can survive weeks without food, but it begins degrading rapidly without proper nutrition. Muscle wasting, immune suppression, and cognitive impairment can develop quickly when protein intake falls short.
Storage duration planning requires honest assessment of your specific risks. If you live in hurricane-prone Florida, your emergency food needs differ from someone in earthquake-vulnerable California or tornado-prone Oklahoma. Consider your regional threats, your household's mobility, and your access to alternative resources. A rural homeowner with a well and garden faces different calculations than an urban apartment dweller dependent on municipal services. Your emergency food storage should reflect these realities, not a one-size-fits-all formula. The goal isn't to prepare for every conceivable scenario—it's to build a buffer that addresses your most likely risks while remaining practical and sustainable.
- Children (4-12)
- 1,200-2,200 calories/day, increasing with age and activity level, essential for growth and development
Calculate Your Household's Daily Needs
Calculating your household's emergency food requirements demands precision. Start with baseline numbers, then adjust for your specific circumstances. The standard adult requirement of 2,200 calories per day serves as your foundation, but every household member represents a unique calculation .
Children's caloric needs vary widely based on age, size, and activity level. A five-year-old needs substantially less than a teenager experiencing a growth spurt. Infants present their own challenges—if you have a baby who's formula-fed, you must calculate formula needs separately, accounting for preparation water and potential supply chain disruptions. Breastfeeding mothers typically need additional calories to maintain milk production. These aren't optional extras; they're physiological necessities that can't be ignored during extended emergencies.
Physical activity dramatically impacts caloric requirements. During an emergency, you might spend hours clearing debris, securing your property, walking to distribution centers, or performing other physically demanding tasks. Increased physical work can substantially raise your caloric needs above baseline requirements. A sedentary person sheltering in place needs fewer calories than someone actively working to repair damage or assist neighbors. Calculate for realistic activity levels based on your likely emergency scenarios. If you live in an area prone to hurricanes, you'll probably spend considerable energy on preparation and cleanup. Earthquake zones might require extensive physical work to secure a damaged home.
Medical conditions add another layer of complexity. Diabetics need careful carbohydrate management and consistent meal timing. People with celiac disease require gluten-free options. Food allergies can't be ignored during emergencies—an allergic reaction becomes exponentially more dangerous when medical services are compromised. Pregnant women need additional calories and specific nutrients, particularly folic acid and iron. Elderly household members might have reduced caloric needs but increased requirements for easily digestible, nutrient-dense foods.
Create a detailed household inventory. List each person's name, age, approximate weight, activity level, and any special dietary requirements. For a family of four—two adults, one teenager, and one elementary-age child—your baseline might look like this: Adult male (moderate activity) 2,500 calories, adult female (moderate activity) 2,200 calories, teenager (high activity) 2,800 calories, eight-year-old child (moderate activity) 1,700 calories. This household requires 9,200 calories daily. For a three-day minimum supply, you need 27,600 calories. For a two-week supply, you need 128,800 calories.
Convert calories to actual food quantities. A pound of rice contains approximately 1,650 calories. A can of tuna provides about 200 calories. A tablespoon of peanut butter offers 95 calories. These conversions transform abstract numbers into tangible shopping lists. Understanding these relationships helps you make informed decisions about what to stock and in what quantities.
Don't forget hydration. While not caloric, water is equally critical. One gallon per person per day of water is recommended . This covers drinking, food preparation, and basic hygiene. A four-person household needs 12 gallons for three days, 56 gallons for two weeks. Water weighs approximately eight pounds per gallon, so 56 gallons represents 448 pounds of storage. This physical reality influences how and where you store supplies.
Seasonal variations matter. Summer emergencies increase hydration needs. Winter emergencies in cold climates increase caloric requirements as your body works to maintain core temperature. If your home loses heat during a winter storm, you might need 20-30% more calories than your baseline calculation. These adjustments separate theoretical planning from practical preparedness.
Essential Food Categories and Proportions
Building an effective emergency food supply resembles constructing a balanced diet under normal circumstances—but with the added constraints of shelf stability, storage space, and preparation limitations. Each food category serves specific nutritional functions, and understanding these roles helps you create a genuinely sustainable supply rather than just a pile of random cans.
Pros and Cons of Different Food Categories
Canned Proteins
- Pros: Long shelf life, ready-to-eat, familiar taste, good protein density
- Cons: Heavy to transport, require can opener, higher cost per calorie, limited variety
Dried Beans and Legumes
- Pros: Extremely cost-effective, very long shelf life, high protein and fiber
- Cons: Require water and fuel for preparation, time-consuming to cook, may cause digestive issues
Whole Grains
- Pros: Excellent shelf life when properly stored, nutrient-dense, versatile
- Cons: Require cooking equipment, need proper storage containers, some require grinding
Freeze-Dried Meals
- Pros: Lightweight, easy preparation, long shelf life, familiar meals
- Cons: Expensive, require water, less cost-effective than basic ingredients
Step 1: Establish Your Protein Foundation
Protein should comprise 15-25% of your emergency food storage by caloric content. This macronutrient preserves muscle mass, supports immune function, and provides satiety—critical during stressful situations. Start with shelf-stable protein sources: canned meats (tuna, chicken, salmon, beef), dried beans and legumes, peanut butter, and protein powder. A 165-gram can of chicken breast provides about 220 calories and 42 grams of protein. Dried beans offer approximately 1,200 calories per pound with 80-90 grams of protein, though they require water and fuel for preparation.
Calculate your household's daily protein needs—roughly 0.8 grams per kilogram of body weight for adults works as a general guideline. A 70-kilogram (154-pound) adult needs about 56 grams of protein daily. Your four-person household might require 200-250 grams of protein per day. Diversify your protein sources to prevent taste fatigue and ensure amino acid variety. Ten cans of tuna, five pounds of dried beans, two jars of peanut butter, and several cans of other meats create a foundation for a two-week supply.
Step 2: Build Your Carbohydrate Base
Grains should comprise 40% of emergency food storage . Whole grains offer the best combination of calories, nutrients, and shelf life. Properly stored whole grains can maintain quality for extended periods when kept in sealed containers with oxygen absorbers. Rice, oats, wheat berries, quinoa, and pasta form your carbohydrate backbone.
White rice stores better than brown rice due to lower oil content—brown rice typically lasts 6-12 months while white rice can last much longer under proper conditions. A pound of rice provides about 1,650 calories and feeds two adults for a day when combined with other foods. Stock both quick-cooking options (instant rice, quick oats) for fuel-scarce situations and traditional grains for normal preparation. Include variety: pasta for familiar comfort meals, oats for breakfast, crackers for snacking. Carbohydrate variety prevents monotony and provides different nutritional profiles.
Step 3: Incorporate Essential Fats
Fats deliver concentrated calories—nine calories per gram compared to four for proteins and carbohydrates—and support vitamin absorption and hormone production. Target 25-35% of calories from fats. Oils, nuts, seeds, and nut butters serve as primary fat sources. Coconut oil and olive oil stored in dark containers maintain quality for 1-2 years. Nuts in sealed packages last 6-12 months at room temperature, longer if refrigerated before an outage.
Peanut butter deserves special mention—it's calorie-dense (190 calories per two tablespoons), protein-rich, requires no preparation, and stores well for 6-9 months unopened. A family of four consuming two tablespoons per person daily would need approximately seven standard jars for two weeks. Seeds like chia and flax provide omega-3 fatty acids, though they have shorter shelf lives and should be rotated more frequently.
Step 4: Address Vitamins and Minerals
Micronutrients become challenging during extended emergencies. Canned fruits and vegetables provide essential vitamins, though processing reduces some nutrients. Vitamin C degrades over time, making it particularly important to include. Canned tomatoes, citrus fruits, and fortified juices help maintain vitamin C levels. Dark leafy greens (available canned), sweet potatoes, and carrots provide vitamin A. Fortified cereals and dried fruits contribute B vitamins.
Consider a multivitamin supplement as insurance against nutritional gaps. A bottle of 100 tablets costs minimal money and space while providing significant nutritional security. Calcium, vitamin D, and iron deserve particular attention, especially for children, women, and elderly household members. Powdered milk, though less palatable than fresh, provides calcium and vitamin D while storing for extended periods.
Step 5: Balance Preparation Requirements
Categorize your foods by preparation needs. Ready-to-eat items (canned goods, crackers, dried fruits, nuts) require no cooking. Heat-and-eat options (canned soups, prepared meals) need only warming. Preparation-required foods (dried beans, rice, pasta) demand water, fuel, and cooking equipment. A balanced emergency supply includes all three categories. If utilities fail completely, you'll rely on ready-to-eat items. With limited fuel, heat-and-eat foods maximize efficiency. When conditions allow normal cooking, preparation-required foods provide cost-effective, nutritious meals.
The right balance depends on your specific situation. Urban apartment dwellers with limited cooking options during outages should emphasize ready-to-eat items. Rural homeowners with alternative cooking methods (wood stoves, outdoor grills) can stock more preparation-required foods. Match your storage to your realistic capabilities during the emergencies you're most likely to face.
Storage Duration and Rotation Planning
The difference between emergency food storage and a garage full of expired cans comes down to systematic rotation and proper storage conditions. Even the most carefully calculated supply becomes worthless if half of it has spoiled when you actually need it. Effective rotation planning requires understanding the interplay between storage conditions, food types, and time.
Temperature control represents the single most critical factor in food preservation. For optimal shelf life, store food at around 70°F or cooler when possible. Every 10-degree increase in temperature can significantly reduce shelf life. Canned goods that might last five years at 60°F could deteriorate in just 2-3 years at 80°F. This mathematical reality has practical implications. That garage where summer temperatures reach 95°F? It's destroying your emergency supplies. The attic that hits 110°F? You're essentially cooking your food storage. Basements, interior closets, and climate-controlled spaces provide ideal conditions.
Compare storage locations systematically. A basement maintaining 55-60°F year-round extends shelf life dramatically compared to a kitchen pantry fluctuating between 65-75°F. The kitchen pantry, however, vastly outperforms a garage swinging from 40°F in winter to 90°F in summer. Temperature stability matters as much as average temperature—constant 70°F beats fluctuating 50-80°F even though the average is the same. If you must use suboptimal storage locations, prioritize shorter-shelf-life items there and reserve the best conditions for long-term staples.
Humidity creates another critical variable. Moisture promotes rust on cans, degrades cardboard packaging, and encourages mold growth. Basements might offer excellent temperatures but problematic humidity. A dehumidifier becomes an investment in food security, not a luxury. Moisture barrier bags, sealed plastic containers, and proper spacing between stored items all combat humidity damage. Never store food directly on concrete floors—use pallets or shelving to allow air circulation and prevent moisture wicking.
Light exposure degrades nutrients and accelerates spoilage, particularly for oils, grains, and foods in clear containers. Ultraviolet light breaks down vitamins and causes fats to become rancid. Store foods in dark locations or opaque containers. If using clear storage bins, keep them in closets or covered areas away from windows.
Establishing a rotation schedule transforms static storage into a living system. The principle is simple: first in, first out. Implementation requires discipline. Date every item when purchased using a permanent marker. Organize storage so older items sit at the front, newer purchases go to the back. Replace stored food every six months . This isn't optional—it's the mechanism that prevents waste and ensures readiness.
Compare rotation strategies to find what works for your household. The continuous rotation method integrates emergency supplies into daily eating. You buy extra cans of beans, store them, and pull from storage for regular meals, replacing what you use. This approach ensures nothing expires and keeps you familiar with your supplies. The challenge is maintaining discipline to actually replace what you consume. The periodic rotation method treats emergency supplies separately from daily food. Every six months, you move approaching-expiration items to your regular pantry and replenish storage with fresh supplies. This creates clearer separation but requires more deliberate rotation events.
The hybrid approach combines both strategies: frequently-used items (canned vegetables, pasta, rice) follow continuous rotation while long-term staples (whole grains, specialty items) follow periodic rotation. Most households find this balanced method most sustainable. You're eating and replacing commonly-used items naturally while conducting biannual reviews of longer-term supplies.
Create a rotation calendar. Mark six-month intervals for complete inventory reviews. Note specific items requiring more frequent attention—brown rice every six months, white rice every two years, canned goods every 12-18 months, dried beans annually. Spreadsheets work well for detailed tracking, but even a simple notebook listing items, quantities, purchase dates, and expiration dates provides adequate management. The key is having a system and following it consistently.
Consider the practical realities of rotation. A family actively using their storage will naturally rotate through supplies faster than a single person who rarely cooks. Adjust your purchasing and rotation frequency accordingly. If you'll realistically use twenty cans of tomatoes annually through normal cooking, buying forty cans creates a natural two-year rotation without additional effort. If you rarely use canned tomatoes, buying forty cans means you'll probably throw away half when they expire.
Storage container selection influences both preservation and rotation ease. Original packaging works for short-term storage (under one year) but offers minimal protection for longer periods. Food-grade plastic buckets with gamma seal lids provide excellent protection for bulk grains, beans, and rice. Mylar bags with oxygen absorbers inside buckets create optimal long-term storage for whole grains—properly sealed containers can extend shelf life significantly. Vacuum-sealed bags extend shelf life for items like dried fruits, nuts, and shorter-term grains. Clear, labeled containers make inventory management easier, while opaque containers provide better light protection—choose based on storage location.
Tracking expiration dates requires understanding different labeling systems. "Best by" dates indicate peak quality but don't necessarily mean food becomes unsafe afterward. "Use by" dates suggest actual safety limits. Canned goods often remain safe well beyond printed dates if stored properly—the quality degrades but safety persists. Dried goods in sealed containers with oxygen absorbers can last far beyond manufacturer dates. Use your judgment: bulging cans, off odors, and visible mold indicate spoilage regardless of dates. When in doubt, throw it out—food poisoning during an emergency could prove catastrophic.
The rotation system you build today determines whether your emergency food storage becomes a genuine lifeline or an expensive pile of waste. Treat it as a living system requiring regular attention, not a set-it-and-forget-it project. The thirty minutes every six months you invest in inventory review and rotation could mean the difference between security and crisis when you actually need these supplies.
Actionable Recommendations for Getting Started
Start small and build systematically. Don't attempt to purchase a complete two-week supply in one shopping trip. Begin with a three-day supply, then expand to one week, then two weeks. This approach spreads costs over time and lets you refine your selections based on your family's actual preferences.
Focus on foods your family already eats. Emergency storage shouldn't introduce completely unfamiliar items. If your family hates canned green beans, don't stock them regardless of their shelf life. Stress already reduces appetite—unfamiliar or disliked foods make eating during emergencies even harder.
Test your supplies before you need them. Cook meals using only your stored foods and available cooking methods. This reveals gaps in your planning. Maybe you stored rice but forgot you need oil to cook it properly. Perhaps your camp stove takes longer than expected, meaning you need more fuel. These discoveries during practice prevent critical shortages during actual emergencies.
Document everything. Create a master inventory listing every item, quantity, purchase date, and expiration date. Update it every time you add or remove items. Store this document both physically (printed and kept with your supplies) and digitally (cloud storage or email to yourself). If you need to evacuate, you'll know exactly what you have and where it is.
Involve your whole household. Everyone should know where emergency supplies are stored, how to prepare them, and when to use them. Children old enough to understand should participate in rotation activities. This builds awareness and ensures multiple people can access and use supplies if needed.
Review and adjust quarterly. Your household's needs change. Kids grow. Medical conditions develop. Jobs change, affecting daily schedules and stress levels. Review your emergency food storage every three months to ensure it still matches your current situation.
The difference between preparation and panic is planning. Start today, build systematically, and maintain your supplies with the same attention you give any other important household system. When the power goes out at 3 a.m., you'll face the situation with confidence rather than fear—and that peace of mind is worth every minute you invest in proper emergency food storage.