1. Why Flameless Greenhouse Heat Matters When the Grid and Supply Chain Fail
On the third night of the storm, the only light on your street comes from headlamps. Ice took down the lines on day one. The highway has been closed since, and the grocery store forty minutes away has had no truck in four days. Inside your hoop house, the lettuce, kale, and spinach you planted in autumn are the freshest food within a day's drive. Your fans are dead, the thermostat is dead, and the electric heater you bought three winters ago is a very heavy paperweight.
That scenario is why passive greenhouse heating belongs in a serious preparedness plan. A working greenhouse can keep producing food while supply chains stutter, which speaks directly to food shortages. Methods that need no electricity also keep working through a grid failure, when anything with a plug or a controller goes silent. Neither benefit is a guarantee. Passive heat moderates cold and does not defeat it, and a long run of extreme nights can still kill tender crops.
This guide organizes everything around a heat-loss hierarchy, ordered by cost-effectiveness and safety:
- Seal and reduce heat loss (Section 2).
- Capture solar gain (Section 3).
- Store heat in thermal mass (Section 3).
- Consider supplemental heat last, and only listed equipment (Section 5).
The order matters because of when your greenhouse loses heat. UW–Madison Extension reports that 70% to 80% of greenhouse heating occurs at night . Your main job is therefore to keep the warmth you collected during daylight from escaping after sunset . Every degree you hold with a curtain or a barrel is a degree you never have to buy, burn, or generate.
Some of the "unlimited free heat" projects circulating online use improvised open flames: candles under clay pots, pooled-alcohol burners, and similar rigs. They are not part of this strategy. Carbon monoxide is odorless and colorless, and it can accumulate wherever fuel is burned in a poorly ventilated space. Fire risk compounds that hazard in a building full of plastic film, cardboard, and potting mix. Section 5 lays out the reasoning, including what is worth borrowing from one popular video and what is not.
Start with the cheapest and most reliable layer: stopping the leaks.
2. Layer 1: Stop Heat Loss Before You Add Heat — Sealing, Night Curtains and Row Covers
Heat you never lose is heat you never have to replace. Layer 1 is the least glamorous part of the system, and it usually delivers the most protection per dollar. It also runs on zero fuel and zero electricity.
The quick-wins checklist
Work through these on a calm, dry day well before storm season:
- Seal gaps around doors, vent frames, end walls, and the base where the structure meets the ground.
- Repair torn or loose film and any cracked glazing panels. Small tears tend to grow quickly in wind.
- Add weatherstripping to doors and operable vents so they close tight.
- Close and secure vents before dusk, not after the temperature has already started falling.
- Check the base perimeter for daylight or drafts. Banking soil, mulch, or boards against the bottom edge is a cheap fix.
Run the inspection at dusk with a helper inside holding a flashlight, then walk the outside. Light leaks mark air leaks.
- Charge by day, release by night
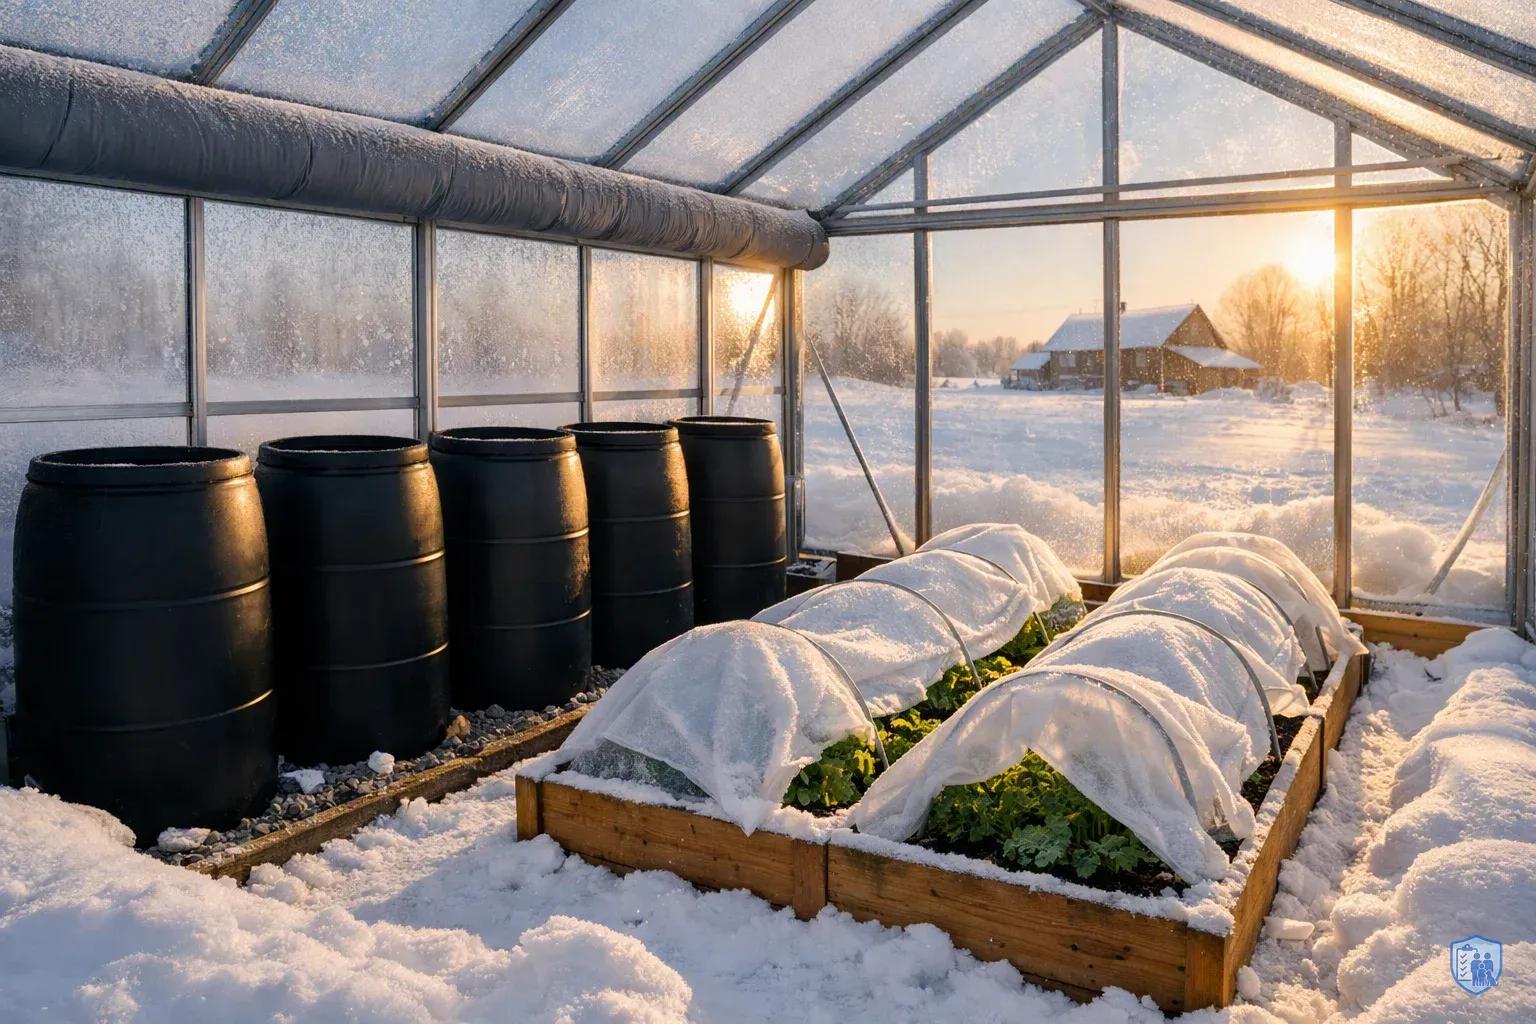
- 70% to 80% of greenhouse heating occurs at night. Water absorbs heat while the sun shines and gives it back slowly once the air cools. This lowers the daytime peak and raises the nighttime low.
- How much heat one barrel stores
- Water has a specific heat of roughly 1 BTU per pound per °F and weighs about 8.3 pounds per gallon. A full 55-gallon barrel holds roughly 459 pounds of water and stores on the order of 459 BTU for every 1°F change. This is a back-of-envelope estimate, not a guarantee.
- Use dark barrels
- Dark or black barrels generally absorb more solar radiation and charge faster than light-colored ones. If you reuse food-grade barrels, paint the sun-facing side a dark color. Use clean, sound containers that never held toxic chemicals.
- Place barrels in direct winter sun, near crops
- Set barrels along the north wall facing the south glazing, or under benches in the sun's path. A barrel in permanent shade is a cold cistern. Keep barrels close to the plants you want to protect, and leave walking room and airflow.
- Plan for the weight before filling
- A full 55-gallon barrel carries roughly 460 pounds of water alone. Set it on a level, solid base such as compacted gravel, pavers or a concrete pad. Site it permanently before you fill it, because moving a full barrel is rarely practical.
- Know the limits
- After several cloudy days in a row, barrels can run out of stored heat. Leave headspace and use sturdy containers so ice cannot split them. Barrels work best inside a sealed, curtained greenhouse.
Night curtains and thermal screens
A night curtain (also called a thermal or energy curtain) is a layer of material drawn across the growing space at dusk. It does two jobs, as a general matter of heat transfer. First, it reduces the volume of air you need to keep warm, because the cold air above the curtain no longer counts toward the heated space. Second, it reduces radiant loss to the clear night sky, which is how a greenhouse can feel colder than the air temperature suggests.
UW–Madison Extension reports that greenhouse energy curtains can reduce nighttime heat loss by 20% to 75% . That wide range likely reflects differences in material, installation quality, and how well the curtain seals at its edges. The source gives the range but does not break down the causes, so treat those factors as informed expectation, not measured fact.
Material choice follows from how you plan to use the curtain. Some fabrics are built primarily to hold heat, while others combine heat retention with partial light passage for daytime shading. I won't quote R-values or product specifications here, because they vary by manufacturer. Read the data sheet for any product you consider.
For a grid-down greenhouse, the deciding factor is operation without power. Manual pull systems work during an outage and are easy to repair. A hand-drawn cord over a pulley or a simple rod-and-hook arrangement will do.
Deployment timing is the other half of the equation. Draw the curtain late in the afternoon while the structure is still warm, so you trap that warmth instead of sealing in cold air. Open it in the morning once the sun reaches the glazing, so solar gain can start recharging the space. Edges matter more than most beginners expect. A curtain with gaps at the sides lets warm air spill upward and cold air circulate, which wastes much of its benefit.
Row covers and low tunnels
Row covers and low tunnels build a nested microclimate directly over the crop (greenhouse within a greenhouse) . The outer structure slows heat loss for the whole space, and a fabric or plastic layer over the bed slows it again at the plant. In Fort Collins trials, a plastic cover on a frame typically provided about 3°F to more than 6°F of frost protection . That gain won't carry a crop through a deep freeze alone, but it can be the margin between a bruised leaf and a dead plant.
Row covers are a low-cost, no-power protection method suited to Tier 1 . They need no fuel, no controller, and no wiring, so they keep working through an outage.
A low tunnel uses hoops to hold the cover off the foliage. Standard horticultural practice favors this approach because fabric or plastic resting directly on leaves can conduct cold to them. Anchor the edges with soil, boards, or sandbags so wind can't pull the cover loose.
Covers also need management. On a sunny day, a sealed row cover can trap enough heat to overheat the crop and damage tender growth, even in midwinter. Vent or remove covers once the sun is up and temperatures climb, then replace them before dusk. Confirm venting thresholds for your crops against local extension guidance.
Taken together, sealing, curtains, and covers form your base layer. With the leaks closed, you can start collecting free heat.
3. Layers 2 and 3: Capture Solar Gain and Store It in Water Barrels
Daytime sunshine is the only fuel your greenhouse produces on its own. Layers 2 and 3 harvest that heat and hold it past sunset.
- Tier 1 (low cost): Seal and cover
- Seal gaps, repair torn film, and add weatherstripping to doors and vents. Buy row covers and anchor materials for priority beds. They need no power, and a plastic cover on a frame typically gave about 3°F to more than 6°F of frost protection in trials. Print your hard-freeze checklist.
- Tier 2 (moderate cost): Curtains and water barrels
- Install thermal or energy curtains with manual pull operation. They can cut nighttime heat loss by 20% to 75%. Add low-tunnel hoops for nested protection. Place dark water barrels where direct winter sun hits them, setting each on a solid, level base before filling.
- Tier 3 (higher cost): Listed backup heater as last resort
- Use only a heater listed for its intended use, and follow its manual for ventilation. Set it on a stable, noncombustible base and keep anything that can burn at least three feet away. Install and test battery-backed CO alarms, and never refuel while the heater is lit or hot.
Capturing solar gain
Solar gain begins with the structure itself. In the Northern Hemisphere, south-facing glazing collects the most low-angle winter sun. Keep that glazing clean, because dust, algae, and film haze cut the light reaching the interior. Remove or prune anything that shades the south side during the short winter days, including evergreens, sheds, and stacked firewood.
If you are building new, orient the long axis and glazing for winter exposure from the start. Utah State University Extension publishes background on heating high tunnels . Check that material for its specific orientation guidance before you commit to a design.
How water barrels work
Water absorbs heat while the sun is shining and gives it back slowly once the air cools. A barrel in a sunny greenhouse warms gradually through the day and then radiates that stored energy through the night. The result is a buffer on temperature swings: the daytime peak runs a bit lower and the nighttime low a bit higher than they would otherwise. Extension programs describe passive solar greenhouses that use thermal mass such as sand walls or black water barrels, and the approach is well established.
The physics is simple. Water has a specific heat of roughly 1 BTU per pound per °F, and it weighs about 8.3 pounds per gallon. A full 55-gallon barrel therefore holds roughly 459 pounds of water and stores on the order of 459 BTU for every 1°F change in its temperature. That figure is a back-of-envelope estimate, not a performance guarantee. Real output depends on how much sun reaches the barrel and how tight the envelope is.
Dark or black barrels generally absorb more solar radiation than light-colored ones, so they tend to charge faster. If you are reusing food-grade barrels, a coat of dark paint on the sun-facing side is a common approach. Use containers that are clean and sound, and avoid anything that previously held toxic chemicals.
Placement
Put barrels where direct winter sun actually strikes them. In many greenhouses that means along the north wall, facing the south glazing, or stacked beneath benches in the sun's path. A barrel in permanent shade is a cold cistern, not a heat battery. Keep barrels close to the crops you want to protect, since the warmth they release is gentle and radiates mostly to nearby surfaces.
Spacing matters as well. Leave walking room and airflow, and avoid walling off the plants you are trying to warm. A row of barrels along the back wall, with benches of vulnerable seedlings in front, is a practical layout.
Structural realities
Plan the weight before you fill anything. A full 55-gallon barrel carries roughly 460 pounds of water alone, before you count the container. That is a serious load on a wooden bench or a soft floor. Set barrels on a level, solid base, such as compacted gravel, pavers, or a concrete pad, and site them permanently before filling. Moving a full barrel is rarely practical.
Barrels can also freeze. If the greenhouse drops far enough, the water will freeze solid, and expanding ice can split a weak container. Water does release heat while it is freezing, because it gives up latent heat as it changes phase. Once it is frozen solid, though, that buffer is spent. Don't rely on the phase change as a strategy. Leave headspace, use sturdy containers, and keep them within the insulated envelope you built in Layer 1.
Alternatives and realistic expectations
Water is not the only option. Sand walls and other dense materials can also serve as thermal mass. Water is cheap and easy to handle, but dense masonry or sand-filled structures can suit certain designs better, particularly permanent builds where weight is less of a concern.
Thermal mass has real limits. It moderates temperatures but cannot replace sunlight. After several cloudy days in a row, barrels can run out of stored heat because nothing is recharging them. Mass also works best alongside Layer 1. A leaky, uncurtained greenhouse will drain its barrels quickly, while a well-sealed one lets them carry you through the night. Treat barrels as an amplifier of everything you've already done, not as a stand-alone solution.
With the structure tightened and the thermal batteries charged, you need a routine for the moment the forecast turns ugly.
4. Hard-Freeze Protocol: What to Do in the 24 Hours Before a Forecast Freeze
A plan you have to improvise under pressure is a plan you'll execute badly. Print this protocol and follow it step by step. The clock times below are illustrative, so adjust them for your latitude, sunset time, and the actual forecast.
Step 1: Triage (24 hours out)
- List your most valuable and most tender plants: seedlings, food crops near harvest, and perennials you can't replace.
- Mark them for first protection. Hardy crops can wait.
Step 2: Structural checks (24 to 12 hours out)
- Inspect film for tears and loose edges, and secure it against wind.
- Check door and vent seals.
- Review the University of Nevada, Reno Extension guidance on managing and protecting high tunnels in winter . Confirm its snow-load recommendations against your structure's specifications.
- Plan how you will keep snow from building up on a high tunnel. Brush off or manage accumulation safely from outside, and don't let wet snow pile up.
Step 3: Early afternoon (about 1 to 2 p.m.)
- Close vents and doors while the structure is still warm, locking in stored solar heat.
- Make sure barrels sit in sun and nothing blocks them.
Step 4: Before dusk
- Deploy row covers and low tunnels over priority beds, with edges anchored.
- Draw thermal curtains fully, closing gaps at the sides.
- Cluster pots near the thermal mass.
- Move the most vulnerable containers indoors or into the warmest zone.
Step 5: Overnight
- Check on plants from the doorway or a window. Avoid opening doors repeatedly, since each opening dumps stored heat.
- Look at the structure for snow buildup or flapping film.
Step 6: Morning
- Once the sun is on the glazing, open curtains to let in solar gain.
- Vent and uncover plants on sunny mornings to prevent overheating and condensation damage.
- Walk the beds, note losses, and reset for the next night.
Layers are what give you margin. A plastic cover on a frame typically provided about 3°F to more than 6°F of frost protection in CSU trials . Stacking a sealed structure, a night curtain, and a low tunnel over the same bed should therefore gain you more than any single measure alone, though the effects won't necessarily add up linearly. I'm deliberately not listing per-crop temperature thresholds here. Check a sourced guide for the specific plants you grow.
Download the printable Greenhouse Hard-Freeze Checklist now and tape it inside your greenhouse door before the next storm warning.
5. Limits of Passive Heat, Supplemental Heat Safety, and Why Improvised Flame Heaters Don't Belong
Every passive system has a ceiling. Prolonged extreme cold, consecutive cloudy days, and single-digit nights can exceed what layering and thermal mass provide. At that point you have two honest options: bring plants indoors, or add a listed supplemental heater used exactly as its manual directs. A few trays of seedlings by the kitchen window beat losing the entire crop.
If you add heat, do it properly
Use only equipment listed for its intended use and follow the manual . Ventilate as the manual requires, and place the unit on a stable, noncombustible base.
NFPA's guidance is to install and test carbon monoxide alarms . My own recommendation is to choose battery-backed alarms, so they keep working when the grid fails. That battery-backup detail is the author's recommendation, not a quotation from the source. Carbon monoxide is odorless and colorless, so an alarm is the only warning you will get.
Greenhouses are full of fuel for a fire: plastic covers, potting-mix bags, cardboard, wooden benches, and stored fuel. Keep anything that can burn at least three feet from heating equipment, which is the distance NFPA recommends and FEMA reinforces.
Fuel handling is its own discipline. Never refuel any fuel-burning device while it is lit or hot. Let it cool first. If you use a kerosene heater, use only water-clear 1-K kerosene, never gasoline or other fuels . Store fuel in labeled, approved containers away from the greenhouse work area. For broader home-heating guidance during an outage, see our dedicated winter storm heating guide.
Comparing the options
| Approach | What it is | Verdict |
|---|---|---|
| Layered passive (sealing, curtains, mass) | No flame, no fuel, no power | Foundation of the system |
| Listed supplemental heater | Equipment made and tested for the use | Acceptable last layer, with clearances and CO alarms |
| Candle and clay-pot "heaters" | Open flame under a pot | Not reliable greenhouse heat |
| Pooled-alcohol DIY burners | Liquid fuel burning in a can | Not recommended |
Candles and clay pots
The candle-and-terracotta-pot trick is an open flame in a plastic-and-cardboard space . It looks tidy, but a small pot has limited thermal mass, so it likely adds only modest warmth for the fire risk you take on. NFPA recommends battery-powered lighting over candles during outages , and the same logic applies to your greenhouse.
The DIY alcohol heater
One video deserves a specific look, because it is well made and the circulation idea in it is useful. The channel Zen Garden Oasis published "UNLIMITED Heat For Your Home Or Greenhouse | No Electric Needed" (watch here). As I read it, the video demonstrates a paint-can heater filled with perlite and topped with a stainless mesh radiant element. At 11:37, it shows a heat-powered fan pushing warm air down from the ceiling instead of letting it collect overhead. Check my description against the video itself before relying on it.
That circulation insight is sound. Warm air rises and stratifies, and moving it back down toward plants and thermal mass can improve how evenly a space holds heat. You can pursue the same goal without a flame. Use a battery-powered fan, a hand-operated air-circulation approach, or any arrangement that moves warm air to the lower zones.
The burner itself is a different matter, and I do not recommend it. Pooled-alcohol and other liquid-fuel burners are widely associated with flame-jetting and flash-fire hazards, particularly when someone refills them while any flame is present. Alcohol flames can also be hard to see in daylight, which makes a lit burner easy to mistake for an extinguished one. I haven't cited a specific agency finding for these hazards here, so verify them against current CPSC and NFPA material before you form your own judgment.
I won't provide build instructions or fuel ratios. Credit goes to the creator for the demonstration. The safety judgment points away from this design, particularly in a space with plastic film and stored combustibles.
6. Build Your Layered System: Prioritized Investment Plan, Scope and Limitations
You don't need to do everything this season. Build the system in tiers, spending where it protects most per dollar, and think of costs as relative levels instead of fixed prices.
Tier 1 (low cost): seal and cover
- Seal gaps, repair film, and add weatherstripping to doors and vents.
- Buy row covers and anchor materials for priority beds. Row covers are a low-cost, no-power protection method suited to Tier 1 .
- Print your hard-freeze checklist.
Tier 2 (moderate cost): reduce loss and store heat
- Install thermal or energy curtains with manual pull operation. UW–Madison Extension reports that greenhouse energy curtains can reduce nighttime heat loss by 20% to 75% , which makes them a high-priority Tier 2 investment.
- Add low-tunnel hoops for nested protection.
- Place dark water barrels on solid, level bases before filling them.
Tier 3 (higher cost): redesign and backup
- Rework orientation, glazing, and shading for passive solar performance.
- Add a listed backup heater with clearances, correct ventilation, and battery-backed CO alarms.
How this serves your preparedness goals
The tiers connect to the outcomes that opened this guide. Extending fresh food production through winter turns your greenhouse into one component of a food-shortage plan. Maintaining crop protection without power makes it resilient to a grid failure. A sealed, curtained, mass-buffered greenhouse keeps working when the lights go out, because it never relied on them.
Scope and limitations
This guidance targets hobby and small-farm greenhouses and high tunnels. Results vary by climate, glazing, crop, and cloud cover, and passive methods offer no guarantee against extreme multi-day cold. When the forecast exceeds what your layers can handle, move plants indoors or use listed equipment, not improvised flame.
A greenhouse also complements food storage and does not replace it. Keep shelf-stable reserves regardless of how well your winter crops are doing, because a single failed night can erase weeks of growth. Fresh greens add nutrition and morale, but your pantry is the foundation.
Start with the leaks, add the curtains, fill the barrels, and rehearse the hard-freeze routine before you need it. Start your Tier 1 upgrade this weekend: get our layered greenhouse insulation kit list (row covers, weatherstripping, thermal curtain) and lock in your winter food supply.