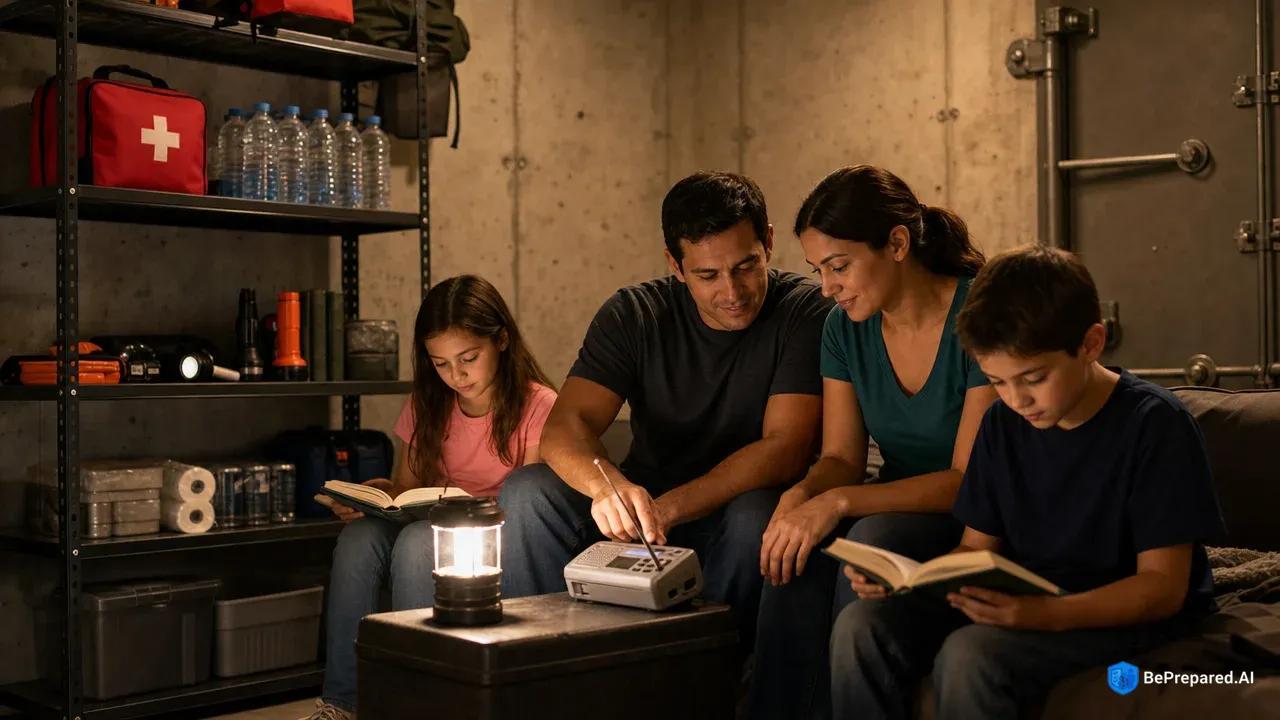
Why Your Safe Room Needs Its Own Emergency Kit
You've invested in a safe room—maybe a reinforced basement shelter or an interior closet built to withstand nature's fury. That's a smart move. Safe rooms built to FEMA criteria provide near-absolute protection in extreme weather events , giving you peace of mind when tornado sirens wail. But here's what many people miss: your safe room isn't truly complete without its own dedicated emergency kit.
Picture this scenario. The tornado warning sounds, and you have minutes—sometimes just seconds—to reach safety. You don't want to realize your flashlight is upstairs, your water bottles are in the garage, or your child's medication is in the kitchen. Once you're in that safe room, you're staying there, potentially for longer than you expect.
Debris can block safe room exits after a tornado passes . What starts as a fifteen-minute warning can stretch into a lengthy wait while emergency crews clear fallen trees, twisted metal, and shattered building materials from your door. During that time, you'll need water, light, and comfort. Pre-positioned supplies eliminate dangerous trips during storms and transform your safe room from merely protective to truly livable. Having everything you need within arm's reach reduces panic and stress during emergencies, letting you focus on keeping your family calm rather than worrying about what you forgot.
- Essential Cooking & Eating Supplies
- Manual can opener, disposable plates/cups, plastic utensils, and portable camping stove with fuel for heating food.
- Food Storage Organization
- Label containers with dates, rotate stock every 6 months, and keep supplies in cool, dry location accessible to all family members.
Water and Food: Your Shelter Survival Basics
Water stands as your most critical supply. FEMA recommends one gallon of water per person per day for drinking and sanitation , and you should plan for at least three days . For a family of four, that's twelve gallons—it sounds like a lot, but it's genuinely necessary. Store water in sturdy, food-grade containers, and mark each bottle with the date you filled it. If you're buying commercially bottled water, check expiration dates twice a year.
Don't forget your pets. Dogs and cats both need clean water readily available during shelter time. Include collapsible bowls that won't take up precious space in your kit. Check with your veterinarian about appropriate water quantities for your specific pets based on their size and needs.
Food comes next, and this is where practicality meets psychology. Non-perishable foods can sustain families during extended shelter periods , but you're not just fueling bodies—you're managing stress and fear. Stock your safe room with items that provide both nutrition and comfort.
Ready-to-eat canned goods like tuna, chicken, beans, and soup work well. Don't forget a manual can opener—electric ones won't help if the power's out. Energy bars and granola bars pack nutrition into small packages and won't spoil. Peanut butter and crackers deliver protein and comfort in familiar flavors. Dried fruit and nuts won't spoil and provide quick energy when you need it.
Comfort foods for children deserve special attention. Juice boxes, individual applesauce pouches, or their favorite crackers can make a frightening situation feel more manageable. When a child has something familiar to eat, they often calm down faster.
Include special dietary items anyone in your family needs—gluten-free options, baby formula, or diabetic-friendly snacks. Store everything in airtight containers to protect against moisture and pests. This keeps your supplies fresh and ready when you need them.
Set a calendar reminder to rotate your supplies every six months. Use the older items in your regular meals and replace them with fresh stock. This rotation prevents waste and ensures you're never sheltering with expired food when you need it most. Think of it as shopping from your own store—you're just restocking what you use.
Light and Communication: Stay Connected and Safe
When a tornado strikes, darkness often follows. Battery-powered devices are essential since tornadoes frequently cause power outages , sometimes for days across entire communities. Your safe room needs multiple lighting options because backup plans save lives.
Equip every family member with their own flashlight. Children feel more secure with their own light source, and if you need to split up to search for supplies or check on damage, everyone stays illuminated. Store these flashlights in the same spot every time—consistency matters when you're fumbling in the dark.
Your NOAA Weather Radio deserves special attention. NOAA Weather Radio provides official tornado warnings and updates during emergencies , and unlike your phone, it doesn't depend on cell towers that might be damaged or overloaded. These radios receive continuous broadcasts from the National Weather Service, alerting you to changing conditions, additional warnings, and eventually the all-clear signal. Choose a model with battery backup and a hand crank for charging.
Stock your kit with extra batteries in all needed sizes—AA, AAA, D, and any specialty sizes your devices require. Fully charged power banks for cell phones and tablets let you stay connected to loved ones and emergency information. Glow sticks work as backup lighting that's safe for children and won't spark if there's a gas leak. A small battery-powered or hand-crank radio serves as a backup communication device if your weather radio fails.
Test every electronic device monthly. Batteries corrode, connections loosen, and you won't discover a dead flashlight during an actual emergency if you check regularly. Make it a habit, like checking smoke detectors.
First Aid and Medications: Health Essentials
Even inside a safe room, minor injuries can happen. A door might slam on someone's hand during the rush to shelter, or someone might trip in the darkness. Your first aid kit addresses these immediate needs and helps you handle small problems before they become big ones.
Build a kit containing adhesive bandages in multiple sizes for cuts and scrapes. Sterile gauze pads and medical tape handle larger wounds. Antiseptic wipes and antibiotic ointment prevent infection. Elastic bandages help with sprains or securing gauze. Tweezers and scissors remove splinters or cut tape. Disposable gloves maintain hygiene when treating injuries.
Prescription medications require special planning. Keep an adequate supply of all prescription medications in your safe room kit, stored in clearly labeled containers with dosage instructions. The exact amount depends on your family's needs and your doctor's recommendations, but having them readily available means you won't need to leave shelter to retrieve them. Include over-the-counter essentials like pain relievers, antihistamines, anti-diarrheal medication, and antacids.
If anyone in your family uses special medical equipment—inhalers, EpiPens, insulin, or glucose monitors—talk to your doctor about storing backups in your safe room. Create laminated cards listing each family member's medications, dosages, allergies, and emergency medical contacts. These cards prove invaluable if emergency responders need to treat someone.
Check expiration dates every six months during your supply rotation. Many medications remain effective past their printed dates, but maintaining fresh supplies eliminates any doubt during a crisis. Your pharmacist can often help you coordinate refills to build up a small emergency supply.
Comfort and Sanitation Items
Survival isn't just about staying alive—it's about maintaining dignity and managing fear. Family practice with emergency supplies reduces panic during actual tornado events , and having comfort items on hand makes that practice more effective. A familiar blanket or beloved stuffed animal can mean the difference between a terrified child and one who feels secure enough to stay calm.
Pack your safe room with blankets and sleeping bags for warmth and comfort. Basements and interior rooms get cold, especially if you're there for a while. Pillows can double as protection for heads during the storm. A change of clothes for each family member in waterproof bags ensures everyone can get dry and comfortable after the danger passes.
Personal hygiene items including toothbrushes, toothpaste, and deodorant help maintain normalcy. Feminine hygiene products in sufficient quantity address basic needs. Toilet paper and heavy-duty garbage bags handle waste disposal if you can't leave the safe room. Hand sanitizer and wet wipes allow cleaning without water.
Small toys, books, or card games occupy children during long waits. Boredom can make fear worse, so having activities appropriate for your family helps everyone stay calmer. For very young children, consider a special "tornado toy" that only comes out during shelter time, making it something novel rather than frightening.
You might need to create a makeshift toilet using a bucket, garbage bags, and kitty litter or sawdust if exits remain blocked. It's not pleasant to think about, but planning for this possibility preserves dignity during an already stressful situation. A deck of cards, a small puzzle, or a favorite book provides distraction during tense hours.
Tools and Important Documents
Once the tornado passes, you transition from sheltering to survival and recovery. Having basic tools on hand can help you assess damage and make temporary repairs . You might be able to clear minor debris from your exit without waiting for emergency services who may be overwhelmed with more critical calls.
Your tool kit should include a multi-tool or Swiss Army knife with pliers, screwdrivers, and knife blade. Work gloves protect hands when moving debris. Duct tape handles emergency repairs to shelter or protective sheeting. Heavy-duty plastic sheeting covers broken windows or damaged walls. Rope or paracord secures items or creates makeshift repairs. A whistle signals rescue workers if you're trapped. Local maps help navigate if GPS and cell service are unavailable.
Waterproof document storage protects vital records from storm damage . Use a portable, waterproof container or heavy-duty zip-lock bags to store copies of identification like driver's licenses, passports, and Social Security cards. Include insurance policies for homeowners, auto, health, and life coverage. Add medical records and vaccination histories, bank account information and credit card numbers, property deeds and vehicle titles, and family photos on a USB drive to preserve irreplaceable memories.
Include cash in small bills. ATMs won't work without power, and stores that can open may only accept cash for days after a major tornado. Small bills ensure you can buy supplies without needing change. The amount you keep depends on your budget, but having some cash available gives you options when electronic payment systems are down.
Setting Up and Maintaining Your Kit
Creating your safe room kit is just the beginning—maintaining it ensures everything works when you need it most. A systematic approach makes this easier than you might think, and you don't need to do everything at once.
Start with proper storage. Invest in waterproof plastic bins with tight-sealing lids. Clear containers let you see contents at a glance, while opaque ones protect light-sensitive items like medications. Label each container clearly with its contents and the date you last checked it. Store bins on sturdy shelving units, not directly on concrete floors where moisture can accumulate.
Create a maintenance schedule. Mark your calendar for the first day of spring and fall to check your entire kit. During these checks, test all electronic devices, replace expired medications and food, refresh water supplies, and update documents if anything has changed. Making this a family activity helps children understand where supplies are and how to use them, turning them into helpers rather than additional worries during emergencies.
Practice in realistic conditions. Once a year, turn off the lights and practice accessing your supplies in complete darkness. Can you find the flashlights? Open the first aid kit? Locate the water? This exercise reveals problems you can fix now rather than discovering them during an actual emergency. It also builds confidence for everyone in your household.
Keep an inventory list attached to the inside lid of your main supply bin. Check off items as you verify them during maintenance. This list also helps if you need to grab supplies quickly or if someone else needs to access your kit. Update it whenever you add or remove items.
Involve your whole family in organization and maintenance. Assign age-appropriate responsibilities—teenagers can check expiration dates, younger children can test flashlights, and everyone should know where the kit is located. This shared knowledge builds confidence and ensures multiple people understand your emergency systems. When everyone participates, preparedness becomes a family value rather than one person's project.
The investment of a few hours twice a year protects the much larger investment you've made in your safe room and supplies. Think of it as insurance for your insurance—a small effort that pays enormous dividends when severe weather threatens. Regular check-ins also help you spot problems early, like corroded batteries or expired medications, before they become issues during an actual emergency.
Your First Steps Start Today
Building a complete safe room kit might feel overwhelming, but you don't need to do everything at once. Start by gathering just three items: water, a flashlight, and basic first aid supplies. You can add the rest over the coming weeks as your budget and time allow.
The most important step is beginning. Even a partially stocked safe room is better than an empty one. Each item you add increases your family's safety and comfort during severe weather. Your future self, sheltering safely while a tornado passes overhead, will thank you for the preparation you're doing right now.
Set a goal to add one category of supplies each week. This week, focus on water. Next week, tackle food. The week after, gather lighting and communication devices. Breaking the project into small chunks makes it manageable and keeps you from feeling overwhelmed. Before you know it, you'll have a fully stocked safe room ready for whatever weather comes your way.
Remember, preparedness isn't about fear—it's about confidence. Every item you place in your safe room kit is one less thing to worry about when storms approach. You're taking control of what you can control, and that's empowering. Start today, build gradually, and know that each step forward makes your family safer and more prepared.