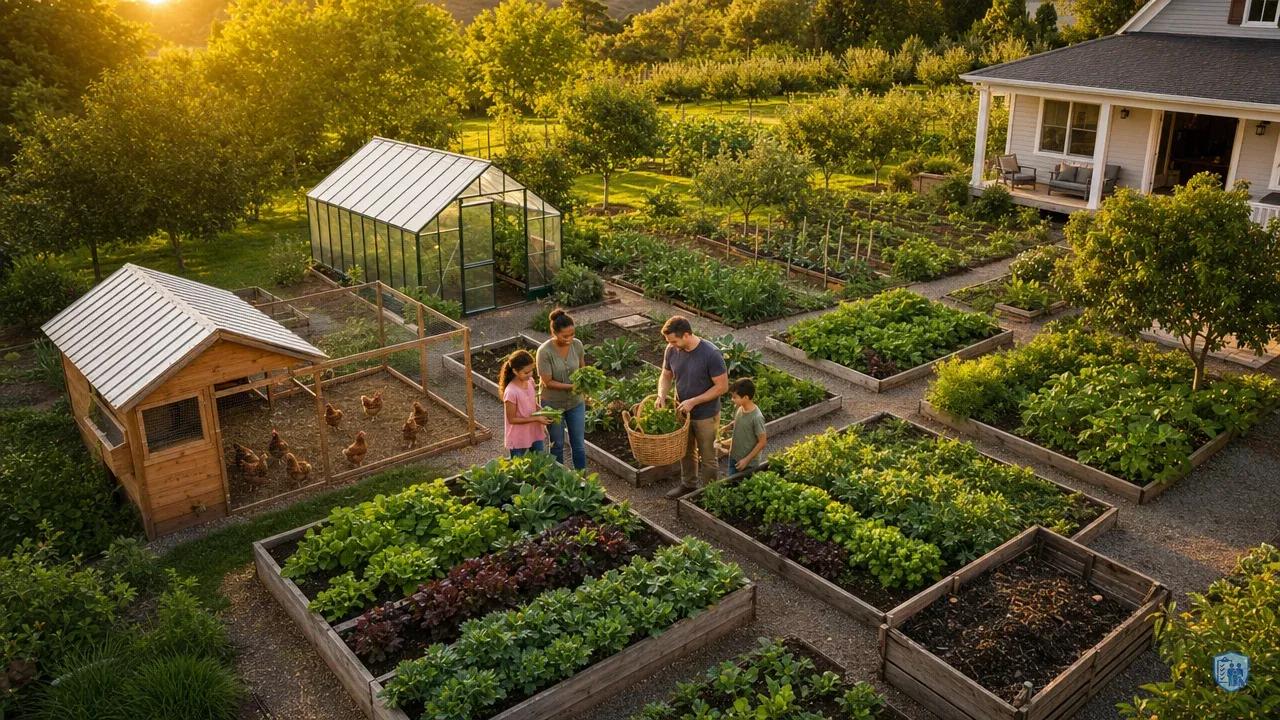
One Acre Can Feed Your Family: The Reality of Small-Scale Food Security
When Maria and James watched their grocery bills climb while their wages stayed frozen, they realized something fundamental had shifted. The reliable food system they'd taken for granted was becoming unpredictable, expensive, and vulnerable to disruptions they couldn't control. They weren't alone—families across the country were making the same uncomfortable discovery. But what they learned next changed everything: the acre of land they'd been mowing every weekend could actually feed them.
The concept of feeding a family from one acre sounds almost quaintly old-fashioned until you realize it's not just possible—it's a proven strategy that families are implementing right now. With proper planning and intensive cultivation methods, one acre can produce enough vegetables to feed a family of four year-round, along with significant protein from small livestock . This isn't about returning to subsistence farming; it's about creating a buffer against economic uncertainty and supply chain disruptions that have become increasingly common.
During the 2020 economic crisis, home food production increased by 35% as families sought food security alternatives . These weren't all experienced farmers or rural homesteaders. Most were ordinary people who recognized that growing their own food provided both economic relief and peace of mind during uncertain times. The question isn't whether one acre can support meaningful food production—it's how to design and manage that acre for maximum security and nutrition.
The reality of small-scale food security starts with understanding what one acre actually represents. It's 43,560 square feet (a standard measurement)—enough space to grow substantial amounts of calorie-dense staples like potatoes, winter squash, and dried beans, while also maintaining intensive vegetable gardens, fruit production areas, and space for small livestock. You won't be completely independent from the food system (few people need to be), but you'll have created a foundation of security that protects your family when grocery store shelves empty or prices spike beyond reason. This foundation becomes especially critical during economic downturns when food access becomes as much about availability as affordability . Research shows that during economic downturns, home food production can reduce household food costs by 40-60% annually .
Strategic Layout: Maximizing Every Square Foot for Food Production
The difference between a productive one-acre homestead and a chaotic, underperforming plot comes down to strategic layout. Think of your acre as a small factory where every zone has a specific purpose and the arrangement of those zones determines overall efficiency. The most successful small-scale food production systems use zone-based planning that places the most frequently accessed areas closest to your home, while longer-term production areas occupy the perimeter.
Zone One should encompass the 1,000-2,000 square feet immediately adjacent to your kitchen door. This is where you'll maintain intensive square foot gardens for daily-harvest items like salad greens, herbs, cherry tomatoes, and quick-growing vegetables. These beds should be raised or intensively prepared, with walking paths that allow access without soil compaction. Intensive square foot gardening methods can yield 4-6 times more produce per square foot than traditional row farming by eliminating wasted path space and optimizing soil conditions . This zone gets visited daily, so convenience matters more than space efficiency. Include a small cold frame or two here for extending seasons and growing microgreens during winter months.
Zone Two expands outward to encompass roughly a quarter-acre of your property and houses your main vegetable production beds. This is where you'll grow the bulk crops that feed your family through preservation—tomatoes for canning, cucumbers for pickling, green beans for freezing, and root vegetables for storage. Layout these beds in a north-south orientation when possible to maximize sun exposure. Maintain 3-4 foot paths between beds for wheelbarrow access. This zone should also include your composting system, positioned for easy access from both the garden and kitchen but far enough away to avoid any odor concerns. The compost becomes your soil factory, transforming kitchen scraps and garden waste into the fertility that drives production.
Zone Three occupies another quarter-acre and contains your calorie crops—the potatoes, winter squash, dried beans, and corn that provide the bulk of your family's energy needs. These crops need less intensive management than vegetables but require more space. You can use traditional row spacing here since you won't be harvesting daily. This zone should also house any fruit trees or berry bushes you plant, positioned on the northern edge where they won't shade your vegetable areas. Small livestock housing fits well in this zone too, where chickens can free-range through crop areas after harvest, cleaning up waste and adding fertility.
The remaining quarter-acre serves multiple purposes: pathways, water infrastructure, tool storage, and future expansion areas. Don't make the mistake of planting every available square foot in your first year. You need room to move, space to pile materials, and areas that can shift purpose as you learn what works on your specific site. Include a dedicated area for season extension structures—hoop houses or high tunnels that can be moved between zones as needed. Position your water storage (rain catchment tanks or cisterns) at the highest point of your property to enable gravity-fed irrigation, reducing your dependence on electric pumps during power outages.
Use the 1-Acre Garden Layout guide to start designing your food security system today
The key to maximizing production isn't cramming more plants into available space—it's creating a layout that makes intensive management practical. When beds are conveniently located and properly sized, you'll actually maintain them. When paths are wide enough for a loaded wheelbarrow, you'll build compost properly. When zones flow logically, the work becomes sustainable rather than overwhelming. Your layout should make the right actions easy and the wrong actions difficult.
- Staple Grains Category
- High-calorie foundation crops including wheat, rice, corn, and oats with yield data per acre and long-term storage methods
- Nutrient-Dense Vegetables Category
- Essential vitamin and mineral sources including potatoes, carrots, onions, and leafy greens with harvest timing and storage duration
Essential Crops for Year-Round Nutrition and Calorie Security
The romantic notion of a diverse garden filled with exotic vegetables collapses quickly when you're actually trying to feed your family through economic disruption. What matters during extended sheltering or food shortages isn't variety—it's calories, complete nutrition, and storage capability. Your crop selection should prioritize these factors above all else. One acre of mixed vegetables and small grains can provide 75% of a family's caloric needs with proper planning .
High-Calorie Staples (½ acre allocation):
Potatoes: The cornerstone of food security. Potatoes deliver more calories per square foot than almost any other crop you can grow. They can store for several months in proper conditions and provide vitamin C, potassium, and enough protein to sustain health when combined with other foods. Plant early, mid, and late-season varieties to spread harvest and storage times. A quarter-acre devoted to potatoes can yield substantial amounts when properly cultivated , providing a caloric foundation for your family's diet.
Winter Squash: Butternut, acorn, and hubbard squash deliver dense calories and can store for many months without refrigeration when properly cured . They're remarkably low-maintenance once established and produce heavily. A 1,000-square-foot patch can yield several hundred pounds of squash that feeds your family through winter and spring. The thick skins protect the flesh inside, and proper curing hardens those skins even further for extended storage.
Dried Beans: Bush beans for fresh eating and pole beans for drying give you complete protein when combined with grains. Dried beans store indefinitely and provide the protein foundation for a plant-based diet. They also fix nitrogen, improving soil for subsequent crops. Dedicate space to both fresh and dry bean varieties to cover immediate eating and long-term storage needs.
Corn: While space-intensive, corn provides calories, can be dried for long-term storage, and gives you something to trade. The stalks become livestock feed and garden mulch. Plant dense blocks rather than long rows for better pollination. Consider flour corn or dent corn varieties specifically bred for drying and grinding rather than sweet corn meant for fresh eating.
Nutrient-Dense Vegetables (¼ acre allocation):
Brassicas: Kale, cabbage, broccoli, and Brussels sprouts provide critical vitamins through fall and winter. Many tolerate hard frost, extending your fresh food season when other crops have finished. These cold-hardy plants become increasingly valuable as winter approaches and other fresh options disappear.
Alliums: Onions, garlic, and shallots can store for many months and provide flavor and antimicrobial compounds. They're compact, relatively easy to grow, and essential for making storage foods palatable. Without onions and garlic, your winter diet of stored staples becomes monotonous quickly.
Root Vegetables: Carrots, beets, turnips, and parsnips store excellently and provide diverse nutrition. Many can be left in the ground under mulch and harvested as needed through winter in moderate climates. This "in-ground storage" extends your effective storage capacity without requiring additional infrastructure.
Tomatoes: While not calorie-dense, tomatoes provide vitamin C and lycopene, and they preserve beautifully through canning. They're also one of the most expensive vegetables to buy, making them economically valuable to grow. A productive tomato patch pays for itself many times over when you factor in both fresh eating and preserved sauce.
Quick-Growing Emergency Crops:
Radishes: Mature in 25-30 days, providing fast food during spring and fall.
Lettuce and Greens: 40-50 days to harvest, can be succession planted every two weeks.
Bush Beans: 50-60 days, can be planted spring through summer for continuous harvest.
Summer Squash: 45-55 days and incredibly productive during peak season.
The strategic approach combines all three categories. Staple crops provide your caloric foundation and long-term security. Nutrient-dense vegetables ensure health and prevent deficiency diseases. Quick-growing crops give you fresh food while waiting for staples to mature and provide rapid response capability if you need to boost production during an extended crisis . This layered strategy ensures you're never completely dependent on any single crop or growing season.
Food Preservation and Storage Systems for Crisis Resilience
Growing food solves only half the equation. Without preservation systems that function independently of the electrical grid, your harvest provides security for mere weeks rather than months. The families who weather extended economic disruptions successfully are those who can eat from their summer garden in February, when nothing grows and grocery stores may be unreliable or unaffordable.
Step 1: Establish Root Cellaring Infrastructure
Root cellaring represents the lowest-tech, highest-reliability preservation method available. The principle is simple: maintain cool temperatures with high humidity and good ventilation. In practice, this means either utilizing a basement corner, digging a dedicated root cellar, or creating an above-ground storage structure insulated with earth.
Start by identifying the coolest, most stable temperature zone in your home. Many basements maintain suitable conditions naturally during winter months. Partition off a corner, insulate it from your home's heating system, and add a vent to outside air. Store root crops in bins of slightly damp sand or sawdust to maintain humidity. Potatoes, carrots, beets, turnips, parsnips, and winter squash all store well using this method. Keep apples separate, as they emit ethylene gas that causes other produce to spoil faster.
The beauty of root cellaring lies in its simplicity and independence. No electricity, no special equipment, no ongoing costs. You're simply creating conditions that slow natural decay processes. Even a crude root cellar dramatically extends your storage capacity compared to keeping everything in your kitchen or refrigerator.
Step 2: Master Water-Bath and Pressure Canning
Canning transforms your harvest into shelf-stable food that lasts years without refrigeration. Water-bath canning works for high-acid foods (tomatoes, pickles, jams, fruits), while pressure canning is required for low-acid foods (vegetables, meats, beans). Home-grown food requires proper preservation methods including canning, dehydrating, and root cellaring to maintain year-round nutrition .
Invest in quality equipment: a pressure canner (not just a pressure cooker), proper jars, new lids each year, and a reliable source of information like the USDA canning guidelines . Never improvise canning methods—botulism is a real risk with low-acid foods processed improperly. Start with simple recipes like tomato sauce, pickled vegetables, and fruit preserves. As you gain confidence, expand to pressure-canned beans, soups, and stock. A well-stocked pantry of home-canned goods provides both nutrition and normalcy during extended shelter-in-place situations.
The learning curve for canning is steeper than other preservation methods, but the payoff is substantial. Properly canned food maintains quality for years, requires no energy to store, and provides ready-to-eat meals when you're too busy or tired to cook from scratch. During genuine crises, this convenience becomes invaluable.
Step 3: Implement Dehydration Systems
Dehydrating removes water that bacteria and mold need to grow, preserving food for extended periods when stored properly. Electric dehydrators work well when power is available, but solar dehydrators or simple air-drying provide backup methods. Herbs, tomatoes, peppers, onions, apples, and beans all dehydrate successfully.
Build or buy a solar dehydrator—essentially a black-painted box with screen trays and vents that uses sun heat to dry food. Slice vegetables thinly for faster drying, and store finished products in airtight containers with oxygen absorbers. Dehydrated foods take minimal storage space and rehydrate quickly in soups and stews. They're ideal for extending your food security without the weight and bulk of canned goods.
The advantage of dehydration over canning is the reduced storage space required. A bushel of tomatoes that would fill a dozen quart jars fits into a single gallon jar when dried. For families with limited storage space, dehydration maximizes the food value you can pack into available area.
Step 4: Utilize Fermentation for Nutrition and Preservation
Fermentation not only preserves food but actually increases its nutritional value by creating beneficial bacteria and enzymes. Sauerkraut, kimchi, pickles, and other fermented vegetables can store for months in cool conditions and provide probiotics that support gut health—especially important during extended periods of stress or limited diet diversity.
Basic fermentation requires only salt, water, and vegetables. Shred cabbage, massage with salt, pack into jars submerged under brine, and wait 1-4 weeks. The process is forgiving and requires no special equipment. Fermented foods provide a crucial source of fresh, living nutrition during winter months when fresh vegetables are unavailable. They also make storage crops more palatable—fermented beets or turnips taste far better than their plain counterparts after months in storage.
Fermentation represents the oldest preservation method humans have used, predating canning by thousands of years. The techniques are simple, the equipment minimal, and the results both delicious and nutritious. Every food security system should include fermentation as a core preservation strategy.
Step 5: Save Seeds for Future Seasons
Seed saving closes the loop on food security, ensuring you can continue producing regardless of supply chain disruptions or economic conditions. Focus on open-pollinated varieties rather than hybrids, as these breed true from saved seed. Tomatoes, beans, peas, lettuce, and squash are excellent beginner crops for seed saving.
Allow your best plants to fully mature and collect seed when completely dry. Store in airtight containers in a cool, dark location. Label everything clearly with variety and year. Seed saving requires planning—you must sacrifice some harvest to seed production—but it transforms you from a consumer dependent on seed companies into a producer with genuine food sovereignty.
Get our Complete Food Preservation Guide to ensure your harvest feeds your family through any crisis
The combination of these five preservation methods creates a resilient system that doesn't depend on any single technique. If your freezer fails during a power outage, you still have canned, dehydrated, fermented, and root-cellared food. If you run out of canning lids, you can dehydrate or ferment instead. This redundancy is what separates genuine food security from fragile systems that collapse when one component fails.
- Nutrient Cycling Timeline
- Chicken manure: 6-12 months composting; Rabbit pellets: immediate use; Goat manure: 3-6 months aging
- Integrated System Benefits
- Combined systems reduce external feed costs by 30-40% through garden waste utilization and rotational grazing
Livestock Integration: Protein and Nutrient Cycling on Limited Space
Plants provide calories and most nutrition, but small livestock transform waste into protein while simultaneously improving your soil and creating a more resilient food system. The key is selecting animals that provide multiple benefits while requiring minimal space and feed inputs.
Chickens: The Foundation Flock
Chickens represent the most practical starting point for small-scale livestock integration. A modest flock can provide substantial egg production while processing kitchen scraps into fertilizer . Dual-purpose breeds like Rhode Island Reds or Barred Rocks provide both eggs and meat, giving you flexibility based on your needs.
The real value of chickens extends beyond eggs. They consume kitchen scraps, garden waste, and insects, converting materials you can't eat into protein-rich eggs and nitrogen-rich manure. Their scratching behavior helps prepare garden beds—rotate them through areas you plan to plant, and they'll clear crop residue and incorporate organic matter while fertilizing. During economic disruptions when feed prices spike, chickens can largely support themselves by foraging if given adequate space, making them more resilient than livestock dependent entirely on purchased feed.
Chickens also provide psychological benefits during stressful times. The daily routine of caring for animals, collecting eggs, and watching their behavior creates normalcy and purpose when the broader world feels chaotic and uncertain. This shouldn't be dismissed as trivial—mental health matters during extended crises.
Rabbits: Efficient Protein Conversion
Rabbits convert feed into meat more efficiently than cattle, pigs, or even chickens for meat production. They're quiet, compact, and can be fed partially on garden waste, weeds, and foraged greens. A small breeding setup can produce substantial amounts of meat annually in minimal space.
Compared to chickens, rabbits require less space and create less noise and odor, making them suitable for suburban settings where chickens might face restrictions. Their manure is "cold"—it can be applied directly to gardens without composting, unlike chicken manure which must age. The pellets make excellent fertilizer for intensive vegetable beds. Rabbit meat is lean, healthy, and stores well through canning or freezing. The main drawback is psychological—many people find processing rabbits more difficult than poultry—but during genuine food shortages, this becomes less of a barrier.
Rabbits also breed quickly, allowing you to scale production up or down based on your needs. During times of plenty, you can maintain a small breeding stock. When you need more protein production, rabbits can expand your meat supply within a few months rather than the years required for larger livestock.
Goats: Milk and Land Management
Dairy goats can provide substantial amounts of milk daily during their lactation period, yielding milk, yogurt, cheese, and buttermilk. They're browsers rather than grazers, meaning they'll clear brush, weeds, and woody plants that chickens and rabbits ignore. This makes them valuable for managing overgrown areas and converting low-value vegetation into high-value protein.
Goats require more infrastructure than chickens or rabbits—secure fencing, substantial shelter, and careful feed management—but they provide benefits neither of the smaller animals can match. Fresh milk during extended shelter-in-place situations provides critical nutrition for children and adds richness to an otherwise austere diet. The challenge is commitment: goats need milking twice daily, every day, for months. They're not a casual addition to your homestead but rather a serious upgrade that makes sense once your systems are established and running smoothly.
Goats also provide companionship and entertainment. Their curious, playful nature makes them enjoyable to work with, and many families find that goats become genuine members of the household rather than simply livestock. This emotional connection shouldn't be underestimated—it makes the daily work of animal care more rewarding.
Integration Strategy
The most efficient approach layers these animals into your existing production system. Chickens follow behind goats in a rotational grazing system, spreading manure and consuming parasites. Rabbits in colony housing can range in orchards, controlling weeds without damaging trees. All three convert waste streams into fertility that drives vegetable production, creating a closed-loop system that becomes more productive and resilient over time.
Start with chickens, add rabbits once you've mastered basic animal husbandry, and consider goats only when you're ready for the commitment they require. This phased approach prevents overwhelm while building your skills and infrastructure gradually. Each animal species teaches you lessons that apply to the next, creating a learning progression that makes sense.
Seasonal Planning and Crisis-Proof Growing Strategies
The Thompson family learned about seasonal planning the hard way. Their first year, they planted everything in May, harvested frantically in August and September, and then watched their gardens sit empty from October through April. They'd produced food, but only for four months. The next year, they implemented four-season growing strategies and never experienced another empty garden month.
Four-season growing isn't about pretending you live in California when you're actually in Minnesota. It's about understanding that different crops thrive in different conditions and planning accordingly. Season extension techniques can significantly expand your growing window in most climates , transforming a six-month growing season into eight or even ten months of fresh food production. This becomes critical during extended economic disruptions when you can't simply wait until next summer to address food shortages.
Spring: The Rush Season
Spring is when most gardeners focus all their energy, but it's actually the shortest growing window. The key is starting early with cold-hardy crops under protection. Lettuce, spinach, kale, peas, and radishes can go into cold frames 4-6 weeks before your last frost date. Use succession planting—sow new lettuce every two weeks—to avoid the feast-or-famine cycle where everything matures simultaneously.
While tending these early crops, prepare your main beds for summer planting. Build soil, spread compost, and plan your layout so you're ready when conditions allow. Spring is also when you're planting perennials—fruit trees, berry bushes, asparagus, and rhubarb. These long-term investments take years to reach full production, but they eventually provide food with minimal annual effort.
The challenge in spring is managing enthusiasm. New gardeners often plant too much too early, resulting in frost-killed plants and wasted effort. Start conservatively, protect what you plant, and expand gradually as temperatures stabilize. Better to have modest success than ambitious failure.
Summer: Peak Production and Preservation
Summer is your window for heat-loving crops and your opportunity to preserve food for winter. Tomatoes, peppers, squash, cucumbers, beans, and corn all need summer's warmth. This is also when you're harvesting and preserving frantically—canning tomatoes, freezing beans, and curing winter squash. The work is intense but absolutely critical. Every jar you fill in July is a meal you'll eat in February.
Plant fall crops in mid-to-late summer even while you're overwhelmed with harvest. Those brassicas, root vegetables, and greens need time to mature before fall frost. This requires discipline—when you're already working hard on summer harvest, the last thing you want to do is prepare beds and plant more crops. But families who push through this difficult period eat fresh food well into winter, while those who skip fall planting face months of stored food only.
Summer is also when you're managing water most intensively. Irrigation, mulching, and monitoring soil moisture become daily tasks. Establish routines that make this work sustainable rather than overwhelming. Early morning watering, drip irrigation systems, and heavy mulching all reduce the labor burden while improving results.
Fall: The Second Spring
Many gardeners quit after summer harvest, but fall is actually your second major growing season. Cool-weather crops that bolt in summer heat thrive in fall's moderate temperatures. Kale, collards, lettuce, spinach, turnips, and Asian greens all grow beautifully from August plantings. These crops often survive light frosts and some (like kale and collards) actually improve in flavor after frost.
Extend their season with row covers or cold frames, and you'll harvest fresh greens well into winter. Fall is also when you're storing root crops, planting garlic, and preparing beds for next spring. The work shifts from frantic harvest to methodical preparation. Clean up spent crops, spread compost, plant cover crops on empty beds, and organize your storage areas.
Fall is when you're evaluating what worked and what didn't. Take notes while the season is fresh in your mind. Which varieties performed well? What pests caused problems? Where did your layout create inefficiencies? This information becomes invaluable when planning next year's garden.
Winter: Protected Growing and Planning
Winter isn't a dead season—it's an opportunity for protected growing and intensive planning. Microgreens and sprouts can provide fresh nutrition quickly using minimal space and resources . A sunny windowsill or simple grow light setup produces nutrient-dense greens when outdoor gardens are frozen. These crops grow slowly during winter's short days but they grow, providing fresh food when it's most valuable.
Cold frames with proper management can grow spinach, mâche, and claytonia even through significant cold. These crops grow slowly during winter's short days but they provide fresh greens when they're most valuable. The key is planting in fall and allowing crops to establish before hard cold arrives. Once established, they'll survive and even grow slowly through winter.
Winter is also when you evaluate last season, order seeds, and plan improvements. This isn't wasted time—it's when you transform experience into strategy. What worked? What failed? What should you expand, and what should you eliminate? Document everything while it's fresh in your memory. Review your preservation inventory—what ran out first, and what do you still have too much of? This information guides next year's planting decisions.
Emergency Crop Strategies
During actual crisis situations, you need crops that produce quickly from minimal inputs. Microgreens, sprouts, and fast-maturing vegetables like radishes and lettuce can go from seed to table in 2-4 weeks. Keep a dedicated seed reserve for emergency planting—quick-maturing varieties stored separately from your main seed stock. If you need to rapidly boost production, these crops provide the fastest return.
They're not calorie-dense, but they provide fresh nutrition and psychological benefits during stressful shelter-in-place situations. The act of growing something, even something small, provides a sense of control and purpose when external circumstances feel chaotic and unmanageable. This psychological dimension of food security deserves recognition—mental health affects your ability to make good decisions and maintain the systems that keep your family fed.
Water security deserves equal attention to food production. Install rain catchment systems that store water independently of municipal supply. Even modest roof areas can collect substantial amounts of water during rain events. Combine storage tanks with drip irrigation or soaker hoses that deliver water efficiently without waste. During extended dry periods or if water service is disrupted, these systems keep your food production viable when neighbors' gardens are dying.
Getting Started: Your First-Year Implementation Plan
The gap between understanding what's possible and actually implementing a food security system stops most people before they begin. The vision of a productive one-acre homestead seems overwhelming when you're staring at an empty lawn. The solution is a phased approach that builds capability gradually without requiring impossible amounts of time, money, or expertise upfront.
Step 1: Infrastructure Foundation (Spring, Year One)
Start with 1,000-2,000 square feet of intensive growing space near your home. This isn't about perfection—it's about establishing your Zone One production area and learning fundamental skills. Build or install 4-6 raised beds (4'x8' is a practical size), establish pathways, and create a small composting area. If you're working with existing lawn, you can skip tilling by using sheet mulching: cover grass with cardboard, top with 6-8 inches of compost or topsoil mix, and plant immediately.
Install basic water infrastructure during this phase. Even a simple rain barrel connected to a downspout provides backup water and reduces your dependence on municipal supply. If budget allows, install a more substantial catchment system, but don't let perfect be the enemy of good. Any water storage is better than none. The same principle applies to your growing beds—adequate beds built now are better than perfect beds you never construct.
Your initial investment will likely run under $2,000 for basic infrastructure, depending on what materials you can source locally or salvage. Lumber for raised beds, compost or topsoil, basic hand tools, seeds, and a few season extension supplies cover most needs. You don't need a tractor, greenhouse, or expensive irrigation system to start. Those can come later if they prove necessary.
Step 2: First Crops and Skill Building (Late Spring through Fall, Year One)
Plant a limited selection of reliable crops: tomatoes, lettuce, beans, squash, and herbs. These are forgiving, productive, and useful. The goal isn't feeding your family entirely—it's learning the rhythm of growing, harvesting, and managing plants. You'll make mistakes. Plants will die. Some crops will fail completely. This is normal and valuable. Every failure teaches you something specific about your site, climate, and methods.
Focus on building soil health rather than fighting problems with inputs. Add compost, mulch heavily, and feed the soil biology. Healthy soil creates healthy plants that resist pests and diseases naturally. This approach takes longer to show results than simply dumping synthetic fertilizer on beds, but it creates lasting fertility that improves year after year rather than requiring constant inputs.
Keep records of what you plant, when you plant it, and how it performs. Note pest problems, disease issues, and environmental stresses. This information becomes your site-specific growing guide, more valuable than any generic gardening book because it reflects your actual conditions. Simple notes in a notebook work fine—you don't need elaborate systems, just consistent documentation.
Step 3: Preservation and Storage (Late Summer through Fall, Year One)
As your first crops mature, begin learning preservation methods. Start simple: freeze beans, make tomato sauce, dehydrate herbs. Don't invest heavily in canning equipment until you've actually grown enough to preserve. Many first-year gardeners buy canners and never use them because their harvest doesn't justify the effort. Let your production scale drive your preservation infrastructure, not the other way around.
Set up a basic storage area for crops that keep without processing. Even a cool closet or basement corner works for winter squash, onions, and garlic. You're establishing systems and learning what works in your specific situation. Pay attention to what stores well and what spoils quickly. This information guides both your growing decisions (plant more of what stores well) and your preservation priorities (preserve what doesn't store well fresh).
Calculate the actual value of what you've preserved. Price out equivalent store-bought items and total up your preserved inventory's worth. This number often surprises first-year growers—even modest harvests translate to significant grocery savings. Use this information to motivate continued effort and justify expansion investments.
Step 4: Expansion and Livestock (Year Two)
With one season's experience, you understand your site better and can expand intelligently. Add another 1,000-2,000 square feet of growing space, incorporating lessons from year one. This is when you establish your Zone Two production beds and begin growing staple crops like potatoes and winter squash in quantity. You're no longer just gardening—you're producing food at a scale that meaningfully impacts your family's food security.
Consider adding chickens during year two. Start with 6-12 birds rather than a full flock. Learn their needs, establish routines, and integrate them into your system gradually. Chickens teach you animal husbandry fundamentals without overwhelming commitment. If they work well, expand the flock in year three. If they're more trouble than they're worth, you've learned that with minimal investment.
Year two is also when you're planting perennials and making longer-term improvements. Fruit trees, berry bushes, asparagus beds, and permanent infrastructure like greenhouses or root cellars all make sense once you've proven you'll stick with food production. These investments pay off over years or decades, so you want to be confident in your commitment before making them.
Step 5: Refinement and Resilience (Year Three and Beyond)
By year three, you're no longer a beginner. You understand your growing season, know which crops thrive in your conditions, and have established preservation routines. This is when you add complexity: more livestock, season extension structures, expanded staple crop production, and advanced preservation methods like fermentation and root cellaring.
The goal isn't achieving complete food independence—that's unrealistic and unnecessary for most families. The goal is creating meaningful food security that buffers you against supply disruptions, reduces economic vulnerability, and provides genuine peace of mind during uncertain times. A well-developed one-acre homestead can provide the majority of your family's food needs while remaining manageable alongside normal work and life commitments.
You're also developing skills that extend beyond your own property. You can help neighbors start their own food production, trade surplus for items you don't produce, and contribute to community resilience. Food security isn't just individual—it's also about strengthening the networks and relationships that help entire communities weather difficult times.
Weighing the Pros and Cons of One-Acre Food Production
Advantages:
- Economic Buffer: Significant reduction in food costs, with potential savings of 40-60% annually once systems are established
- Supply Chain Independence: Protection against disruptions, shortages, and price spikes
- Nutritional Quality: Fresh, organic produce without pesticides or long transportation times
- Food Sovereignty: Control over what you eat and how it's grown
- Skill Development: Practical knowledge that increases in value during crises
- Physical Activity: Meaningful exercise integrated into daily life
- Mental Health Benefits: Purpose, accomplishment, and stress relief through productive work
Disadvantages:
- Time Investment: Significant ongoing labor, especially during peak seasons
- Learning Curve: Mistakes and failures during initial years
- Upfront Costs: Infrastructure investment before seeing returns
- Physical Demands: Heavy work that may be challenging for some individuals
- Weather Dependency: Crop failures due to drought, flood, frost, or pests
- Limited Crop Diversity: Climate and space constraints limit what you can grow
- Ongoing Commitment: Systems fail without consistent maintenance
The families who succeed with this approach share one characteristic: they start before they feel ready. They don't wait for perfect conditions, complete knowledge, or ideal circumstances. They begin with basic infrastructure, plant their first crops, and learn by doing. Economic disruptions and food security crises don't wait for convenient timing. The best time to establish your food security system was five years ago. The second-best time is today, with whatever resources and space you currently have available.
Your one-acre homestead won't look like anyone else's because your family's needs, your site's conditions, and your personal circumstances are unique. That's not just acceptable—it's ideal. The principles outlined here provide a framework, but you'll adapt them to your reality through experimentation and experience. Start small, build gradually, and focus on creating systems that work for your life rather than trying to fit your life into someone else's system.
The result will be genuine food security that serves your family through whatever economic or supply chain disruptions the future brings. You'll have created not just a productive piece of land, but a foundation of resilience that protects what matters most—your family's ability to eat well regardless of external circumstances. That security is worth every hour of work, every dollar invested, and every lesson learned through failure. The peace of mind that comes from knowing you can feed your family, no matter what happens, is something no amount of money in the bank can replicate.