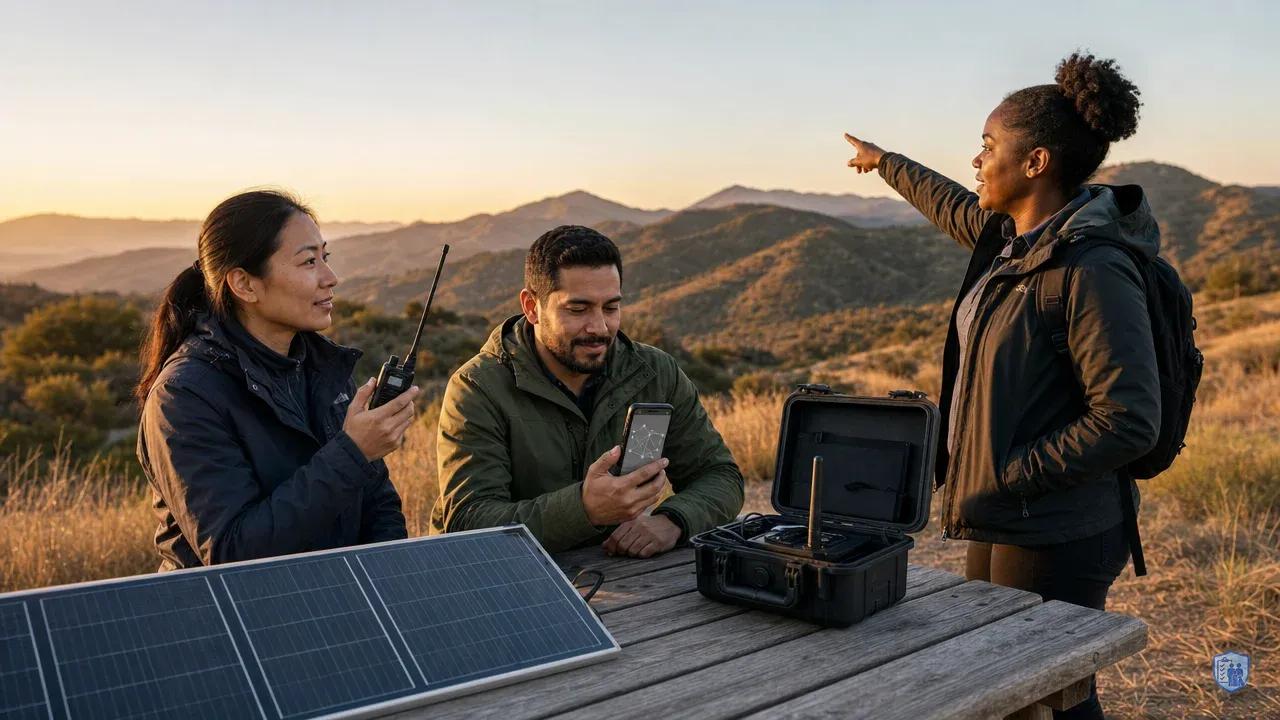
Why Meshtastic networks matter when everything else fails
The morning after an electromagnetic pulse event, Sarah reached for her smartphone out of habit. The screen remained dark, not just powered off, but completely dead. Her husband tried the landline. Nothing. The battery-powered radio produced only static across every frequency. In that moment, the reality set in: they were cut off from their adult children across town, from emergency services, from any information about what had happened or what to do next.
This scenario represents a genuine concern for millions of Americans. Extended power outages can last days to weeks and disable cellular towers and internet infrastructure . When disaster strikes, the communication systems we take for granted become useless metal and plastic.
This is where Meshtastic networks become valuable. Unlike cellular towers that depend on grid power and backhaul connections, or internet services that require functioning infrastructure across thousands of miles, Meshtastic operates on fundamentally different principles. Meshtastic operates on LoRa (Long Range) technology, these mesh networks use low-power radio signals in the unlicensed ISM band (902-928 MHz in North America) . When one person sends a message, nearby devices automatically relay it to others, hopping from node to node until it reaches its destination. The network has no single point of failure because there's no center to fail.
The EMP resilience of LoRa mesh networks stems from their low-power design and solid-state electronics . While high-power systems and long cable runs act as antennas for electromagnetic pulses, properly shielded low-power devices demonstrate remarkable survivability. Research into disaster-resilient communications shows that mesh network architectures maintain functionality even when significant portions of the network are damaged or destroyed . The decentralized nature means that as long as you have a path of functioning nodes between sender and receiver, messages get through.
For preparedness-minded individuals, operating a Meshtastic network requires no licenses, no monthly fees, and no permission from any authority. The ISM band frequencies are specifically allocated for unlicensed operation , meaning you can deploy your network today and have it ready for tomorrow's emergency. Compare this to amateur radio, which requires licensing and technical knowledge, or satellite phones that cost thousands of dollars and depend on functioning satellites and ground stations. When the Federal Emergency Management Agency emphasizes the critical importance of backup communications systems , they're recognizing a simple truth: in grid-down scenarios, amateur radio networks and mesh systems often provide the only reliable communications available .
The technology offers distinct advantages over alternatives. Satellite phones require clear sky views and depend on orbital infrastructure that may be compromised in widespread disasters. Amateur radio demands technical expertise and licensing that many people lack. CB radios suffer from limited range and congested channels. Meshtastic fills the gap between these options, more capable than CB, more accessible than amateur radio, more independent than satellite systems.
- ESP32 LoRa Development Boards
- Three recommended boards: TTGO T-Beam ($25-35), Heltec WiFi LoRa 32 ($20-30), and LilyGO T-Echo ($40-50) with frequency bands and GPIO specifications
- Battery Solutions & Power Management
- 18650 lithium cells (2600-3500mAh, $8-15), LiPo packs (1000-5000mAh, $12-25), and solar charging options ($15-40) with runtime estimates
- Antenna Options & Performance
- Stock PCB antennas (0-2km range), upgraded whip antennas (2-5km, $5-15), and directional Yagi antennas (10-20km, $25-60) with gain specifications
- Enclosure & Environmental Protection
- Weatherproof cases rated IP65/IP67 ($10-30), 3D printable designs, and mounting hardware for outdoor deployments with temperature ratings
- Essential Accessories & Tools
- USB-C/micro-USB cables, SMA connectors, breadboards for prototyping ($5-20), and programming adapters with compatibility matrix
- Cost Analysis & Compatibility Matrix
- Total system costs from basic ($30-50) to advanced setups ($100-200) with component compatibility checkmarks and regional frequency considerations
Choosing your Meshtastic hardware: essential components
Building a resilient Meshtastic network starts with selecting the right hardware. You don't need an engineering degree or a massive budget to get started. The heart of any Meshtastic device is an ESP32 microcontroller paired with a LoRa radio module. This combination delivers the sweet spot of capability, power efficiency, and affordability.
Several manufacturers produce ready-to-use Meshtastic devices. The Heltec LoRa32 series offers compact, affordable options suitable for handheld use. The LILYGO T-Beam integrates GPS positioning, allowing your network to share location data, invaluable when coordinating movement or requesting assistance during an emergency. The RAK WisBlock system provides modular expansion capabilities for advanced users. Prices vary based on features, but entry-level devices start around $25-30, while full-featured units with GPS and better antennas run $60-80.
GPS integration deserves consideration for your use case. Location sharing helps coordinate group movements, mark important locations, and request assistance with precise position data. If your network supports a mutual assistance group spread across rural areas, GPS-equipped nodes provide situational awareness that text-only devices cannot match. For urban users in familiar territory, GPS may be less critical.
Battery considerations extend beyond initial capacity. Look for devices that accept standard 18650 lithium cells, the same batteries used in many flashlights and power tools. This standardization means you can stockpile compatible cells and swap them quickly in the field. Battery life varies significantly based on configuration settings, message frequency, and whether GPS is active. Expect anywhere from two to seven days of operation on a single charge under typical use. Aggressive power management extends battery life at the cost of message latency.
For fixed installations like home base stations or elevated repeaters, integrating solar charging transforms your node from a temporary device into a permanent installation. A small solar panel with charge controller can keep a Meshtastic node running indefinitely, even during extended grid-down scenarios. Solar setups work particularly well for repeater nodes positioned on rooftops or hilltops where they receive consistent sunlight.
Antenna selection makes the difference between a network that reaches across your neighborhood and one that struggles to span a city block. The compact antennas included with most devices work adequately for close-range communication. Upgrading to a larger antenna with higher gain extends range significantly. For fixed installations, particularly elevated repeater nodes, a high-gain collinear antenna can dramatically increase coverage area. The frequency matters here: ensure your antenna matches your regional frequency band (915 MHz for North America, 868 MHz for Europe, 923 MHz for Asia-Pacific).
Weatherproofing becomes critical for outdoor deployments. A repeater node mounted on your roof or in a tree does no good if moisture kills it after the first rainstorm. IP65-rated enclosures seal against dust and water jets and accommodate most Meshtastic devices with room for batteries. Use cable glands for antenna connections to maintain the weather seal. For extreme environments, adding desiccant packets inside the enclosure prevents condensation during temperature swings.
Budget-conscious preppers can start with a minimal two-node network for basic family communication. A more robust four-node system with GPS, upgraded antennas, weatherproof cases, and solar charging for two fixed repeaters provides comprehensive coverage for a household or small group. This represents a fraction of the cost of a single satellite phone, yet provides communication capability for an entire family or mutual assistance group.
Consider your specific needs when selecting hardware. A family living in a suburban neighborhood needs different equipment than a rural mutual assistance group spread across twenty miles. Urban users face building penetration challenges that rural users don't encounter. Start with basic equipment, test it in your environment, then expand based on actual performance rather than theoretical specifications.
Step-by-step initial configuration
Setting up your first Meshtastic device has become remarkably straightforward thanks to the web-based flasher tool. You don't need to install development environments, compile code, or wrestle with command-line interfaces. Even someone who's never programmed hardware before can complete the process successfully.
Start by connecting your device to your computer using a USB cable. Most Meshtastic hardware uses USB-C or micro-USB connections, and the device should power on immediately, indicated by an LED or screen display. Open a web browser, Chrome, Edge, or Opera work best, and navigate to flasher.meshtastic.org. Click the "Flash" button and select your device from the popup menu.
The flasher automatically detects your hardware model in most cases. If it doesn't, you can manually select from the dropdown list. Choose the latest stable firmware version (avoid development builds unless you're troubleshooting specific issues) and click "Install." The firmware downloads and writes to your device over the next few minutes.
Once flashing completes, the web interface automatically transitions to the configuration screen. This is where you personalize your node and set critical security parameters. First, give your device a unique name, something memorable that identifies it to other network users. "Home Base," "Mobile-1," or "Hilltop Repeater" work better than generic names like "Meshtastic_a4b2." This name appears on every message you send, so choose something appropriate for your operational security requirements.
Next, configure your region setting. This determines which frequency band your device uses and ensures legal operation. For North America, select "US." This automatically sets your device to operate in the 902-928 MHz ISM band with appropriate power limits and channel spacing . Getting this wrong means your device either won't communicate with others on your network or potentially violates regulations.
The encryption settings deserve careful attention. Meshtastic uses AES-256 encryption to protect your messages from casual interception. The default channel uses a publicly-known encryption key, fine for testing and public networks, but unsuitable for private emergency communications. Create a new channel with a custom encryption key by clicking "Add Channel" and selecting "Generate Random PSK" (pre-shared key). Write this key down and store it securely, you'll need to enter this same key on every device you want to include in your private network. Without the matching key, devices can see that messages are being transmitted but cannot decrypt the content.
Device role configuration determines how your node participates in the mesh. The "Client" role suits mobile devices and handhelds. These nodes send and receive messages while also relaying for others, but prioritize battery conservation. The "Router" role works best for fixed installations with continuous power. These nodes wake more frequently to check for messages and relay more aggressively, strengthening the overall mesh at the cost of higher power consumption. The "Repeater" role creates a dedicated relay node that doesn't generate its own messages but focuses entirely on extending network range. For your initial two-device setup, keep both as "Client" roles.
Test basic functionality before closing the configuration interface. The web tool includes a message panel, send a test message and verify it appears on your second device (which you've configured with the same encryption key). If messages aren't getting through, check that both devices show the same channel number and frequency. The device screen or LED should flash when transmitting or receiving. If one device transmits but the other doesn't receive, try moving them closer together. Initial testing should happen within the same room to eliminate range issues.
Power cycling your devices after initial configuration is good practice. This ensures all settings persist to flash memory and the devices restart with their final configuration. Unplug the USB cable and let the device run on battery power for a few minutes, then reconnect. If the device boots up with your custom name and settings intact, configuration was successful.
Common troubleshooting issues include incorrect USB drivers (usually auto-installed by modern operating systems), browser compatibility (Firefox sometimes struggles with the web flasher), and confusion between channel numbers and encryption keys. If the flasher can't detect your device, try a different USB cable, some cables are power-only without data lines. If configuration settings don't save, ensure you click the "Save" button in the web interface rather than just closing the browser.
The configuration process becomes faster with practice. Your first device might take thirty to forty minutes as you familiarize yourself with the interface. By your third or fourth device, you'll complete the process in under ten minutes. This efficiency matters when you're deploying backup devices from Faraday storage after an emergency.
Building your mesh network topology
The physical layout of your Meshtastic network determines whether it functions as a robust communication system or a collection of isolated devices that can't reach each other when you need them most. Mesh network topology requires strategic thinking about geography, line-of-sight, and redundancy.
Start by mapping your coverage requirements. For a family living in a suburban neighborhood, you might want to connect your home to your parents' house three kilometers away, your sister's apartment four kilometers in another direction, and maintain mobile communication throughout the area. For a mutual assistance group spread across a rural county, the challenge scales up to connecting homesteads separated by ten to fifteen kilometers of rolling terrain. Understanding these distances and the terrain between locations drives every subsequent decision.
Line-of-sight matters enormously for LoRa communications. While the signals can penetrate obstacles, passing through wooden structures, foliage, and even some building materials, range decreases dramatically with each obstruction. Research into disaster-resilient communications shows that mesh network architectures maintain functionality even when significant portions of the network are damaged or destroyed . Urban environments present their own challenges: modern buildings with metal framing and energy-efficient windows (which often include metallic coatings) significantly attenuate radio signals.
Elevation provides the single most effective way to extend range. A repeater node mounted at ground level in a valley might reach one to two kilometers. The same node mounted on a hilltop or rooftop with clear sightlines can cover substantially more area. This is why serious mesh networks always include at least one elevated repeater node. Scout your area for high points: tall buildings where you can get roof access, water towers, hilltops on your property or accessible public lands. Even mounting a node in a tall tree can provide enough elevation advantage to bridge gaps that would otherwise fragment your network.
Redundancy separates a fragile network from a resilient one. A minimum of three nodes creates the possibility of multiple paths between any two points. If you're connecting two homes, the naive approach places one node at each location. But what happens if the direct path is blocked by a building or terrain feature? Adding a third node in between, or better yet, two additional nodes in different locations, creates alternative paths. Messages can route around obstacles and damaged nodes, automatically finding working paths through the mesh. This is the fundamental advantage of mesh topology over point-to-point communications.
Consider a practical example: connecting three homes forming a triangle, each four to six kilometers from the others. Placing one node at each home gives you three potential communication paths, A to B directly, A to C to B, and A to B to C. If the direct A-to-B path suffers interference or one device fails, messages automatically reroute through C. Now add a fourth node at an elevated central location, perhaps a water tower or hilltop roughly equidistant from all three homes. This central repeater can see all three home nodes, creating three additional communication paths and dramatically improving reliability. The network now survives any single node failure while maintaining full connectivity.
Fixed versus mobile nodes serve different purposes in your topology. Fixed nodes, those with continuous power from solar or grid backup, should occupy strategic positions that maximize coverage and provide network backbone. These nodes run in Router or Repeater roles, maintaining the mesh even when mobile devices are turned off or out of range. Mobile nodes carried by individuals or in vehicles extend the network's reach dynamically, filling gaps and providing communication in areas without fixed coverage. A robust network includes both types, with fixed nodes providing reliable infrastructure and mobile nodes adding flexibility.
Practical deployment means testing your planned topology before committing to permanent installations. Start with temporary setups using battery power. Place nodes at proposed locations and verify they can communicate. Walk or drive the routes you expect to travel with mobile nodes, monitoring signal strength and message reliability. Identify dead zones where coverage fails, then experiment with repeater placement to fill those gaps. This testing phase reveals problems when they're easy to fix, before you've invested in weatherproof enclosures, solar panels, and roof-mounting hardware.
In flat, open terrain with clear line-of-sight, expect six to ten kilometers between nodes with standard antennas, extending to fifteen kilometers or more with upgraded antennas and elevated positions . Suburban environments with houses and trees typically yield shorter ranges. Dense urban areas or heavily forested terrain may require nodes positioned closer together. These are guidelines, not guarantees, actual performance varies based on specific local conditions, antenna quality, and environmental factors.
Terrain analysis tools help plan your network. Topographic maps show elevation changes that affect line-of-sight. Google Earth provides 3D visualization of terrain and buildings. Some mesh network planning tools calculate theoretical coverage based on node positions and terrain data. While these tools provide useful starting points, nothing replaces real-world testing with actual hardware in your specific environment.
Weather affects LoRa propagation. Heavy rain attenuates signals, particularly at higher frequencies. Dense fog can reduce range. Temperature inversions sometimes extend range beyond normal expectations. Plan your network with enough margin that it remains functional even during adverse weather conditions. If your network barely works on a clear day, it will fail when you need it during a storm.
EMP protection and hardening your network
Building a Meshtastic network means nothing if an electromagnetic pulse or severe geomagnetic storm destroys every device simultaneously. EMP protection isn't paranoia, it's recognizing that low-probability, high-consequence events demand proportional preparation. The Department of Homeland Security explicitly identifies EMP threats to communications infrastructure as a critical national security concern , and the same physics that threaten the grid also threaten your personal electronics.
The good news: The EMP resilience of LoRa mesh networks stems from their low-power design and solid-state electronics . The bad news: "greater resilience" doesn't mean "immune." Unprotected devices can still suffer damage from the intense electromagnetic fields generated by a high-altitude EMP . Protection requires storing backup devices in Faraday cages and implementing surge protection for operational systems.
A Faraday cage blocks electromagnetic radiation by surrounding contents with conductive material that redirects electromagnetic energy around the exterior rather than allowing it to penetrate inside. You don't need expensive commercial solutions. Effective Faraday protection can be built using readily available materials. A galvanized steel trash can with a tight-fitting lid provides excellent shielding. Line the interior with cardboard or foam to prevent stored devices from directly contacting the metal (which could create ground loops), place your backup Meshtastic nodes inside with batteries removed, and ensure the lid seals firmly. For additional protection, nest a smaller metal container inside the larger one, separated by insulating material. This double-layer approach provides redundancy if the outer shield is compromised.
Ammo cans offer another practical Faraday cage option. Military surplus .50 caliber or larger ammo cans feature thick steel construction and rubber gasket seals. These cans are already designed to be weatherproof and durable, making them ideal for long-term storage. Verify the seal creates electrical continuity around the entire lid perimeter. Use a multimeter to check for conductivity between the lid and body. If the gasket prevents electrical contact, apply conductive copper tape around the rim to ensure proper shielding. Store your backup devices inside, wrapped in anti-static bags or insulating material.
Testing Faraday cage effectiveness doesn't require specialized equipment. Place a battery-powered AM/FM radio inside the cage, tuned to a strong local station. Seal the cage and walk away with another radio tuned to the same station. If your Faraday cage is working properly, the radio inside should receive no signal, you'll hear only static. This simple test verifies that radio frequency energy cannot penetrate your shielding. Perform this test whenever you build or modify a Faraday cage, and periodically thereafter to ensure seals haven't degraded.
Solar charging systems require special attention because they necessarily connect to the outside world. Solar panels, charge controllers, and the cables between them create potential pathways for EMP-induced surges to reach your devices. Implement surge protection using gas discharge tubes or metal oxide varistors rated for your system voltage. These components shunt voltage spikes to ground before they reach sensitive electronics. Install surge protectors at the charge controller input (between panel and controller) and output (between controller and device). For critical fixed installations, consider a manual disconnect switch that allows you to physically isolate the solar charging system from devices during high-risk periods, for example, during a geomagnetic storm or heightened threat environment.
The backup device strategy is straightforward: for every operational node in your network, maintain at least one backup device stored in Faraday protection. This means if you're running a four-node network with two fixed repeaters and two mobile nodes, you should have four additional devices in protected storage. Store these devices with batteries removed and in discharged state. Fully charged lithium batteries pose fire risk during long-term storage and can degrade faster. Include spare batteries in your Faraday storage, along with antenna adapters, USB cables, and any other components needed to deploy a complete node.
Quick deployment procedures matter as much as the protection itself. An EMP event provides no warning, you'll have seconds to minutes before the pulse arrives. Operational devices will likely be destroyed. Your protected backups become your only communication capability. Practice the deployment procedure: retrieve devices from Faraday storage, install charged batteries (stored separately), perform basic function checks, and establish communication with other nodes. Time this process. If it takes you thirty minutes fumbling with unfamiliar procedures, you need more practice. Aim for deployment within five to ten minutes.
Consider the scenario realistically. After an EMP event, you're operating in a degraded environment, possibly without lighting, with limited time before security situations develop, and under significant stress. Pre-position Faraday cages in accessible locations. Label contents clearly. Include printed quick-start instructions inside each storage container. Store charged batteries (in their own Faraday protection) nearby but separate from devices. These small details transform theoretical preparedness into practical capability when circumstances are least favorable.
Grounding considerations affect EMP protection. Some experts recommend grounding Faraday cages to earth ground, while others argue this creates a path for ground currents to enter the cage. The conservative approach: don't ground your Faraday storage containers. Keep them isolated from ground and from other conductive paths. This prevents ground currents from reaching stored devices while still providing shielding from electromagnetic fields.
Layered protection provides the best results. Store critical backup devices in nested Faraday cages, a small metal container inside a larger one, separated by insulating material. This creates two independent shields that must both fail before devices are exposed. For maximum protection, store your most critical backup equipment in this nested configuration, even if you use single-layer protection for less critical items.
- Weekly System Checks
- HVAC filters, plumbing fixtures, electrical panels, and safety equipment inspections with visual status indicators
- Bi-Weekly Deep Maintenance
- Equipment calibration, detailed cleaning protocols, and performance testing with completion tracking
- Monthly Documentation Review
- Maintenance logs, compliance records, and performance metrics analysis with digital archiving
- Seasonal Equipment Overhauls
- Comprehensive system maintenance, parts replacement, and efficiency optimization based on usage patterns
- Annual Compliance Audits
- Regulatory inspections, certification renewals, and comprehensive facility assessments with reporting
- Emergency Preparedness Updates
- Safety protocol reviews, emergency supply inventory, and response plan testing with staff training
Testing, maintenance, and operational procedures
A Meshtastic network that sits untouched between emergencies will fail precisely when you need it most. Batteries degrade, firmware develops security vulnerabilities, users forget procedures, and environmental factors damage hardware. Regular testing and maintenance transform your network from a theoretical capability into a reliable tool.
Weekly testing protocol:
- Power on all nodes and verify they connect to the mesh
- Send test messages between all node pairs to confirm bidirectional communication
- Check battery voltage on mobile nodes, recharge when voltage drops
- Verify GPS lock on equipped devices (should acquire within sixty seconds outdoors)
- Monitor signal strength indicators, degradation suggests antenna problems or interference
- Review message logs for unusual activity or failed delivery attempts
Monthly maintenance tasks:
- Physically inspect fixed nodes for weather damage, loose connections, or pest intrusion
- Clean solar panels if equipped, dust and debris reduce charging efficiency significantly
- Verify weatherproof enclosures maintain their seals, replace degraded gaskets
- Update firmware if new stable releases are available (check meshtastic.org/downloads)
- Rotate backup devices from Faraday storage, power them on and verify functionality
- Test Faraday cage effectiveness using the AM radio method described earlier
- Review and update communication protocols with network users
Quarterly deep maintenance:
- Full battery capacity test, discharge and recharge to verify batteries hold expected charge
- Antenna system inspection, check connections, coax cables, and mounting hardware
- Range testing, verify coverage hasn't degraded due to new construction or vegetation growth
- Backup restoration drill, deploy devices from Faraday storage and establish full network
- Security review, ensure encryption keys remain secure and unauthorized devices haven't joined
- Documentation update, revise contact lists, node locations, and deployment procedures
Battery maintenance deserves special emphasis because battery failure represents the most common cause of node unavailability. Lithium polymer and lithium-ion cells degrade over time regardless of use. Before they fail completely, batteries lose capacity. A cell that once powered a node for five days might only manage three days, then two. Track battery performance over time. When capacity drops noticeably, schedule replacement. Keep spare batteries in stock, stored at 40-50% charge in cool, dry conditions.
Firmware updates improve security and functionality, but they also introduce risk. A failed firmware update can brick your device, leaving it non-functional until you can re-flash it. Never update firmware on all devices simultaneously. Update one device, test it thoroughly for several days, then update others one at a time. This staged approach ensures you always have functional nodes while minimizing risk. Before any firmware update, record your current configuration settings, you may need to re-enter them if the update resets your device.
Communication protocols establish who can send what messages, how urgent information is prioritized, and what codes or brevity words streamline communication. Your network isn't a replacement for casual texting, it's an emergency communication system. Develop standard message formats: "Status OK," "Need assistance," "Rally at checkpoint," or whatever phrases suit your group's needs. Practice using these formats during weekly testing. When stress levels are high and information is critical, practiced protocols prevent confusion and wasted bandwidth.
Training family or group members on operation is perhaps the most overlooked aspect of preparedness. You might be proficient, but what happens if you're injured or separated from your primary device? Every adult in your household or mutual assistance group should be able to power on a device, send a message, and interpret received information. Conduct training sessions quarterly. Let others handle the devices, send messages, and troubleshoot basic problems. The goal isn't making everyone an expert, it's ensuring basic operational capability survives the loss of any single person.
Documentation ties everything together. Maintain a physical binder (not just digital files that become inaccessible during grid-down) containing node locations, encryption keys, contact lists, frequency settings, and deployment procedures. Include diagrams of your network topology, photographs of fixed installations, and troubleshooting guides. Store copies in multiple locations, your home, your vehicle, and with trusted network members. When you're operating under stress in a degraded environment, this documentation becomes invaluable.
Message discipline matters more than most users realize. Every transmission consumes battery power and occupies airtime that other nodes need. Keep messages brief and relevant. Use standard formats and abbreviations. Avoid unnecessary chatter. During actual emergencies, bandwidth becomes a precious resource, practice conserving it during routine testing so the habit carries over when it matters.
Security audits should happen quarterly. Review who has access to your encryption keys. Check whether any unauthorized devices have appeared on your network. Verify that all users still require access, remove devices for people who've moved away or left your group. Consider changing encryption keys annually or after any security concern. Yes, this requires reconfiguring all devices, but it ensures your private network remains private.
Environmental monitoring helps predict failures before they happen. Keep notes on how your network performs in different weather conditions. Document any dead zones or areas with marginal coverage. Track how seasonal vegetation changes affect range, that hilltop repeater with perfect line-of-sight in winter might be blocked by foliage in summer. Understanding these patterns lets you adjust your network proactively rather than discovering problems during emergencies.
The testing and maintenance burden might seem excessive, but consider the alternative. When conventional communications fail and you reach for your Meshtastic network, you discover dead batteries, corrupted firmware, or forgotten encryption keys. The network you spent money and time building provides no capability because you didn't maintain it. Regular testing takes minimal time but buys confidence that your backup communication system actually works when everything else has failed. That confidence is worth far more than the time invested.
Weighing the advantages and limitations
Meshtastic networks offer compelling benefits for emergency communications, but they're not perfect solutions for every situation. Understanding both strengths and weaknesses helps you deploy them effectively and maintain realistic expectations.
Advantages:
- Infrastructure independence: No reliance on cellular towers, internet, or grid power
- Cost-effective: Significantly cheaper than satellite phones or commercial radio systems
- No licensing required: Legal to operate without amateur radio licenses or permits
- Scalable: Start with two nodes, expand to dozens as needs and budget allow
- Encrypted: AES-256 encryption protects message content from casual interception
- Low power consumption: Devices run for days on small batteries, indefinitely with solar
- Automatic routing: Messages find paths through the mesh without manual intervention
- Community support: Active development community and extensive online documentation
Limitations:
- Range constraints: Typically limited to a few kilometers without elevated repeaters
- Bandwidth limitations: Text-only communication, no voice or video capability
- Message latency: Messages may take seconds to minutes to reach destination
- Line-of-sight dependency: Terrain and obstacles significantly reduce range
- Weather sensitivity: Heavy rain and storms can degrade signal propagation
- Learning curve: Initial setup and network planning require technical understanding
- Battery management: Requires regular charging and eventual battery replacement
- No emergency services integration: Cannot call 911 or contact official emergency responders
The technology excels at maintaining communication within defined groups across moderate distances. A family spread across a suburban area, a mutual assistance group in a rural county, or a neighborhood watch organization all represent ideal use cases. Meshtastic provides the communication backbone these groups need during emergencies when conventional systems fail.
The technology struggles with long-distance communication without extensive infrastructure. Connecting locations fifty kilometers apart requires multiple repeater nodes positioned at elevated locations along the path. This is achievable but demands significant planning and installation effort. For truly long-distance emergency communications, amateur radio HF systems remain superior despite their licensing requirements and complexity.
Text-only communication limits some applications. You can't coordinate complex activities as efficiently as voice communication allows. Medical emergencies requiring detailed symptom descriptions become challenging. Situations demanding immediate back-and-forth discussion suffer from message latency. These limitations don't make Meshtastic useless, they mean you need realistic expectations about what the technology can and cannot do.
Practical deployment recommendations
Based on the capabilities and limitations discussed, here are specific recommendations for different user profiles.
Urban and suburban families should start with three nodes, one at home, one mobile for each vehicle. Add a fourth node at an elevated location (rooftop or tall building) configured as a repeater. This provides coverage across most suburban neighborhoods and maintains communication during local emergencies. Budget approximately $200-300 for this basic setup.
Rural homesteads should deploy at least four nodes with two configured as solar-powered repeaters at elevated locations. GPS integration becomes more valuable in rural environments where landmarks are less obvious. Plan for longer distances between nodes and invest in upgraded antennas. Budget approximately $400-500 for adequate coverage.
Mutual assistance groups should ensure each member household has at least two nodes, one fixed, one mobile. The group should collectively fund and maintain elevated repeater nodes at strategic locations providing coverage across the group's geographic area. Establish clear communication protocols and conduct regular training exercises. Per-household budget: $150-250, plus shared infrastructure costs.
Neighborhood organizations should deploy a network of fixed repeater nodes providing coverage across the neighborhood. Individual households can then connect with basic mobile nodes. This shared infrastructure approach reduces per-household costs while providing robust coverage. Consider solar power for all fixed nodes to ensure operation during extended outages.
Regardless of your profile, start small and expand based on actual testing results. Buy two devices, configure them, test range and reliability in your specific environment. Identify coverage gaps, then add nodes strategically to fill those gaps. This incremental approach costs less than buying everything at once and ensures you spend money on equipment that actually improves your network rather than theoretical capabilities you don't need.
Document everything as you build. Photograph installations, record GPS coordinates of fixed nodes, maintain lists of encryption keys and device configurations. This documentation becomes critical when you need to troubleshoot problems, add new nodes, or recover from device failures. Store physical copies in multiple locations, digital documentation does no good when computers are unavailable.
Train regularly with the people who will actually use the network. Technical capability means nothing if family members don't know how to power on a device and send a message. Conduct quarterly exercises where you communicate using only the Meshtastic network. Practice deploying backup devices from Faraday storage. Run scenarios where primary nodes fail and you must establish communication using only backups. This training identifies gaps in your procedures while there's still time to fix them.
The goal isn't building the most technically impressive network, it's ensuring you can communicate when conventional systems fail. A modest network that you maintain and practice with regularly outperforms an elaborate network that sits unused until an emergency reveals all the problems you never discovered during testing. Start simple, test thoroughly, expand deliberately, and maintain consistently. This approach builds genuine capability rather than false confidence.