Why Your Child Needs a School Emergency Kit
Picture this: you've just dropped your daughter off at school, watching her backpack bounce as she runs toward the playground to meet her friends. You drive away confident she has everything she needs for the day—her lunch, homework, library books. But does she have what she needs if the ground suddenly starts shaking?
Earthquakes strike without warning, and they don't wait for convenient moments. When seismic activity happens during school hours, your child may be separated from you while schools shelter students in place. Buildings need inspection, roads require clearing, and communication systems must be restored. During this uncertain time, having a personalized emergency kit can make an enormous difference in your child's physical safety and emotional wellbeing.
The reality is that earthquakes can happen anywhere and at any time, making school preparedness essential . While we often associate major earthquakes with places like California, seismic events occur across the United States and can catch communities off guard. Beyond the immediate physical dangers, children experience psychological impacts during emergencies that we shouldn't underestimate. A familiar comfort item—something as simple as a small stuffed animal or a family photo—can provide crucial emotional stability when everything else feels chaotic and uncertain.
Children should have their own emergency supply kit that includes comfort items like a favorite toy or blanket, along with practical necessities . This isn't about creating fear. Think of it like teaching your child to buckle their seatbelt or look both ways before crossing the street. You're empowering them with tools and resources that help them feel secure and prepared.
- First Aid Kit
- Basic bandages, antiseptic wipes, and pain relievers for treating minor injuries
- Emergency Water
- Bottled water or water pouches to stay hydrated during extended emergencies
- Non-Perishable Snacks
- Granola bars, crackers, or dried fruit that won't spoil and provide quick energy
- Flashlight & Batteries
- Battery-powered light source for power outages or dark emergency situations
- Emergency Contact List
- Laminated card with parent, guardian, and emergency contact phone numbers
- Whistle
- Loud signaling device to attract attention and call for help when needed
Essential Items for Your Child's School Emergency Kit
Building an effective emergency kit for your child means striking a balance between comprehensive preparation and practical portability. Every item needs to earn its place since your child will be carrying this kit. Think of it as packing for a camping trip where space is limited but safety comes first.
Emergency Contact Information: Start with a laminated emergency contact card featuring multiple phone numbers—yours, your partner's, a nearby relative, and an out-of-state contact. Students should have emergency contact cards with them at all times during school . Include your child's full name, address, any critical medical information like allergies, and your family's meeting place if you're separated. When local phone lines jam up during emergencies, that out-of-state contact becomes your communication lifeline.
Comfort and Familiarity: Pack one small comfort item that holds meaning for your child. This might be a tiny stuffed animal that fits in their palm, a family photo in a protective plastic sleeve, or a small token from home. During the stress of an emergency, these familiar objects provide emotional anchoring. They help children regulate their feelings and maintain composure when adults around them are also stressed.
Safety Tools: A whistle attached to the outside of the backpack serves dual purposes. It helps rescuers locate your child if they're trapped or separated, and it gives your child an active way to call for help without exhausting their voice. Include a small but sturdy flashlight with fresh batteries. Consider models that are LED-based and designed for children's hands. These are easy to grip and operate even when scared.
Basic First Aid: Age-appropriate first aid supplies should include adhesive bandages in fun designs (which somehow make minor scrapes more bearable), individually wrapped antiseptic wipes, a small tube of antibiotic ointment, and any personal medications your child needs with clear instructions attached. Keep quantities small. This isn't a full medical kit, just enough to address minor issues until professional help arrives.
Personal Hygiene: Don't overlook comfort items like travel-size tissues, hand sanitizer, and perhaps a small pack of unscented wet wipes. These simple additions help children maintain a sense of normalcy and cleanliness during extended shelter-in-place situations. Feeling clean can make a huge difference in how your child copes emotionally.
Food and Water for School Emergencies
When your child is stuck at school following an earthquake, familiar foods become more than just nutrition. They're a taste of home and normalcy in an abnormal situation. Pack foods your child already knows and likes to help reduce anxiety during stressful situations. This isn't the time to introduce new snacks or experimental protein bars your child has never tried before.
Choose non-perishable items that don't require any preparation and won't create a mess if the package gets crushed in a backpack. Individual packets of crackers, shelf-stable fruit pouches, granola bars your child actually likes, or small boxes of raisins all work well. Avoid anything that requires opening with tools, generates loud crinkling noises that might be disruptive, or could melt in warm conditions. Single-serving nut butter packets paired with crackers provide protein and comfort, though you'll need to verify your school's allergy policies first.
Water presents its own challenge since it's heavy and takes up significant space. Individual water packets or juice boxes with long shelf lives offer good solutions. Emergency kits should include enough supplies for at least 72 hours . Some families prefer small water bottles with sport caps that seal tightly and won't leak when jostled around in a backpack throughout the school day.
Food allergies and dietary restrictions require special attention when building your child's kit. If your child has celiac disease, dairy allergies, or other dietary needs, you can't assume the school's general emergency supplies will accommodate them. Pack foods you know are safe. Attach a small note to the kit reminding teachers and emergency responders about these restrictions.
Water and food supplies should be checked and rotated regularly—set a reminder for every six months . Make this a fun ritual rather than a chore. Let your child help select replacement snacks, and you can eat the old supplies together during a family movie night. This turns preparedness maintenance into a positive family experience instead of another item on your to-do list.
Communication and Comfort Items
Getting the communication elements right can mean the difference between hours of worry and relatively quick reunification after an emergency. Let's walk through exactly what information your child needs and how to present it in a way that's accessible even when they're frightened or disoriented.
Step 1: Create the Emergency Contact Card. Use a sturdy cardstock or print on regular paper that you'll laminate. At the top, write your child's full name and date of birth. Below that, list at least four contacts: both parents' cell and work numbers, a local relative or trusted neighbor, and crucially, an out-of-state contact. During major local disasters, cell towers can become overwhelmed with traffic. An out-of-state contact may be easier to reach and can relay messages between family members who can't connect directly.
Step 2: Add Medical Information. Include any allergies, medications, or medical conditions in clear, simple language. If your child has asthma, note where their inhaler is located. If they're diabetic, include relevant details. Keep this information brief but complete. Imagine an unfamiliar teacher or first responder reading it in a stressful moment with limited time.
Step 3: Include Reunion Instructions. Write down your family's emergency meeting place and any alternative locations. Explain in child-friendly language: "If school is closed and Mom or Dad can't get there, Mrs. Johnson next door will come get you" or "We will meet at Grandma's house if we can't go home." This clarity removes guesswork during a time when clear thinking is already difficult.
Step 4: Add a Comfort Photo. Slip a recent family photo into a small plastic sleeve or laminate it along with the contact card. Seeing your smiling faces can provide enormous reassurance when your child is wondering where you are and when you'll arrive. Write a short, encouraging message on the back: "We love you and will come get you as soon as it's safe." These words matter more than you might think.
Step 5: Make It Accessible. Place one copy in your child's emergency kit, another in their backpack's front pocket, and give a third to their teacher to keep on file. Redundancy matters when things get chaotic. If one copy gets lost or damaged, others remain available.
Earthquake-Specific School Safety Items
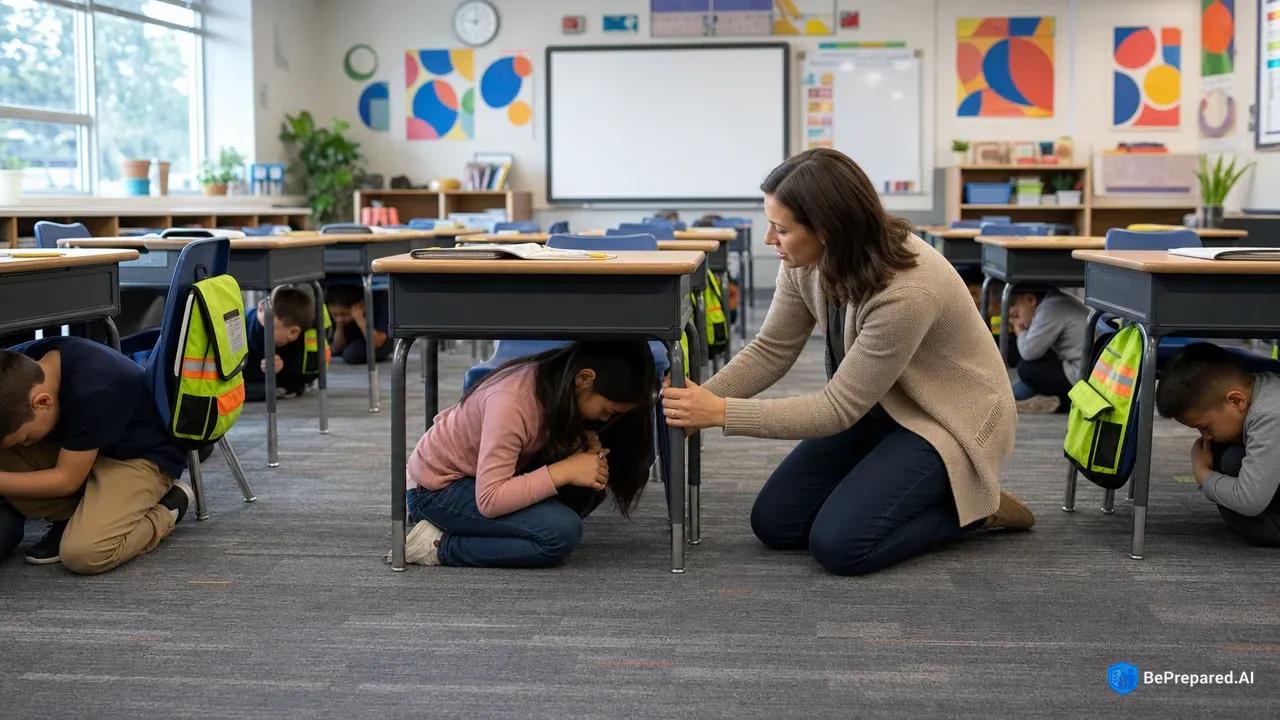
Earthquakes create unique hazards that require specific protective equipment beyond general emergency supplies. If you are in school during an earthquake, get under a desk or table and hold on, but once the shaking stops, the environment becomes filled with new dangers . Broken glass, fallen ceiling tiles, cracked walls, and clouds of dust transform familiar hallways into obstacle courses.
Sturdy Footwear Protection: Pack a pair of thick-soled shoes or commercial shoe covers designed for emergencies. After an earthquake, broken glass and debris litter floors. Walking even short distances becomes dangerous. These shoes should be easy for your child to slip on quickly. Avoid complicated laces if your child is young. Some families use thick socks with rubberized grips as a lightweight alternative that takes up less space.
Respiratory Protection: Collapsed structures and damaged buildings can release dust and debris into the air. Include child-sized N95 or KN95 masks, or at minimum, several simple dust masks. Older buildings particularly may release decades of accumulated dust from walls and ceilings when they shake. These masks protect small lungs from inhaling harmful particles and provide a sense of security when visibility drops.
Hand Protection: Work gloves sized appropriately for children's hands allow them to move debris, open doors with damaged handles, or steady themselves against rough surfaces without injury. Look for gloves with rubberized grips that won't slip off easily. Leather gardening gloves work well and come in youth sizes at most hardware stores.
Signaling and Visibility Tools: Beyond the whistle mentioned earlier, add glow sticks to your child's kit. These chemical light sources work without batteries, last for hours, and can be seen from a distance even through dust or smoke. They're also comforting. There's something reassuring about holding your own light source when the power is out and everything feels uncertain.
Emergency Blanket: Those thin, metallic emergency blankets fold down to the size of a deck of cards but provide warmth and can serve as a clean surface to sit on if your child needs to wait outside while buildings are inspected. They also reflect body heat, which matters if your child is in shock or the weather is cold.
Packing and Maintaining Your Child's Kit
The best emergency kit in the world won't help if your child can't carry it, doesn't know what's inside, or discovers critical items have expired when they're needed most. Let's walk through the practical steps of assembling and maintaining a kit that will actually function when called upon.
Step 1: Choose the Right Container. Select a small, lightweight backpack or zippered pouch that your child can carry comfortably. Bright colors help. If the kit gets separated from your child, a neon green or orange bag is much easier to spot than basic black or navy. Some families use clear plastic pouches so contents are visible at a glance, though this means less privacy for personal items.
Step 2: Pack Strategically. Place heavier items like water at the bottom, creating a stable base. Put frequently needed items like the flashlight and whistle in outside pockets for quick access. Seal food items in an additional plastic bag to contain any leaks or crumbs. Use small zip-top bags to organize categories—one for first aid, one for hygiene items, one for food. This organization helps your child find what they need quickly.
Step 3: Involve Your Child in the Process. Sit down together and examine each item as you pack it. Explain what it's for in simple, non-frightening terms. Let your child choose which comfort item to include or pick between two acceptable snack options. This involvement builds ownership and helps ensure they'll remember what's available when stress makes thinking clearly more difficult. Schools in earthquake-prone areas should conduct regular drills and maintain emergency supplies , and your home preparation should complement these school efforts.
Step 4: Coordinate with School Policies. Contact your child's school to understand their emergency procedures and supply policies. Some schools have specific requirements about what students can keep in their lockers or desks. Others maintain centralized emergency supplies but welcome individual kits. Understanding these policies helps you work within the system rather than against it. You might discover your school already has excellent resources in place.
Step 5: Establish a Maintenance Schedule. Emergency kits require regular maintenance to remain effective . Set phone reminders for every six months to check your child's kit together. Replace expired food and water, swap out clothes if your child has grown, update photos and contact information if anything has changed, test the flashlight batteries, and verify that medications haven't expired. Many families align these checks with daylight saving time changes as an easy way to remember.
Step 6: Practice Regular Drills. At least twice a year, do a practice drill at home. Simulate an earthquake scenario. Have everyone drop, cover, and hold on, then afterward, have your child locate their emergency kit and show you how they would use key items. This rehearsal builds muscle memory and confidence that will serve them well in a real emergency. Make it feel like a game rather than a test to keep anxiety low.
Teaching Your Child About Their Emergency Kit
Knowledge transforms an emergency kit from a mysterious backpack into a tool that empowers your child. Children who understand their emergency supplies are more likely to use them effectively. Practice helps children remember procedures during stressful situations. The goal is making preparedness feel natural and manageable, not frightening.
Start by explaining each item's purpose using language appropriate for your child's age and maturity level. For a younger child, you might say, "This whistle is like your special voice that can be heard from far away if you need help." For an older child, you can be more direct: "If part of the building collapses and you're trapped, this whistle helps rescuers find you without you having to yell and get tired."
Practice emergency procedures at home in a way that feels like a game rather than a test. Set up scenarios: "Imagine the lights just went out—can you find your flashlight and turn it on?" or "Pretend you need to tell someone Mommy's phone number—where's your emergency card?" This kind of relaxed practice builds familiarity without creating anxiety. You can even time these activities to add a fun competitive element.
Role-playing different scenarios helps children think through decision-making processes before stress impairs their judgment. Walk through questions together: "What would you do if the earthquake happened during lunch?" "What if your teacher was hurt and couldn't help?" "Where would you go if you couldn't stay in your classroom?" These conversations reveal gaps in understanding and give you opportunities to clarify confusion before it matters.
Emphasize when and how to use the whistle. This is particularly important because you don't want your child blowing it unnecessarily during drills or minor incidents. Explain that the whistle is for true emergencies when they need adult help and normal methods of getting attention aren't working. Many emergency responders recommend a pattern of three short blasts, followed by a pause, then repeating. This pattern signals distress rather than random noise.
Review your school's specific emergency procedures together. Many schools send home information about their earthquake protocols, evacuation routes, and parent reunification procedures. Read these with your child, talk about what they mean, and connect them to the supplies in their kit. Understanding the bigger picture—that adults have plans and systems in place—provides reassurance that they're not facing emergencies alone.
Discuss what your child should do if they can't find their kit during an emergency. Emphasize that the kit is helpful but not essential to their survival. The most important actions are following their teacher's instructions, staying calm, and remembering the safety procedures they've practiced. The kit enhances their safety and comfort, but their knowledge and behavior matter most.
Preparing your child for earthquake safety at school doesn't have to be overwhelming or scary. By breaking it down into manageable steps and involving your child in the process, you're teaching valuable life skills while providing practical protection. Start building your child's emergency kit today by gathering just three items: an emergency contact card, a comfort item, and a small flashlight. From there, you can add other supplies gradually, creating a comprehensive kit that gives both you and your child greater peace of mind every time they walk through those school doors.