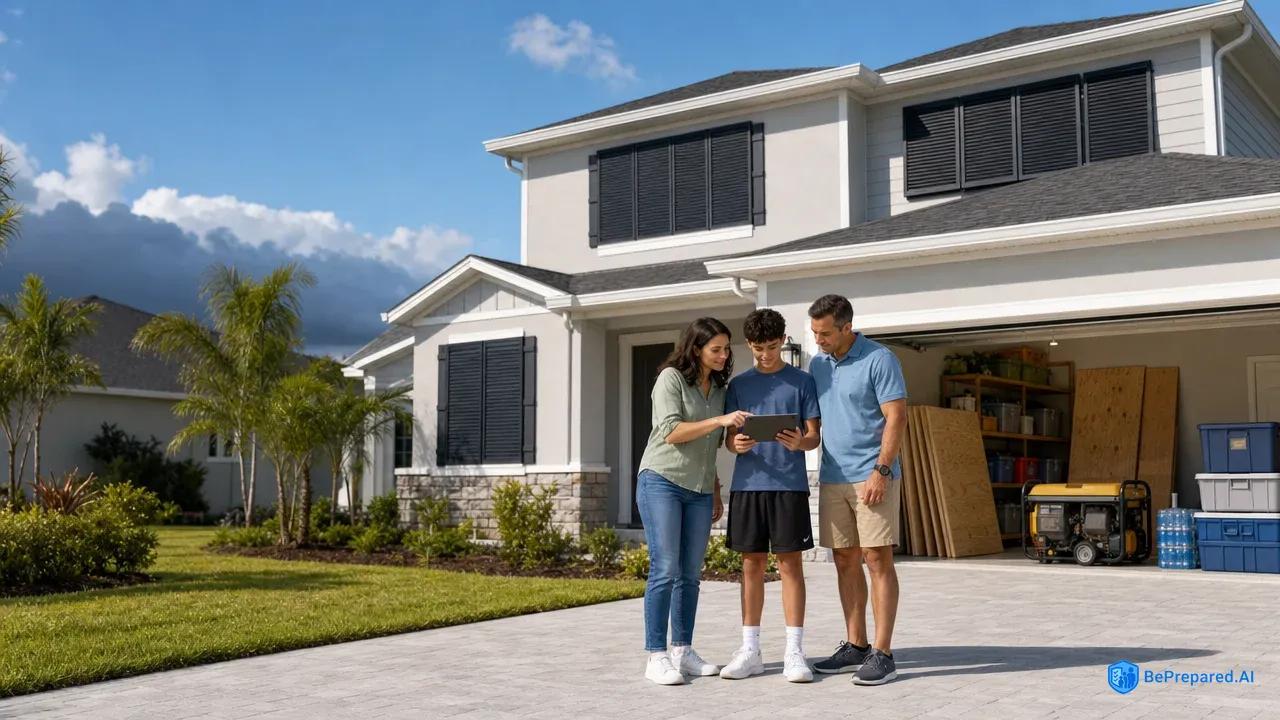
Your Hurricane Protection Command Center: Building Comprehensive Defense
The morning sky takes on that peculiar shade of gray-green that coastal residents know all too well. Your phone buzzes with the first hurricane watch notification, and suddenly the abstract concept of "being prepared" becomes urgently concrete. You stand in your garage, looking at unmarked sheets of plywood leaning against the wall, wondering if they'll actually fit your windows—and whether you remembered to buy enough bolts to secure them.
Hurricane protection isn't a single action you take when the storm appears on the radar. It's a comprehensive defense system built layer by layer, long before the first tropical depression forms in the Atlantic. Think of it as creating a command center for your home and family—one that coordinates physical barriers, evacuation strategies, insurance documentation, and recovery plans into a unified protective shield. The difference between a family that weathers a hurricane with minimal disruption and one that faces months of chaotic recovery often comes down to how well these layers were constructed before the storm season even began.
The stakes couldn't be higher. Storm surge—the abnormal rise of water generated by a storm's winds—is the deadliest aspect of hurricanes, responsible for nearly half of all hurricane-related deaths . Storm surge can reach heights well over 20 feet and can span hundreds of miles of coastline . Yet this isn't a call to fear; it's a call to action grounded in a powerful reality: proper window protection can prevent the majority of structural damage from wind-borne debris. When you understand that your preparation directly translates to protection, the task ahead becomes less overwhelming and more empowering.
Your hurricane protection command center operates on three fundamental pillars. First, physical defenses transform your home from vulnerable structure to fortified shelter. Second, evacuation planning ensures you know exactly when to stay and when to go—and where to go when that decision is made. Third, recovery preparation means that even in worst-case scenarios, you've laid the groundwork for rapid restoration of normalcy. Each pillar supports the others, and weakness in any one area compromises your entire defense strategy.
- Window & Door Reinforcement
- Install storm shutters, plywood boarding, or impact-resistant barriers with proper anchoring systems verified and secured
- Roof & Structural Integrity
- Inspect and secure loose shingles, clear gutters, trim overhanging branches, and verify structural tie-downs are properly fastened
- Utility Systems Shutdown
- Locate and test main electrical breakers, gas shutoffs, and water valves with clear labeling and emergency contact information posted
Fortifying Your Home's Physical Defenses
The wind doesn't destroy most homes during a hurricane—flying debris does. A single piece of patio furniture traveling at 100 miles per hour becomes a missile that can shatter windows, breach walls, and transform your home's interior into a wind tunnel where the real structural damage begins. This is why window protection stands as your first and most critical line of physical defense.
FEMA recommends 5/8-inch marine plywood cut to fit each window opening for boarding . Notice the specificity here: not just "plywood," but marine-grade plywood of a particular thickness. Regular construction-grade plywood may look similar, but it lacks the water-resistant properties and structural integrity needed to withstand hurricane conditions. Each sheet should overlap the window frame on all sides, creating space for secure fastening. Mark each piece clearly with the window it fits—"Master Bedroom Left," "Kitchen Window 2"—because in the 36 hours before landfall, you won't have time to puzzle-match wood to openings.
The installation method matters as much as the material. Drill pilot holes through the plywood and directly into the wall studs surrounding your windows, not just into the exterior siding. Use corrosion-resistant screws or hurricane clips, spaced evenly around the perimeter. This creates a connection strong enough to resist both the positive pressure of wind pushing against the board and the negative pressure trying to suck it away from the building. Store all hardware in clearly labeled bags attached to each corresponding plywood sheet—future you, working against a hurricane timeline, will appreciate this organization immensely.
Permanent storm shutters represent a superior alternative if your budget allows. Accordion shutters, roll-down shutters, or Bahama shutters eliminate the physical labor and time pressure of installation while providing stronger protection . They deploy in minutes rather than hours, a crucial advantage when hurricanes intensify rapidly or your physical capabilities are limited. The initial investment pays dividends in both convenience and insurance premium reductions. Many insurance companies offer discounts for permanent hurricane protection systems, with savings that can offset installation costs over time.
Your roof represents the most vulnerable part of your home's structural envelope. Wind doesn't just blow across a roof; it creates uplift that tries to peel the entire structure away from the walls. Hurricane straps or clips—metal connectors that bind the roof framing directly to the wall structure—dramatically increase resistance to this uplift force. If your home was built before modern hurricane codes were implemented, a structural engineer can assess whether retrofitting these connections is advisable. Similarly, ensuring your roof covering is properly installed with adequate fasteners prevents the cascading failure that occurs when a few missing shingles allow water infiltration that leads to sheathing damage that compromises the entire roof system.
Garage doors are often the weakest point in hurricane protection . When a garage door bows inward or fails completely, wind enters the home's interior and increases internal pressure dramatically, pushing outward on walls and upward on the roof. Retrofit kits that add horizontal and vertical bracing to standard garage doors can be installed by homeowners with basic tools. For homes in high-risk zones, replacing standard garage doors with hurricane-rated versions provides the most reliable protection.
Walk your property and think like the wind. That decorative trellis, those clay pots, the children's trampoline—each becomes a potential projectile. Wind of 39 mph can break branches , and stronger hurricane winds turn loose objects into dangerous missiles. Secure or store everything that isn't permanently anchored. Trim tree branches that overhang your roof or could reach your home if they break. Clear gutters and downspouts so water can drain away from your foundation during the torrential rains that accompany hurricanes. These seemingly minor tasks, completed during the calm of spring, prevent major damage when autumn storms arrive.
Pros and Cons of Physical Defense Options
Plywood Boarding:
- Pros: Low cost, readily available, effective protection, can be DIY installed
- Cons: Labor-intensive installation, requires storage space, must be installed before each storm, physical demands may be challenging for some homeowners
Permanent Storm Shutters:
- Pros: Quick deployment, superior protection, insurance discounts, no storage needed, easier for those with physical limitations
- Cons: Higher upfront cost, professional installation often required, permanent aesthetic impact on home appearance
Hurricane Straps/Clips:
- Pros: Significant structural reinforcement, one-time installation, invisible from exterior, may qualify for insurance discounts
- Cons: Requires professional installation, retrofitting existing homes can be expensive, may require structural modifications
Know Your Evacuation Zone and Escape Routes
Storm surge is the deadliest aspect of hurricanes according to NOAA's National Hurricane Center , yet many coastal residents don't know whether they live in an evacuation zone or understand what those zone designations actually mean. This knowledge gap can prove fatal. Evacuation zones aren't based on wind speed—they're calculated according to storm surge risk, the height of water that could inundate your area based on storm category, approach angle, and local topography.
Coastal communities typically designate evacuation zones using letters A through E, with Zone A representing the highest risk areas that flood even from Category 1 storm surge . A Category 1 hurricane can produce storm surge of 4-5 feet above normal tide levels . Zone B faces significant flooding from Category 2 storms, and so on through the categories. Some jurisdictions use color codes or numerical systems instead, but the principle remains constant: these zones tell you precisely when you need to evacuate based on the forecasted storm intensity. A Category 3 hurricane approaching your coast means Zone A, B, and C residents must evacuate, while Zone D and E residents may shelter in place if their homes are structurally sound.
Finding your evacuation zone requires just a few minutes of research that could save your life. Most county emergency management websites maintain interactive maps where you enter your address and instantly see your zone designation. The South Carolina Emergency Management Division's "Know Your Zone" program, replicated in many coastal states, provides not just zone information but also recommended evacuation routes and shelter locations. Complete this research now, during calm weather, and write your zone designation in multiple places: on your refrigerator, in your phone's notes, in your family emergency plan document.
Evacuation routes matter as much as knowing when to leave. Identify at least three different routes away from the coast, because hurricanes are unpredictable and so is traffic. The primary route may become congested or blocked by accidents. Secondary and tertiary routes provide options when thousands of other residents are simultaneously fleeing. Drive these routes during normal conditions so you understand the roads, know where gas stations are located, and can estimate travel time. Factor in that actual evacuation travel time will likely be three to five times longer than normal due to traffic volume.
Pet-friendly shelter identification solves a problem that keeps many people in dangerous situations. Families refuse to evacuate because they won't abandon their animals, yet many emergency shelters don't accept pets. Research and document pet-friendly hotels along each evacuation route—major chains like La Quinta Inn, Motel 6, and Best Western typically allow pets, though policies vary by location. Call ahead before hurricane season to confirm current policies and make note of any restrictions on animal size or number. Some communities establish pet-friendly emergency shelters; your local emergency management office maintains this information. The American Red Cross Safe and Well website helps you register your evacuation location so family members can find you.
Transportation and fuel planning prevents the nightmare scenario of running out of gas on a gridlocked highway with a hurricane approaching. Never let your vehicle's fuel tank drop below half-full during hurricane season—this simple habit ensures you can evacuate immediately if necessary. Identify gas stations at regular intervals along your evacuation routes, understanding that stations closest to the coast will run out of fuel first as evacuation orders are issued. Consider keeping a small generator-safe gas can filled and properly stored for emergency use. If you don't own a vehicle, establish your evacuation plan now by identifying neighbors, family members, or community evacuation assistance programs that can provide transportation.
Evacuation Decision Matrix
Zone A Residents:
- Evacuate for all hurricane categories
- Storm surge risk present even from tropical storms
- Mandatory evacuation orders typically issued first
- Plan to leave 48+ hours before landfall
Zone B-C Residents:
- Evacuate for Category 2 and higher storms
- Monitor storm intensity forecasts closely
- Prepare to leave on short notice
- Have evacuation supplies ready at all times
Zone D-E and Inland Residents:
- May shelter in place for most storms
- Ensure home meets structural safety standards
- Have supplies for extended power outages
- Be prepared to evacuate if conditions deteriorate
Essential Supplies and Communication Planning
The power goes out, and suddenly your carefully planned life goes dark. No lights, no refrigeration, no air conditioning, no way to charge your phone, no internet connection to check storm updates. This scenario isn't hypothetical—it's the guaranteed reality of major hurricane impact. Your 72-hour supply kit isn't pessimism; it's the minimum buffer between discomfort and genuine crisis.
Water Storage Requirements:
- One gallon per person per day for drinking and sanitation
- Multiply by three days minimum, seven days recommended
- Four-person household needs 12-28 gallons stored
- Additional water for pets based on size and needs
- Store in food-grade containers away from direct sunlight
- Rotate every six months to maintain freshness
Food Supply Specifications:
- Non-perishable items requiring no cooking or refrigeration
- Manual can opener (electric versions become useless)
- Protein sources: canned tuna, chicken, beans, peanut butter
- Carbohydrates: crackers, granola bars, dried fruit, cereal
- Comfort foods that boost morale during stressful situations
- Special dietary needs including baby formula and pet food
- Consider dietary restrictions and allergies for all family members
Power and Lighting Solutions:
- Battery-powered or hand-crank radio (essential when cell towers fail)
- NOAA Weather Radio for continuous storm updates
- LED flashlights with extra batteries for each family member
- Headlamps for hands-free lighting during repairs or cleanup
- Portable phone chargers (power banks) fully charged before storm
- Solar-powered chargers as backup for extended outages
- Battery-powered or propane camping lantern for area lighting
Medical and Hygiene Supplies:
- Prescription medications (30-day supply minimum)
- First aid kit with trauma supplies, not just bandages
- Personal hygiene items including toilet paper, soap, feminine products
- Hand sanitizer and disinfecting wipes
- Garbage bags for waste management when plumbing fails
- Prescription glasses or contacts with solution
- Any medical equipment and supplies for family members with special needs
Important Document Protection:
- Waterproof container or safe for critical papers
- Insurance policies (homeowners, flood, auto, health)
- Property deeds and mortgage information
- Birth certificates, passports, Social Security cards
- Banking and financial account information
- Medical records and prescription information
- Digital backups stored in cloud or with out-of-state family
Communication planning addresses the reality that modern connectivity cannot be assumed during disasters. Cell towers lose power, get damaged, or become overwhelmed by call volume. Your family needs a predetermined plan that doesn't rely on everyone's phones working perfectly. Designate an out-of-state contact person who serves as the family information hub—someone in Arizona or Ohio who's unaffected by the hurricane and can relay messages between family members who can't directly reach each other. This person's phone number should be memorized by all family members, not just stored in phones that might die or get damaged.
Text messages often work when voice calls fail because they require less bandwidth and can queue for delivery when networks are congested. Establish a family code system: "Code Green" means everyone is safe, "Code Yellow" means minor problems but not in danger, "Code Red" means emergency assistance needed. These brief messages can transmit even on severely limited networks. Social media platforms like Facebook's Safety Check feature allow you to mark yourself safe during disasters, notifying all your friends and family simultaneously without individual messages.
- May-June: Foundation Phase
- Establish baseline preparedness with emergency kits, evacuation routes, insurance reviews, and communication plans. Green urgency level for systematic preparation.
- September: Critical Monitoring Period
- Implement active tracking systems, conduct final equipment checks, coordinate with local authorities, and prepare for rapid deployment. Orange urgency for heightened vigilance.
- November: Season Transition
- Conduct post-season assessments, document lessons learned, replenish depleted supplies, and begin planning for next year. Green urgency for evaluation phase.
Supply Kit Pros and Cons
Pre-Assembled Emergency Kits:
- Pros: Convenient, comprehensive, professionally curated, ready immediately
- Cons: More expensive than DIY, may include items you don't need, less customization for specific family needs
DIY Custom Kits:
- Pros: Cost-effective, tailored to family needs, allows quality control of items, can be built gradually
- Cons: Requires research and planning, easy to forget critical items, takes time to assemble
Recommended Approach: Start with a basic pre-assembled kit as your foundation, then customize by adding family-specific items like prescription medications, pet supplies, infant needs, and comfort items. This hybrid approach balances convenience with personalization while ensuring you don't overlook critical supplies.
Insurance and Financial Protection Strategies
The floodwater recedes, leaving behind a brown waterline on your walls and the acrid smell of contamination. You call your homeowner's insurance company, confident your policy will cover the damage. The adjuster's response shocks you: "I'm sorry, but flood damage isn't covered under your homeowners policy. You needed separate flood insurance." This conversation happens thousands of times after every major hurricane, leaving families financially devastated not by the storm itself, but by insurance coverage gaps they didn't know existed.
Standard homeowners insurance specifically excludes flood damage according to the National Flood Insurance Program . This isn't a technicality or fine print—it's a fundamental separation in how property insurance operates. Your homeowners policy covers wind damage: if the hurricane's winds tear off your roof and rain enters through that opening, you're covered. But if storm surge or flooding enters through your doors and windows, causing water damage from the ground up, you're not covered unless you purchased separate flood insurance. This distinction confuses and bankrupts homeowners who assumed "hurricane coverage" meant comprehensive protection.
Flood insurance through the National Flood Insurance Program (NFIP) has a mandatory 30-day waiting period before coverage begins . You cannot wait until a hurricane forms in the Atlantic and then purchase flood insurance—by then it's too late. This waiting period exists to prevent adverse selection, ensuring people buy insurance based on ongoing risk rather than imminent threat. The timeline implications are critical: you must purchase flood insurance during the calm months when no storms threaten, which requires overcoming the human tendency to delay preparation until danger feels immediate.
The cost and coverage structure of flood insurance differs significantly from homeowners policies. NFIP policies offer building and contents coverage with specific limits. Premiums vary based on your flood zone designation, your home's elevation relative to the base flood elevation, and whether you're grandfathered under older flood maps. Homes in high-risk flood zones typically pay higher premiums than those in moderate-risk zones. Private flood insurance has emerged as an alternative to NFIP in recent years, sometimes offering higher coverage limits or different premium structures depending on your specific situation. Compare both options during your research phase.
Homeowners insurance hurricane deductibles operate differently than standard deductibles. Instead of a flat dollar amount, hurricane deductibles are often percentage-based: a percentage of your home's insured value. For a home insured at $300,000 with a percentage-based hurricane deductible, you'll pay a substantial amount of damage out of pocket before insurance coverage begins. This deductible typically applies per storm season in most policies, not per storm, though specific policy language varies. Review your policy declarations page now to understand your hurricane deductible—many homeowners are shocked to discover they have a percentage-based deductible they never knew existed.
Pre-storm documentation creates the evidence foundation your insurance claims will rest upon. Walk through your home with your phone's camera, recording video of every room from multiple angles. Open closets, cabinets, and drawers to document contents. Focus on high-value items, showing brand names, model numbers, and condition. Photograph the exterior of your home from all sides, including roof condition, windows, doors, and landscaping. Store this documentation in cloud storage or email it to yourself so it's accessible even if your phone is damaged or lost. This 30-minute investment, updated annually, can mean the difference between a smooth claims process and a protracted battle with adjusters over what existed before the storm.
FEMA assistance is not a substitute for insurance . FEMA's Individual and Households Program provides disaster assistance, but understanding its limitations prevents false expectations. It's a supplementary safety net for uninsured or underinsured losses. FEMA grants after major hurricanes typically cover only a portion of major home repair costs. FEMA assistance is designated for specific categories: temporary housing, home repairs, medical expenses, and other disaster-related needs. You must first file insurance claims and receive determinations before FEMA will consider your application. FEMA assistance may be in the form of grants that don't require repayment, or low-interest disaster loans that do require repayment. Understanding this structure helps you maintain realistic expectations about post-disaster financial assistance.
Insurance Coverage Comparison
Homeowners Insurance:
- Covers: Wind damage, rain through wind-created openings, falling trees, structural damage from wind
- Excludes: Flood damage, storm surge, rising water, ground water seepage
- Deductibles: Often percentage-based for hurricanes
- Purchase timing: Can be purchased anytime (subject to underwriting)
Flood Insurance (NFIP):
- Covers: Flood damage, storm surge, rising water, mudflow
- Excludes: Wind damage, contents in basement, landscaping, temporary housing
- Deductibles: Separate for building and contents
- Purchase timing: 30-day waiting period before coverage begins
Why You Need Both: Hurricanes produce both wind and water damage. Without both policies, you're only protected against half the threats. The expense of carrying both policies is far less than the financial devastation of being underinsured when disaster strikes.
Post-Hurricane Recovery and Safety
The winds finally diminish to mere gales, then to breezes, then to an eerie calm. Sunlight breaks through thinning clouds, and your first instinct is to rush home to assess the damage. This impulse, while natural, can be deadly. Post-hurricane environments contain hazards more dangerous than the storm itself: downed power lines energizing floodwater, compromised structures ready to collapse, contaminated water carrying diseases, and carbon monoxide from improperly used generators. Your recovery begins not with action but with patience and systematic safety assessment.
Wait for official all-clear announcements from emergency management authorities before returning to evacuated areas. These announcements aren't bureaucratic caution—they reflect ground-truthed assessments of road conditions, power line status, and structural hazards. Roads may be impassable due to flooding, debris, or bridge damage. Traffic signals will be dark, requiring four-way stop treatment at every intersection. Downed power lines may be hidden under debris or standing water, and you cannot determine by looking whether a line is energized. Assume every downed line carries lethal voltage until utility crews confirm otherwise.
Your first approach to your property requires careful observation before entry. Stand back and scan the structure for obvious damage: sagging rooflines, leaning walls, separated foundations, or hanging debris. Look for standing water around the foundation and check whether floodwaters have receded or remain inside the home. Smell for gas leaks—that distinctive sulfur odor means you should not enter and should call the gas company immediately from a safe distance. Listen for hissing sounds that might indicate gas leaks or water leaks. If you have any doubt about structural stability, wait for professional assessment rather than risking injury or death from collapse.
Once you've determined entry is safe, document all damage with photographs before cleanup begins for insurance and FEMA claims . This is the critical moment for insurance claims—photograph and video every instance of damage you discover. Water lines on walls, damaged furniture, ruined appliances, ceiling damage, flooring damage, contents loss—capture it all from multiple angles with clear, well-lit images. The temptation to immediately start cleanup is strong, but premature cleanup can invalidate insurance claims by destroying evidence of damage extent and causation. Most insurance policies require you to prevent further damage (like tarping a damaged roof), but preserve the damage scene until an adjuster can inspect.
Mold begins growing within 24 to 48 hours after flooding according to the CDC , making rapid water removal your highest priority once documentation is complete. Every hour of delay allows mold spores to establish colonies that will require expensive professional remediation. Remove standing water using pumps or wet vacuums. Pull up wet carpeting and padding—these cannot be adequately dried and will harbor mold growth. Remove wet drywall well above the waterline, because wicking draws moisture higher than the visible water damage. Increase air circulation with fans, but only after electrical systems have been inspected and deemed safe.
Electrical system restoration requires professional assessment before you flip breakers or plug in appliances. Water and electricity create lethal combinations, and flooded electrical systems need thorough inspection, testing, and often replacement before safe operation. If your electrical panel was submerged, it likely needs complete replacement. If water reached outlets or switches, those circuits need inspection. Hire a licensed electrician to assess and certify your electrical system before restoration. The few hundred dollars this inspection costs could prevent electrocution or house fires from compromised wiring.
Water safety becomes critical in post-hurricane environments. Assume all floodwater is contaminated with sewage, chemicals, and bacteria. Wear rubber boots and gloves during all cleanup activities. Wash hands frequently with soap and clean water, or use hand sanitizer if clean water isn't available. Don't allow children to play in or near floodwater. Disinfect all surfaces that contacted floodwater using a solution of one cup bleach per gallon of water. Discard any food that contacted floodwater, and any food from refrigerators that lost power for more than four hours.
Never operate a generator inside your home, garage, basement, or any enclosed or partially enclosed space . Generators produce carbon monoxide—an odorless, colorless gas that causes death within minutes in enclosed spaces. Place generators outside with adequate distance from your home and with exhaust directed away from windows, doors, and air intakes. Install battery-operated carbon monoxide detectors in your home if you're using a generator. The hum of a generator running in a garage has lulled many families to sleep from which they never woke.
Post-Storm Safety Priorities
Immediate (First 24 Hours):
- Wait for official all-clear before returning
- Assess structural safety from outside
- Document all damage with photos and video
- Check for gas leaks and electrical hazards
- Begin water removal if safe to do so
Short-term (Days 2-7):
- Contact insurance company and file claims
- Prevent further damage with temporary repairs
- Remove wet materials to prevent mold
- Arrange professional inspections (electrical, structural)
- Apply for FEMA assistance if eligible
Long-term (Weeks 2+):
- Coordinate with contractors for permanent repairs
- Monitor for mold growth and address immediately
- Keep detailed records of all expenses
- Follow up on insurance and FEMA claims
- Begin restoring normalcy for family members
Your Hurricane Protection Action Plan
Hurricane season runs from June 1 through November 30 annually, but your preparation timeline should begin much earlier. Effective hurricane protection isn't a last-minute scramble when a storm appears on radar—it's a systematic annual cycle that builds and maintains your defensive layers during calm months when supplies are available, contractors have capacity, and you can work without time pressure.
January Through March: Foundation Building
- Review and update your family emergency plan
- Verify your evacuation zone hasn't changed due to updated flood maps
- Audit your insurance coverage, including flood insurance policy renewal
- Create or update your home inventory documentation with photos and video
- Research and select contractors for any structural improvements needed
- Order or build window protection systems if you don't have them
- Check generator function and schedule maintenance if needed
- Identify and purchase any missing emergency supplies while selection is good
April Through May: System Testing and Refinement
- Conduct family emergency drill including evacuation route practice
- Test all emergency equipment: radios, flashlights, generators
- Refresh emergency supplies, replacing expired food and medications
- Pre-cut and label plywood for any new windows or doors
- Complete any structural reinforcement projects before season begins
- Trim trees and remove potential debris from your property
- Photograph your property's current condition for insurance baseline
- Confirm contact information for out-of-state emergency contact person
Hurricane Watch Issued (48-Hour Window):
A hurricane watch means hurricane conditions are possible in your area within 48 hours . This is your preparation activation trigger, not your evacuation trigger. Fill vehicles with fuel before gas stations get crowded or run out. Withdraw cash from ATMs since power outages disable electronic payment systems. Fill bathtubs and large containers with water for sanitation if municipal water systems fail. Charge all electronic devices and portable power banks. Move outdoor furniture, decorations, and potential projectiles into garage or home. Review evacuation routes and confirm shelter locations. Install window protection systems if forecast track threatens your area.
Hurricane Warning Issued (36-Hour Window):
A hurricane warning means hurricane conditions are expected in your area. This is decision time. If you're in an evacuation zone matching the storm category, leave now before traffic becomes gridlocked. If you're sheltering in place, complete all outdoor preparations immediately—you won't be able to safely work outside once winds reach tropical storm force. Turn refrigerator and freezer to coldest settings to preserve food during power outage. Fill vehicles with fuel if you haven't already. Confirm your family communication plan and check in with out-of-state contact. Bring pets inside with supplies. Move important documents to highest level of home in waterproof container.
Annual Post-Season Review:
After hurricane season ends, conduct an honest assessment of your preparation effectiveness. What worked well? What gaps did you discover? What supplies ran out or proved inadequate? What parts of your plan caused confusion or stress? Use these insights to refine your approach for next year. Replace any emergency supplies that were used. Repair or improve any physical defenses that showed weakness. Update documentation to reflect any changes in family circumstances, contact information, or property conditions.
Building Your Support Network
Community resources and support networks multiply your individual preparation efforts. Join neighborhood groups or social media communities focused on local emergency preparedness. These networks share real-time information during storms, provide mutual aid during recovery, and create accountability for preparation during calm periods. Know where your local emergency operations center is located and how to access their information during disasters. Identify community organizations like churches, civic groups, or volunteer organizations that mobilize disaster response—these groups often coordinate relief efforts more rapidly than official channels in the immediate aftermath of storms.
Your local emergency management office provides resources most residents never access. They offer free hurricane preparedness presentations, evacuation route maps, shelter location information, and special needs registry for residents requiring assistance during evacuations. Many counties provide text alert systems that send real-time emergency notifications directly to your phone. Register for these services before hurricane season so you receive critical information when it matters most.
Consider forming a neighborhood preparedness team. Identify neighbors with special skills: medical training, construction experience, ham radio operation, chainsaw expertise. Discuss how you'll check on each other after storms, share resources if needed, and coordinate recovery efforts. Exchange emergency contact information and out-of-state contact details. This social infrastructure becomes invaluable when official emergency services are overwhelmed in the immediate aftermath of major hurricanes.
The Cycle of Preparedness
Your hurricane protection command center isn't a destination you reach but a cycle you maintain. Each year brings new storms, new challenges, and new lessons. The family that treats preparation as an ongoing lifestyle rather than a seasonal chore builds resilience that extends far beyond hurricane protection. You develop self-reliance, resourcefulness, and confidence that serves you in any crisis. You model responsible preparation for your children, teaching them that security comes not from hoping disasters won't happen, but from being ready when they do.
Review your plan annually, even if no hurricanes threatened your area the previous year. Insurance policies change, family circumstances evolve, children grow and need different supplies, medications change, and homes require different maintenance. What worked five years ago may not work today. Keep your command center current by treating it as a living system that adapts to your changing needs and circumstances.
Practice your plan before you need it. Run evacuation drills with your family so everyone knows their role. Test your emergency supplies—try eating only from your emergency food stores for a weekend to identify gaps or items your family won't actually eat during a crisis. Set up your generator and run it to ensure it works and you remember the procedure. These practice runs reveal weaknesses in comfortable conditions rather than during the chaos of an actual emergency.
The next hurricane will come—that's not pessimism but meteorological certainty. Whether it finds you vulnerable or prepared, panicked or confident, depends entirely on the choices you make today. Your command center awaits construction. The only question is whether you'll build it during calm weather or wish you had when the winds begin to rise.
Start today. Choose one action from this guide and complete it this week. Next week, choose another. Build your protection layer by layer, the same way hurricanes build strength over warm ocean waters. The difference is that your strength protects while theirs destroys. When the gray-green sky returns and your phone buzzes with that hurricane watch, you'll face it not with panic but with the quiet confidence that comes from thorough preparation. Your family deserves that security. Your home deserves that protection. You deserve the peace of mind that comes from knowing you're ready.